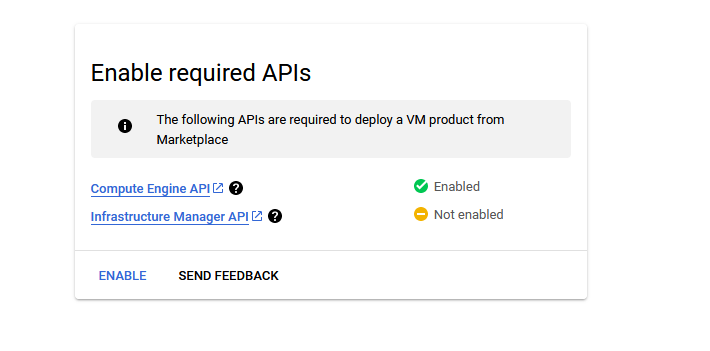
It will ask you to enable the API’s if they are not enabled already for your account. Please click on enable as shown in the screenshot.
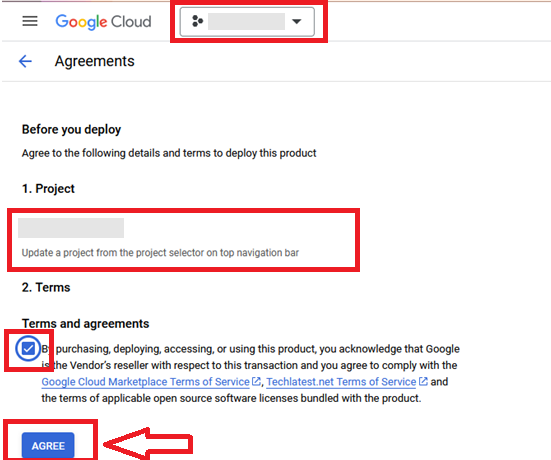
It will take you to the agreement page. On this page, you can change the project from the project selector on top navigator bar as shown in the below screenshot.
Accept the Terms and agreements by ticking the checkbox and clicking on the AGREE button.
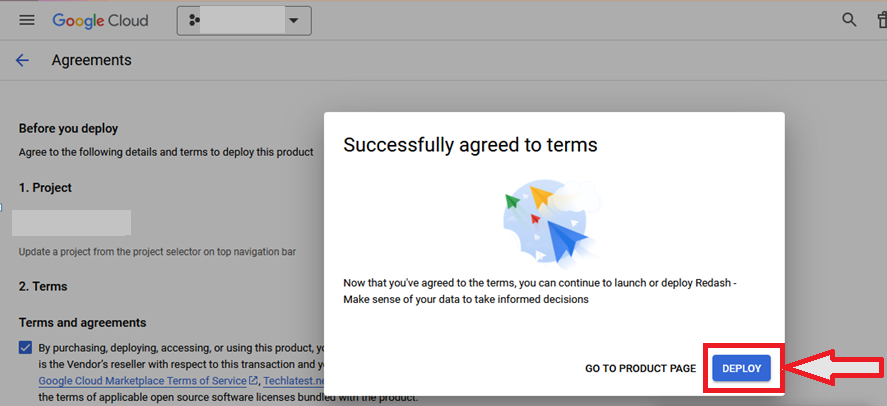
It will show you the successfully agreed popup page. Click on Deploy.
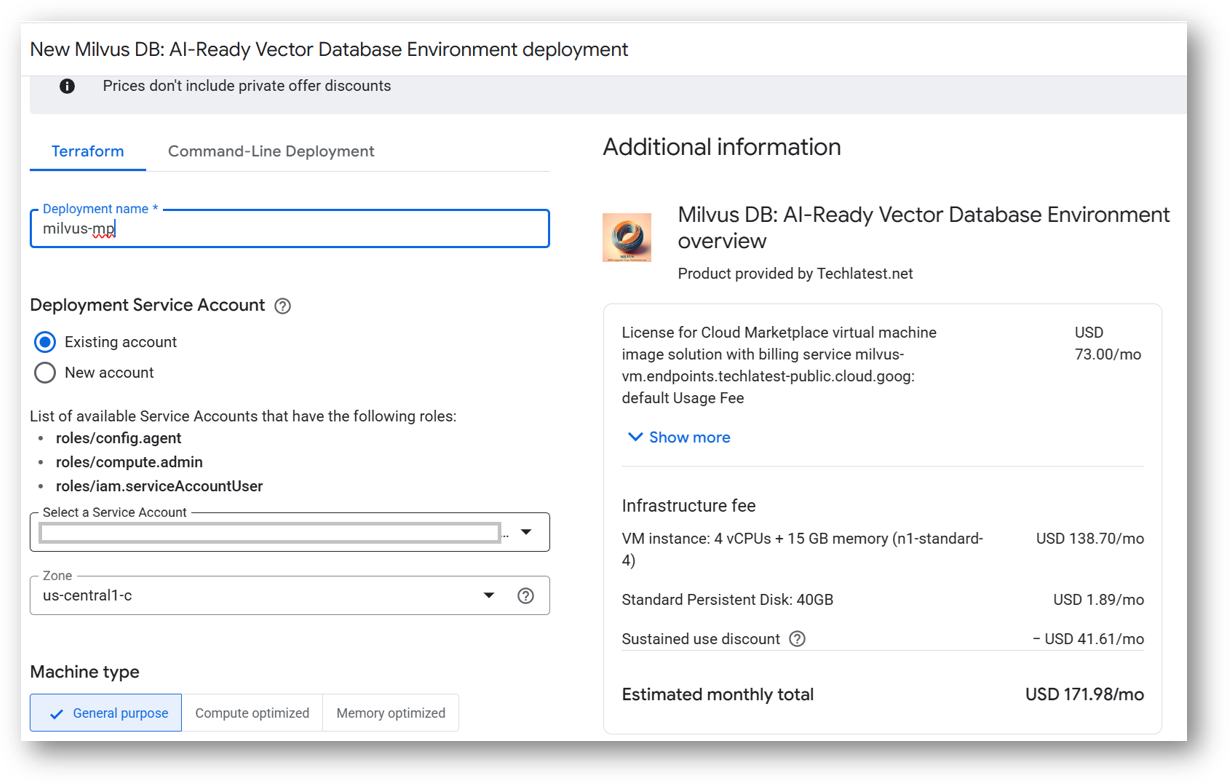
On deployment page, give a name to your deployment.
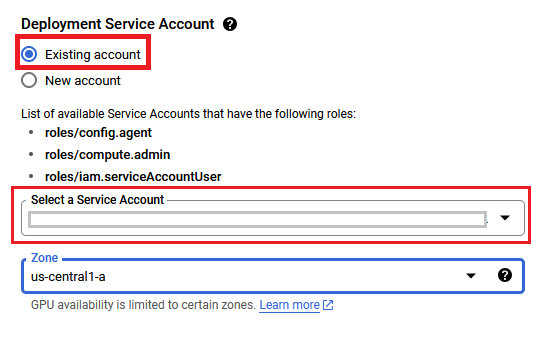
In Deployment Service Account section, click on Existing radio button and Choose a service account from the Select a Service Account dropdown.
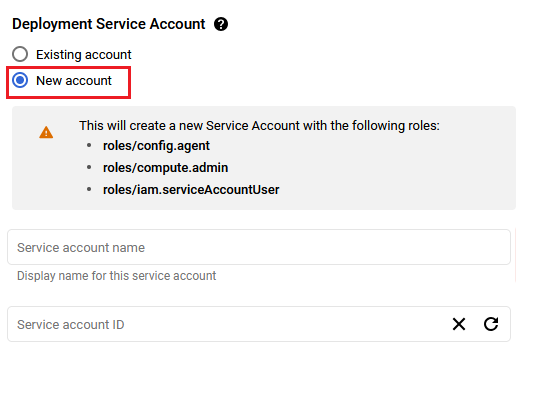
If you don't see any service account in dropdown, then change the radio button to New Account and create the new service account here.
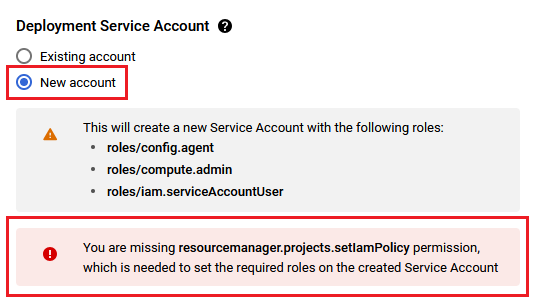
If after selecting New Account option, you get below permission error message then please reach out to your GCP admin to create service account by following Step by step guide to create GCP Service Account and then refresh this deployment page once the service account is created, it should be available in the dropdown.
You are missing resourcemanager.projects.setIamPolicy permission, which is needed to set the required roles on the created Service Account
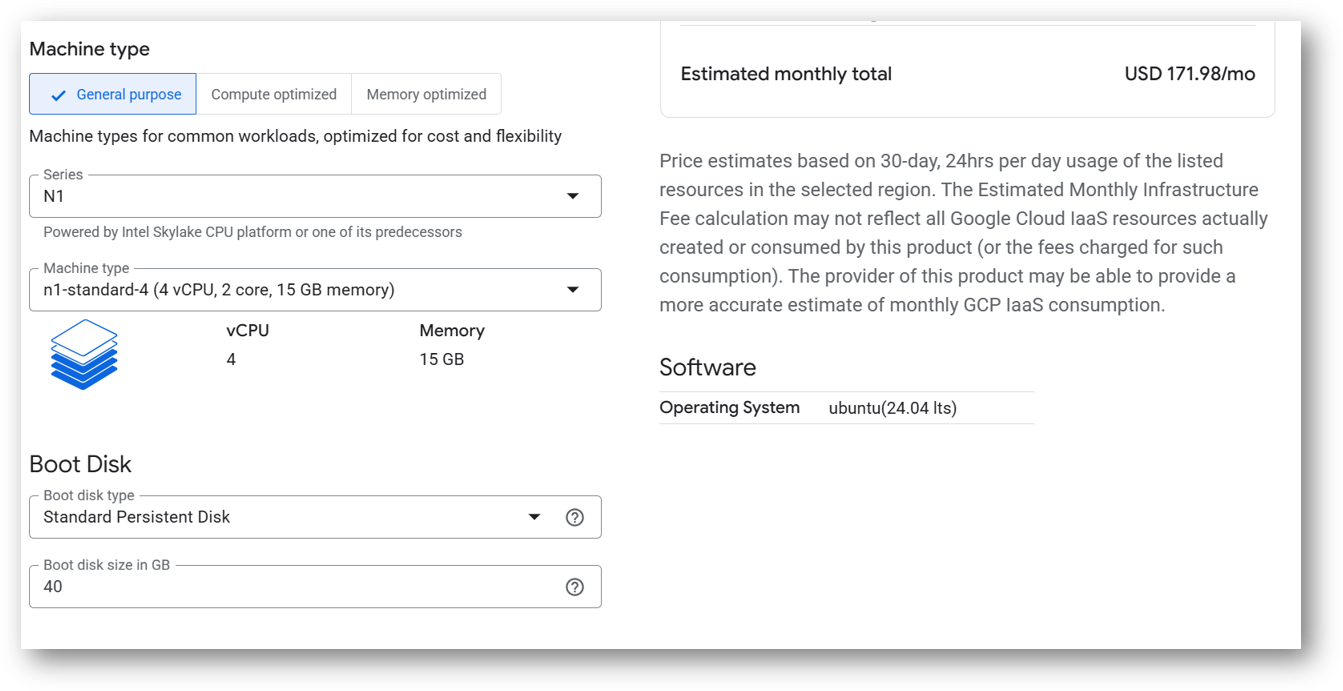
Select a zone where you want to launch the VM(such as us-east1-a)
Optionally change the number of cores and amount of memory. ( This defaults to 2 vCPUs and 7.5 GB RAM)
Optionally change the boot disk type and size. (This defaults to ‘Standard Persistent Disk’ and 50GB respectively)
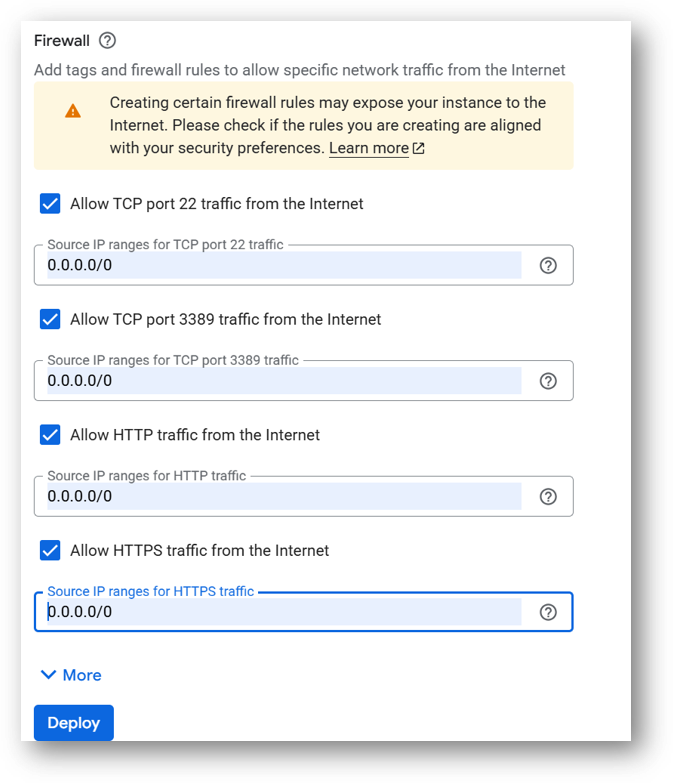
Optionally change the network name and subnetwork names. Be sure that whichever network you specify has ports 22 (for ssh), 3389 (for RDP), port 80 (for HTTP) and 443 (for HTTPS) exposed.
Click Deploy when you are done.
Milvus DB: AI-Ready Vector Database Environment will begin deploying.
A summary page displays when the compute engine is successfully deployed. Click on the Instance link to go to the instance page .
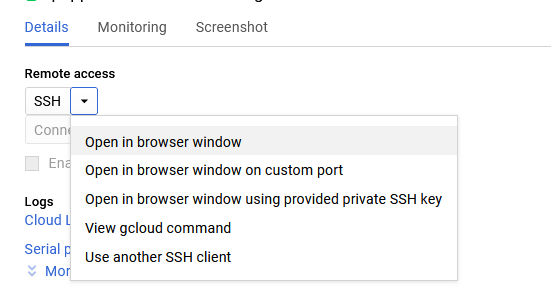
On the instance page, click on the “SSH” button, select “Open in browser window”.
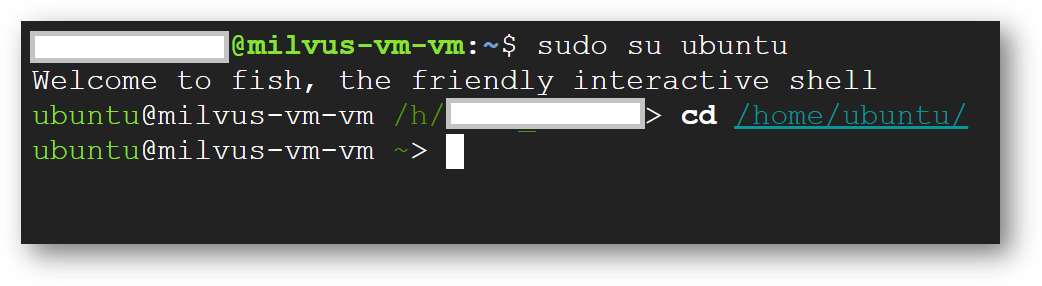
This will open SSH window in a browser. Switch to ubuntu user and navigate to ubuntu home directory.
sudo su ubuntu
cd /home/ubuntu/
Run below command to set the password for “ubuntu” user
sudo passwd ubuntu
Now the password for ubuntu user is set, you can connect to the VM’s desktop environment from any local windows machine using RDP or linux machine using Remmina.
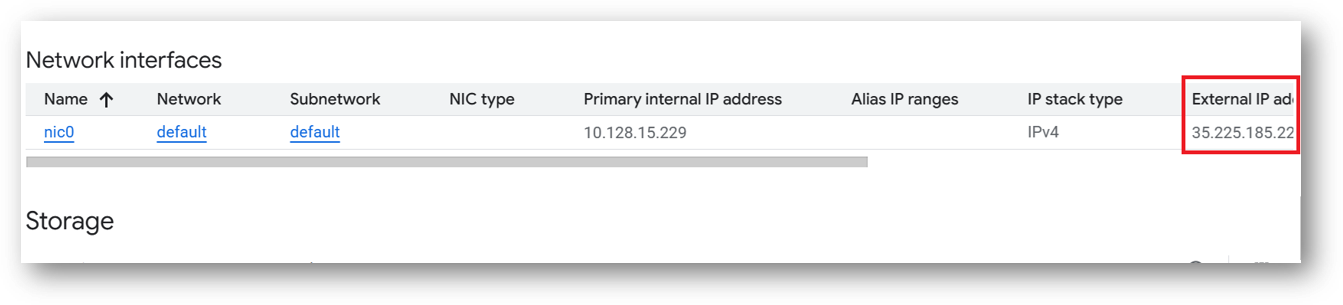
To connect using RDP via Windows machine, first note the external IP of the VM from VM details page as highlighted below
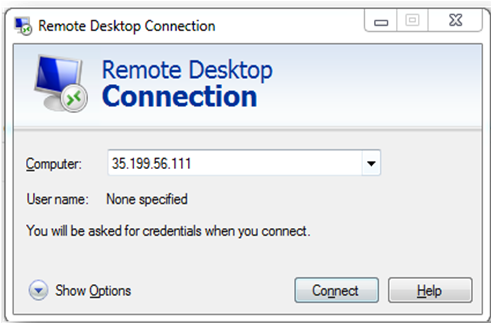
Then From your local windows machine, goto “start” menu, in the search box type and select “Remote desktop connection”
In the “Remote Desktop connection” wizard, paste the external ip and click connect
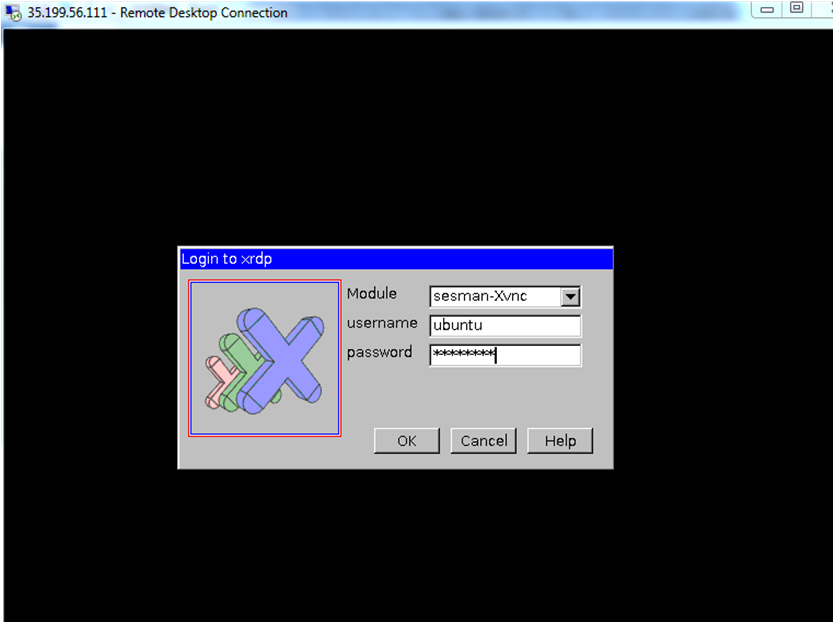
This will connect you to the VM’s desktop environment. Provide “ubuntu” as the userid and the password set in step 6 to authenticate. Click OK
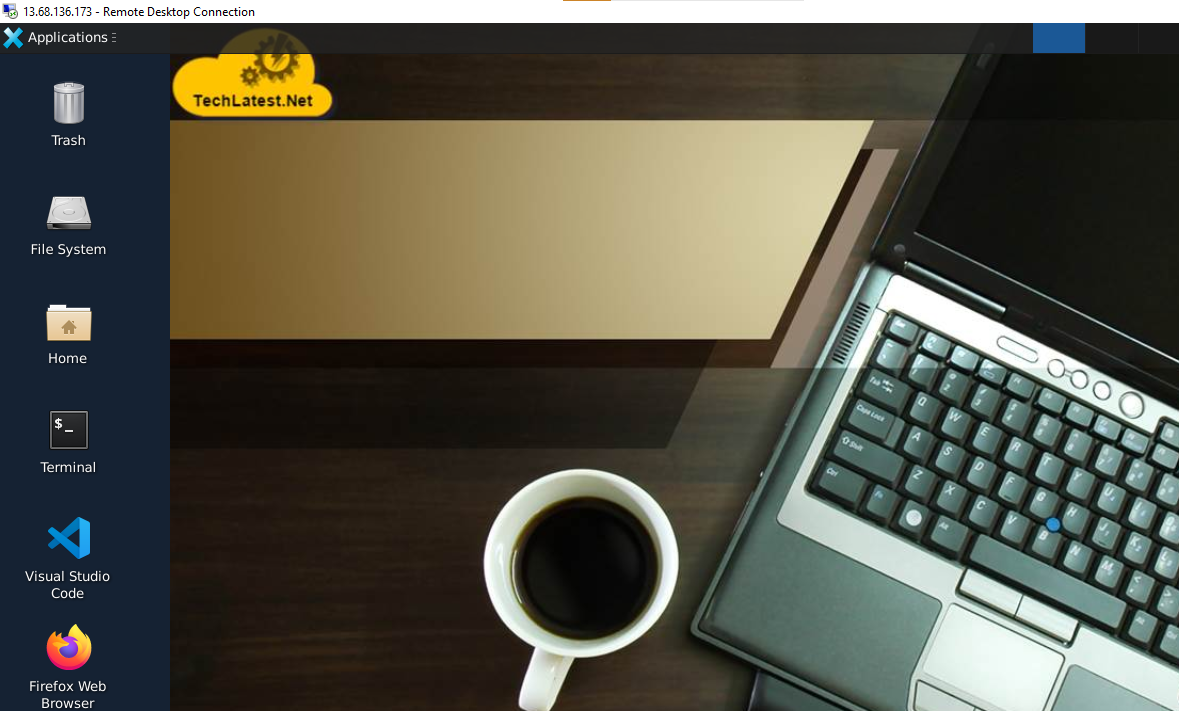
Now you are connected to out of box Milvus DB: AI-Ready Vector Database Environment VM’s desktop environment via Windows machines.
To connect using RDP via Linux machine, first note the external IP of the VM from VM details page, then from your local Linux machine, goto menu, in the search box type and select “Remmina”.
Note: If you don’t have Remmina installed on your Linux machine, first Install Remmina as per your linux distribution.
In the “Remmina Remote Desktop Client” wizard, select the RDP option from dropdown and paste the external ip and click enter.
This will connect you to the VM’s desktop environment. Provide “ubuntu” as the userid and the password set in step 6 to authenticate. Click OK
Now you are connected to out of box Milvus DB: AI-Ready Vector Database Environment VM’s desktop environment via Linux machine.
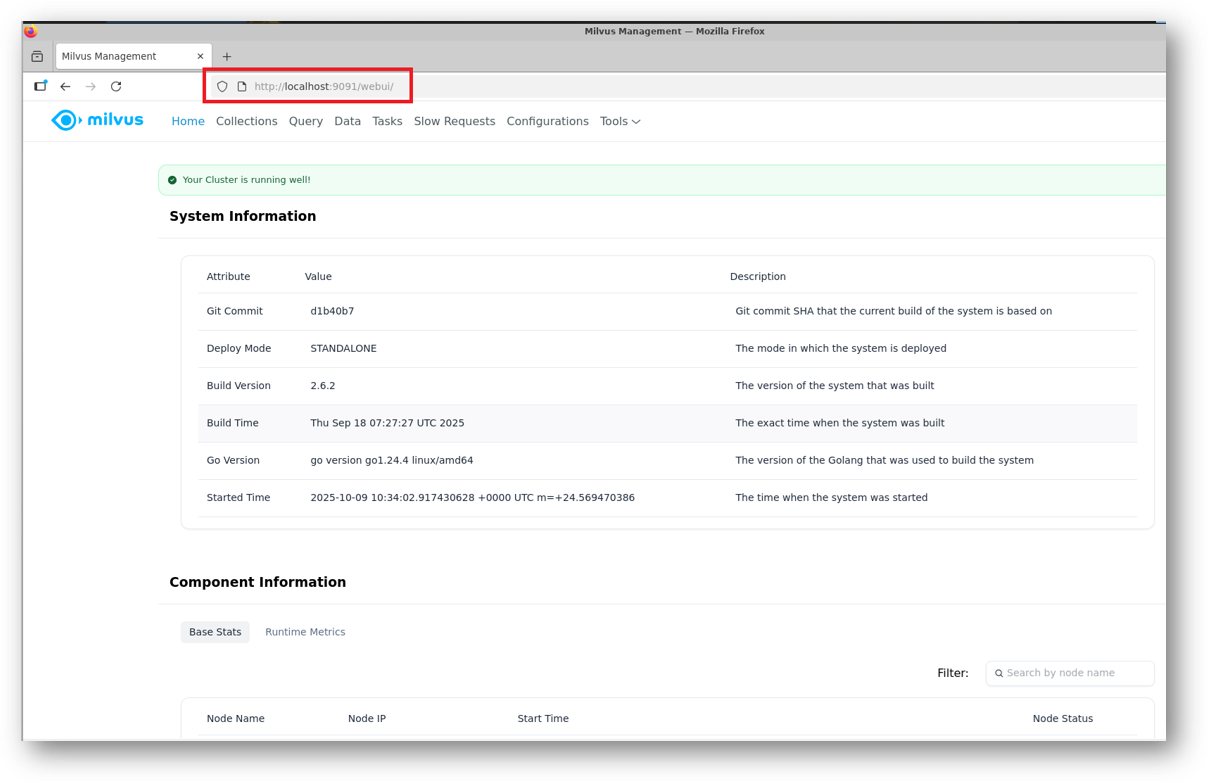
Once you are in RDP session, Open the FireFox from RDP desktop and enter below url to access the Milvus Web UI.
http://localhost:9091/webui/
Note: Milvius UI is available only via RDP for security reasons. However if you want to access it publicly using Public IP of the VM in your local browser then please follow the steps given in Milvus WebUI Proxy Setup .
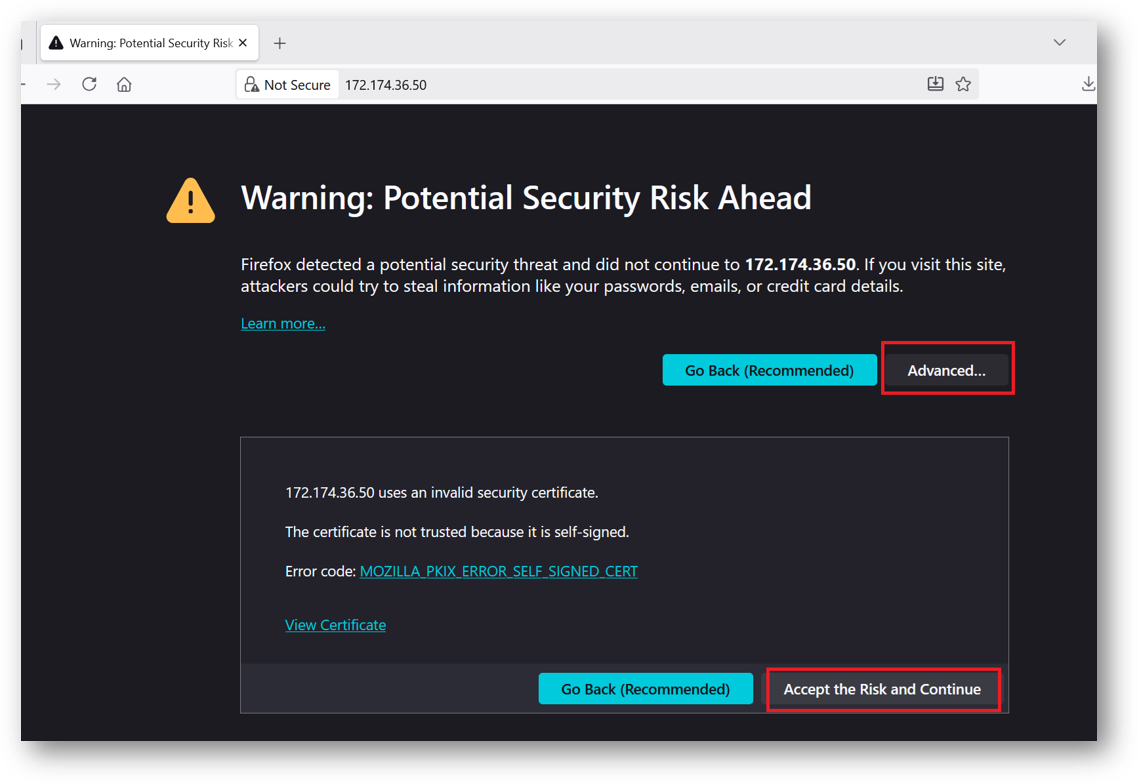
To access the JupyterHub Web Interface, copy the public IP address of the VM and paste it in the browser as https://public_ip_of_vm.
Browser will display a SSL certificate warning message. Accept the certificate warning and Continue.
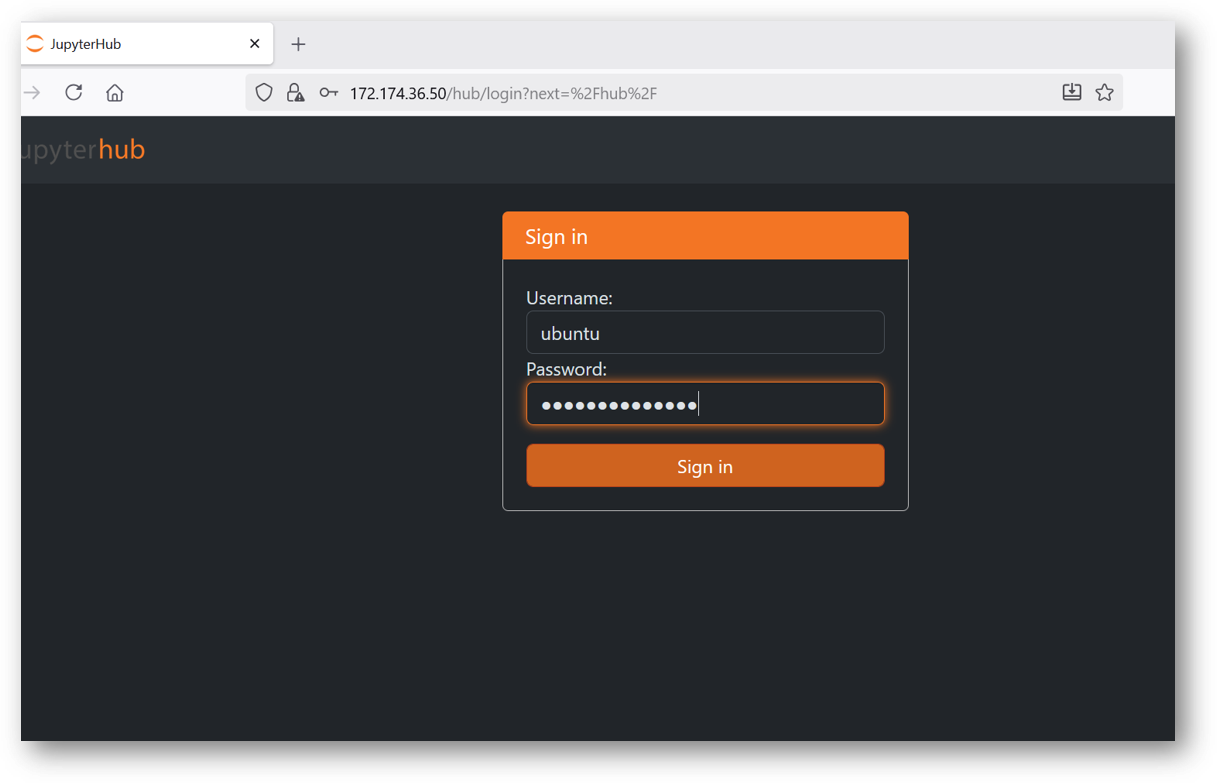
Provide the ‘ubuntu’ user and its password set during VM creation. ubuntu is configured as an admin user here.
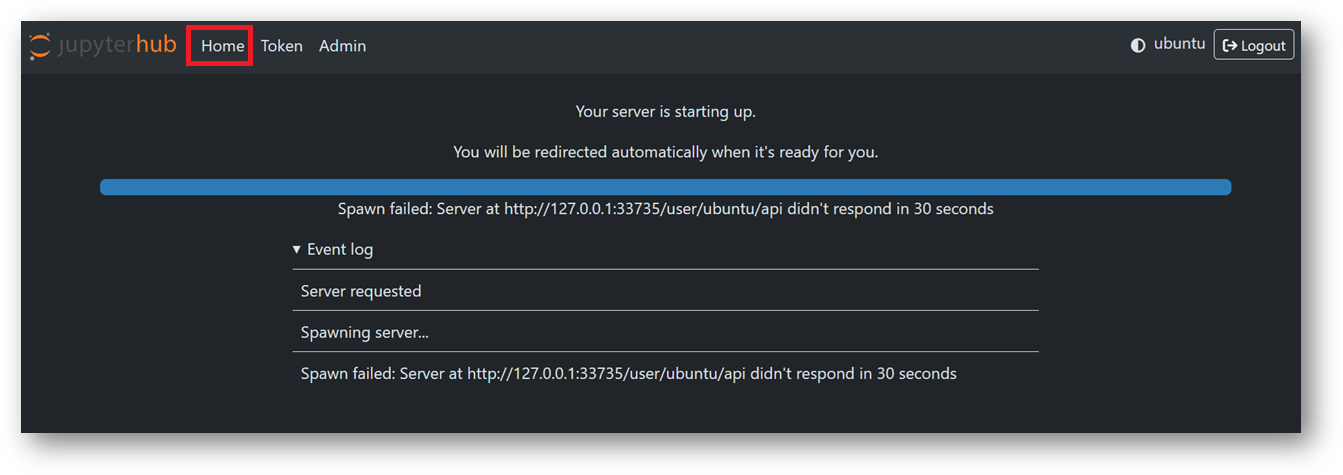
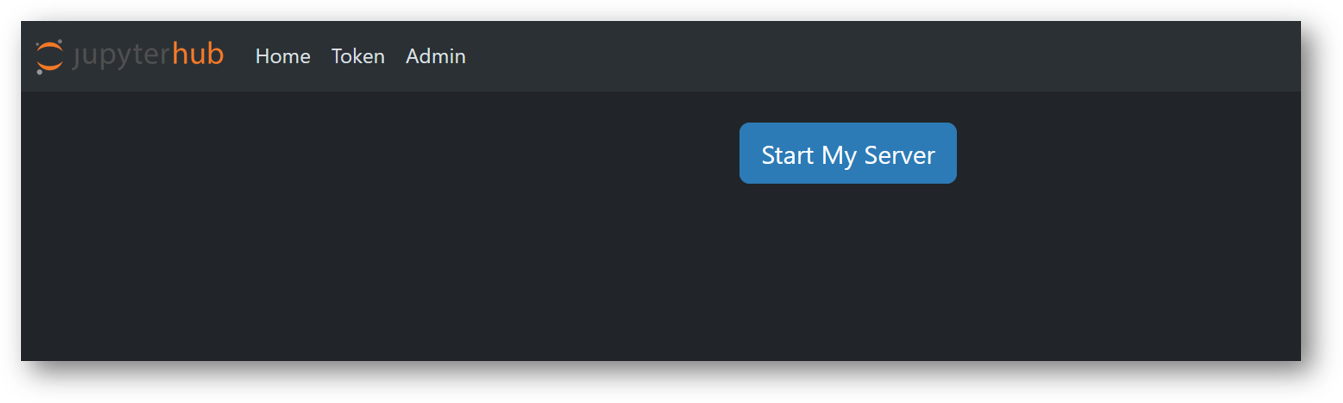
If your jupyter server did not spawn in 30 sec you will see error message as shown in below screenshot. In this case simply click on Home tab and click Start My Server button. It will spawn the server again.
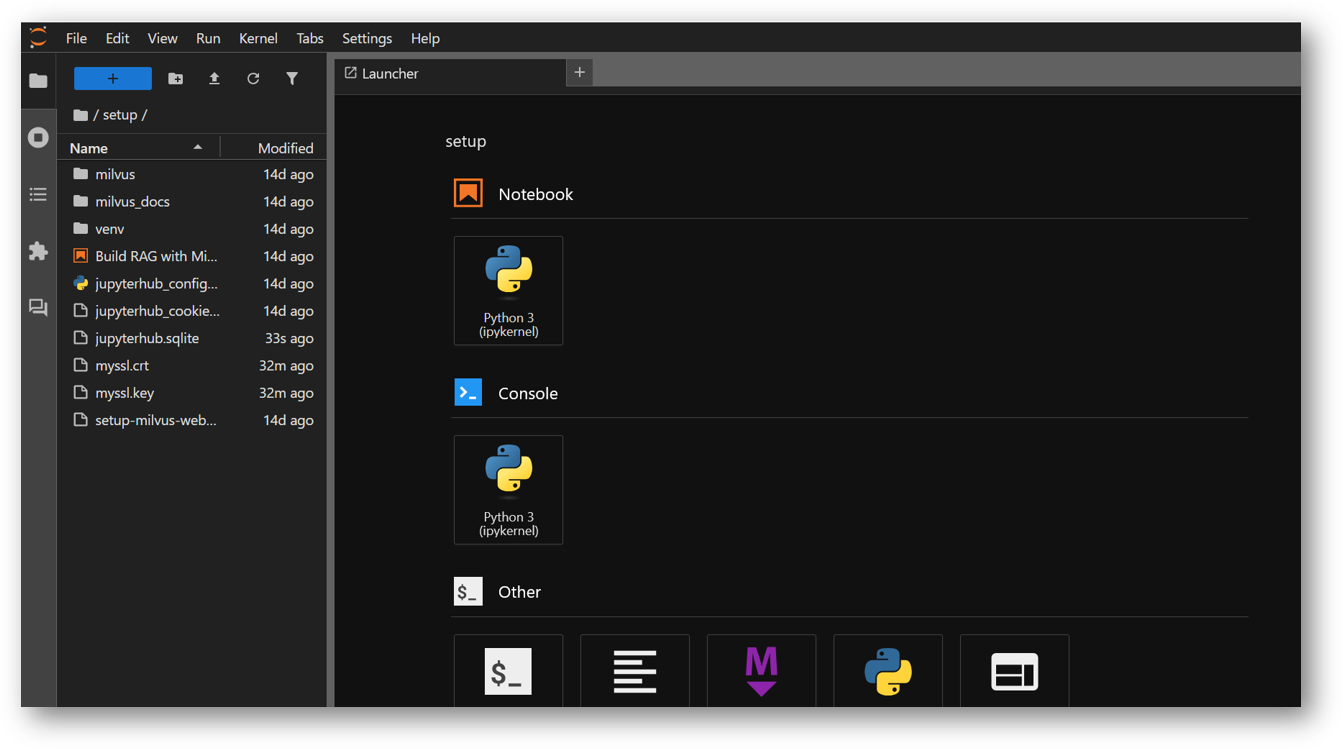
Now you are logged in to jupyterhub. Here you can see we have setup folder configured with jupyter-venv, jupyterhub_config.py files along with other jupyterhub configuration files. You can use jupyter notebook to run and test your AI projects.
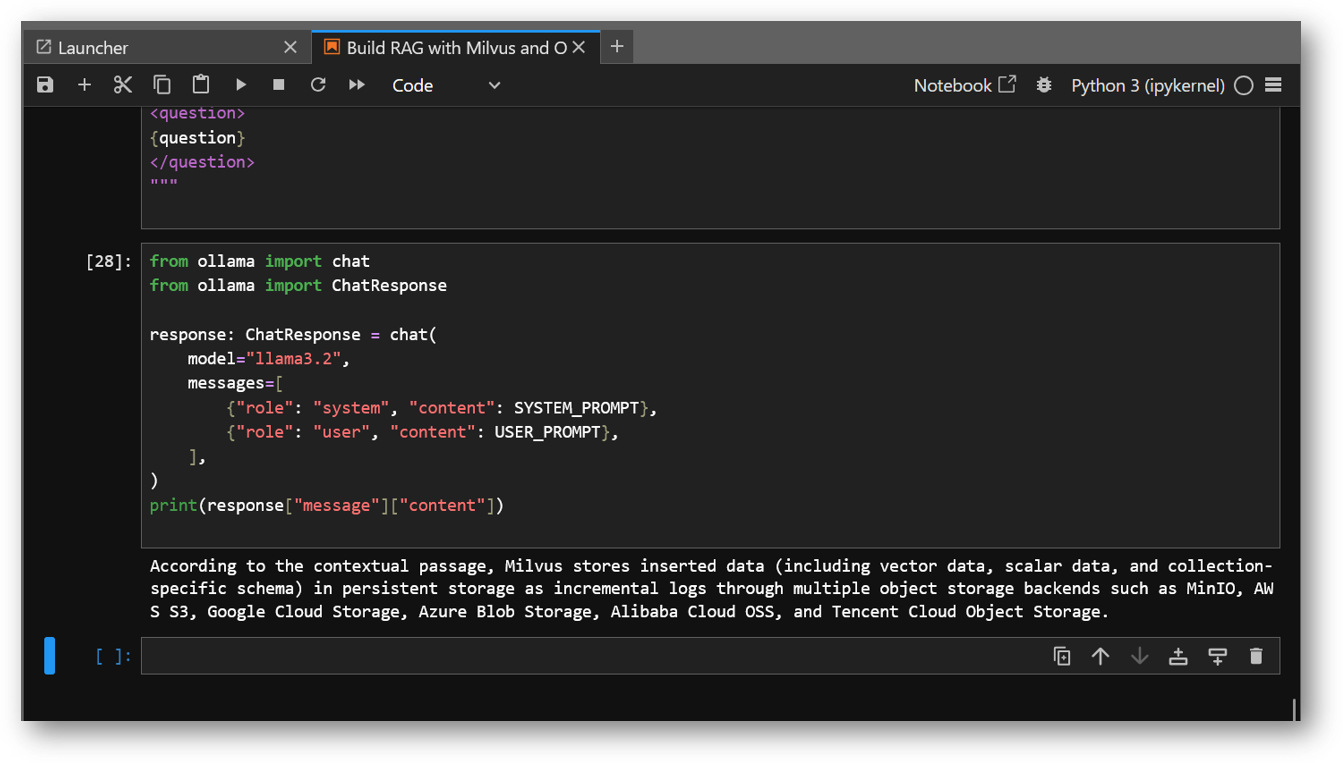
The VM comes preloaded with “Build RAG with Milvus” example. The example file “Build RAG with Milvus and Ollama.ipynb” is available in /home/ubuntu/setup/ directory. Once you logged in the jupyterhub, navigate to setup directory and click on “Build RAG with Milvus and Ollama.ipynb” file.
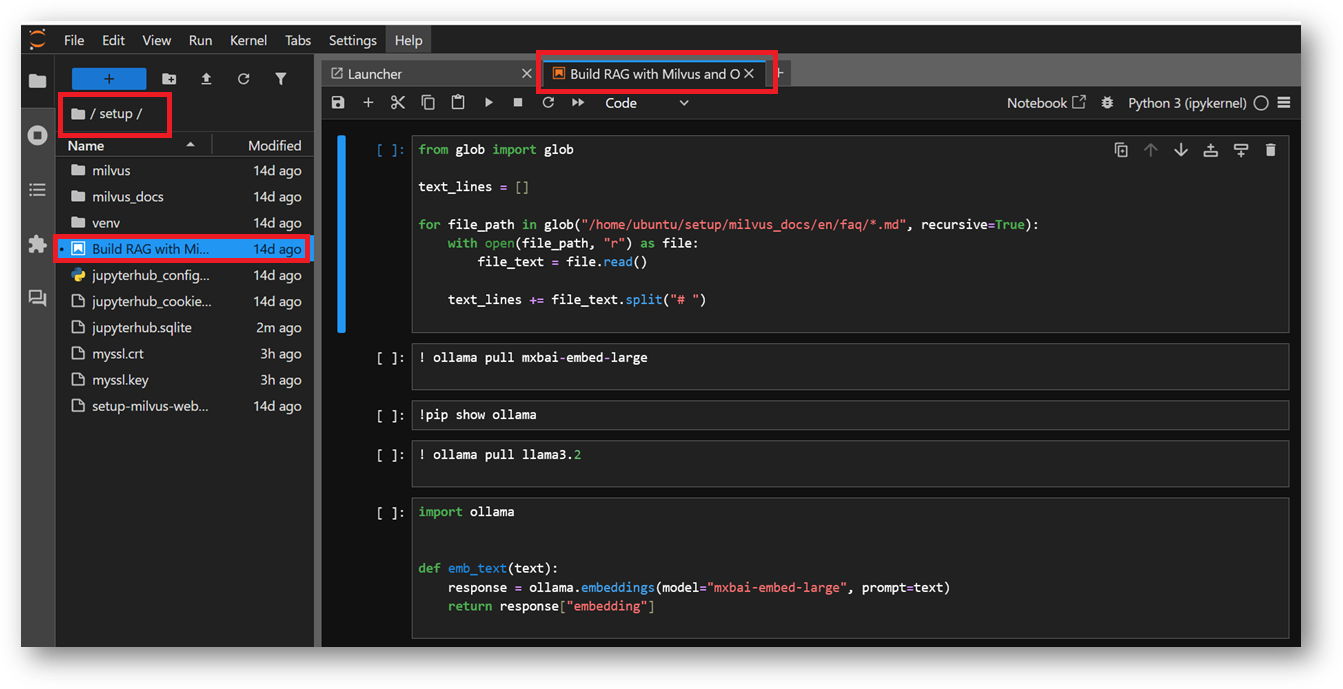
In this example, we will show you how to build a RAG(Retrieval-Augmented Generation) pipeline with Milvus and Ollama.
The RAG system combines a retrieval system with a generative model to generate new text based on a given prompt. This example uses the FAQ pages from the Milvus Documentation 2.4.x as the private knowledge in our RAG for a simple RAG pipeline.
The documents are already Downloaded as a zip and extracted to the folder milvus_docs in the same setup directory. The example is using ollama local model to execute , so you don’t need to provide any API keys here.
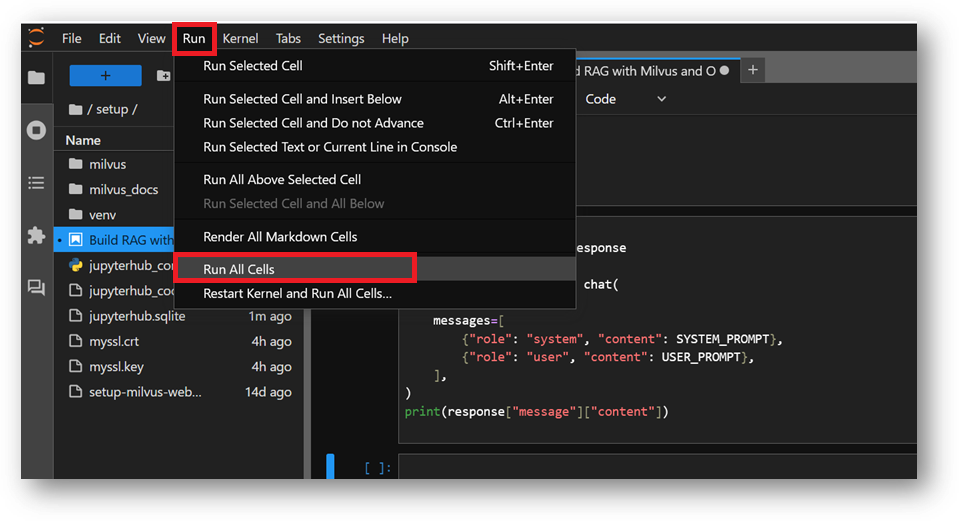
You can simply run each cell one by one in same sequence or you can select the Run All Cells option from Run Menu at the top.
You can access the Milvus WebUI via RDP session Browser as explained above or if you made it publicly available using your public IP of the VM, and can check the new values got inserted into your Milvus DB after execution of this Example demo.
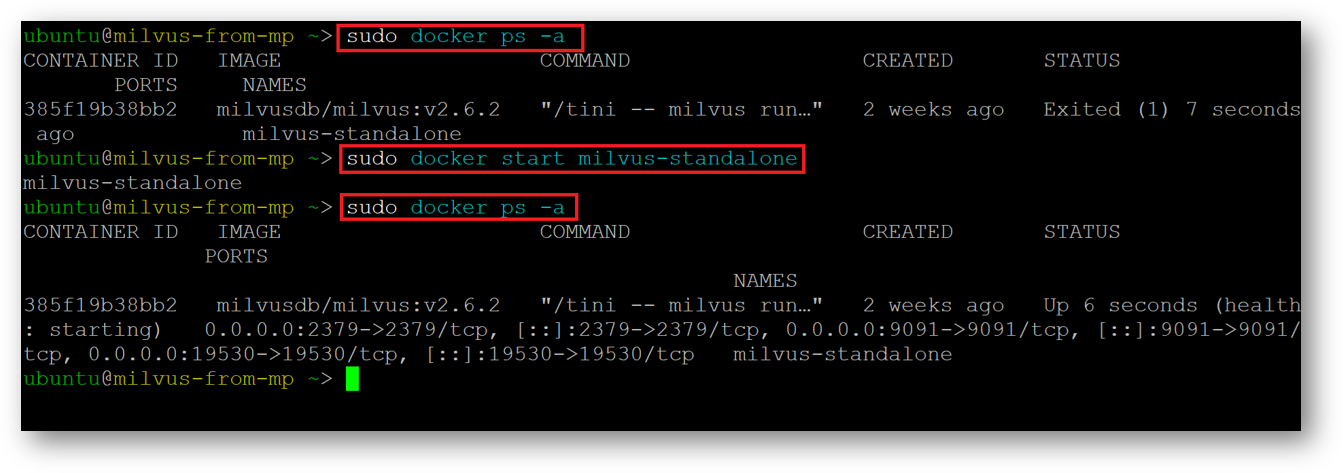
If suppose at any point of running this example you get a connection error, or if any cell is not wokring then please check the running status of milvus Docker container. For that connect via SSH terminal of this VM and run below command.
sudo docker ps -a
If it shows container in exited state, then restart it using:
sudo docker start milvus-standalone
In this Example demo we used milvus documentation and asked a specific query for “How is data stored in milvus?”, However you can play around by updating this example with other values and see how it works in real time.