Go back

Step by Step Guide to Create GCP Service Account

  • Tick the existing account radio button and select your existing service account from the "Select a service account" dropdown as shown below.
  • If you don't see the service account in "Select a service account" drop down, then please follow the below steps to add one. if you can see a service account in the dropdown, skip ahead to the next step to select the region for your deployment.
  • below steps are one time only and you need appropriate IAM permissions to execute these steps. If you encounter IAM permission errors, reach out to your organization's IAM admin to execute these steps :
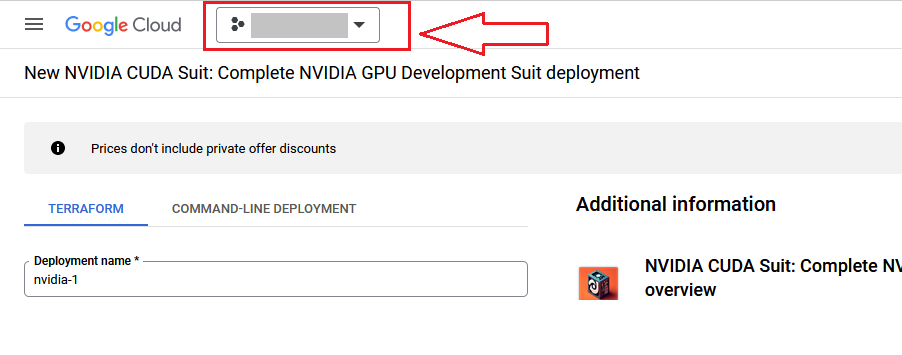
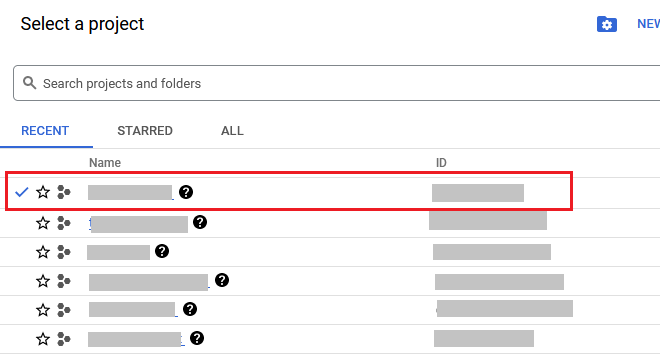
    1. Note Project id : First note down the project-id of the project where you are deploying our solution . Project id can be found by clicking on the project dropdown and copying id from the poped up window.

    2. Activate cloud shell by clicking the shell icon at the top right corner.
    3. In the cloud shell, run below command to switch to the project where you are deploying this solution , replace PROJECT_ID with the actual project id copied in step a.
    4. gcloud config set project "PROJECT_ID"

    5. Then run below command to create new service account, replace highlighted bold text with suitable values.
    6. gcloud iam service-accounts create "your-service-account-name" --description="service account for your-google-cloud-login-emailid " --display-name="your-service-account-name"

    7. Then run below command to associate the newly created service account with your google cloud login id, replace highlighted bold text with values provided in above steps
    8. gcloud iam service-accounts add-iam-policy-binding your-service-account-name@projectid-copied-in-step-a.iam.gserviceaccount.com --member="user:your-google-cloud-login-emailid" --role="roles/iam.serviceAccountUser"

    9. Then run below 3 commands one after the other , replace highlighted bold text with your service account name provided in previous steps.
    10. gcloud projects add-iam-policy-binding PROJECT_ID --member=serviceAccount:your-service-account-name@projectid-copied-in-step-a.iam.gserviceaccount.com --role=roles/config.agent

      gcloud projects add-iam-policy-binding PROJECT_ID --member=serviceAccount:your-service-account-name@projectid-copied-in-step-a.am.gserviceaccount.com --role=roles/compute.admin

      gcloud projects add-iam-policy-binding PROJECT_ID --member=serviceAccount:your-service-account-name@projectid-copied-in-step-a.iam.gserviceaccount.com --role=roles/iam.serviceAccountUser

    11. Once the above steps are done, wait for 60 seconds then refresh the deployment page and you should see the newly created service account in "Select a service account". Continue with the next steps below.
Go back