
This section describes how to launch and connect to Money Saver VM in a Google Compute environment to save upto 80% on VM cost.

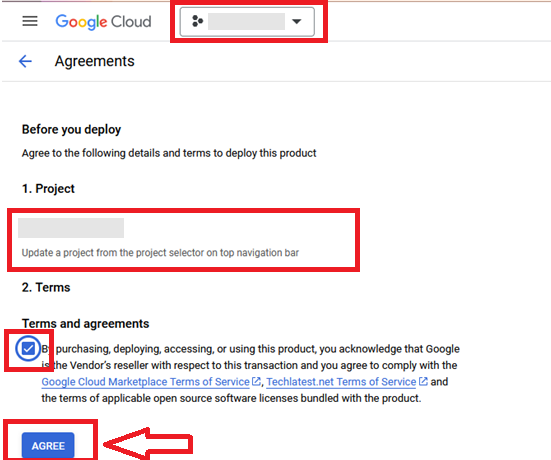
It will take you to the agreement page. On this page, you can change the project from the project selector on top navigator bar as shown in the below screenshot.
Accept the Terms and agreements by ticking the checkbox and clicking on the AGREE button.
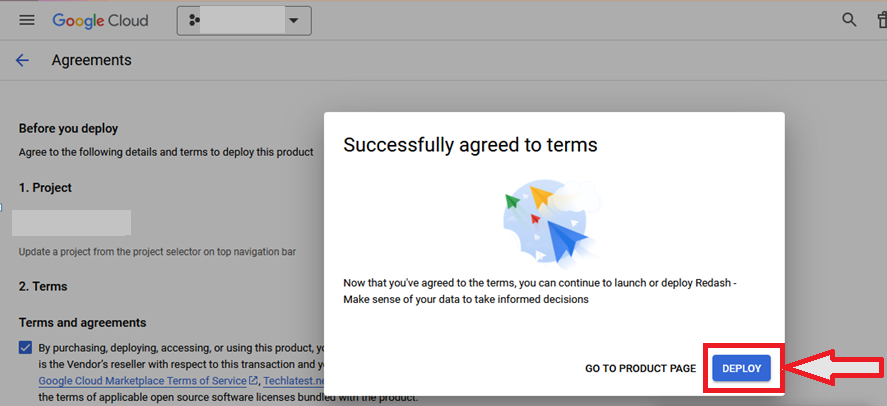
It will show you the successfully agreed popup page. Click on Deploy.
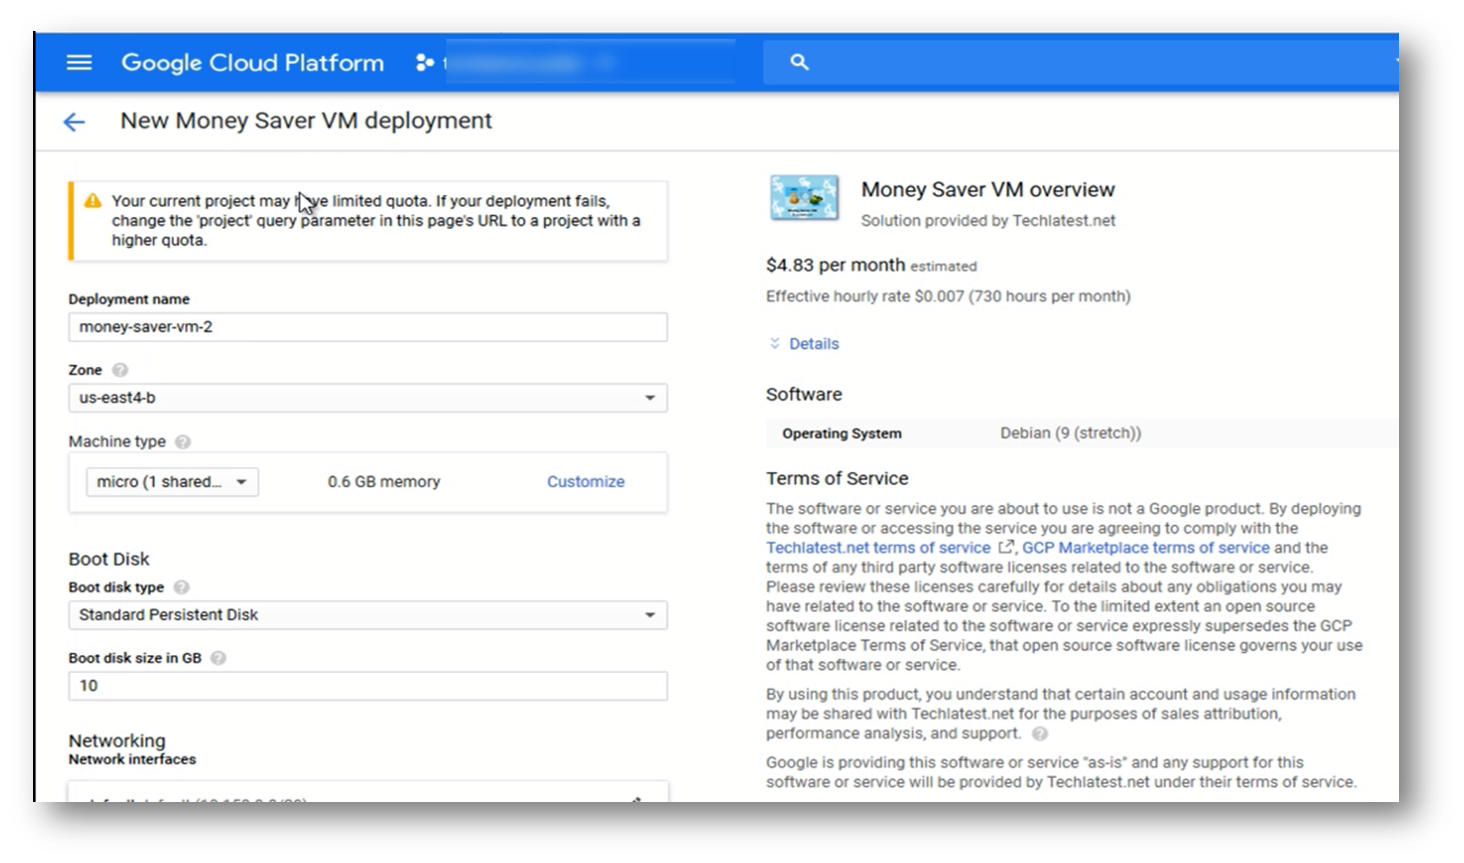
Select a zone where you want to launch the VM(such as us-east1-)
Optionally change the number of cores and amount of memory. For this vm, f1.micro instance size is enough.You can go with micro instance type here. (This defaults to 1 vCPUs and 0.6 GB ram.)
Optionally change the boot disk type and size. (This defaults to “Standard Persistent Disk” and 10 GB respectively)
Optionally change the network name and subnetwork names.Keep port 22 open to allow SSH connection to this VM
Click Deploy when you are done. Money Saver VM will begin deploying.
A summary page displays when the compute engine is successfully deployed. Click on the Instance link to go to the instance page .
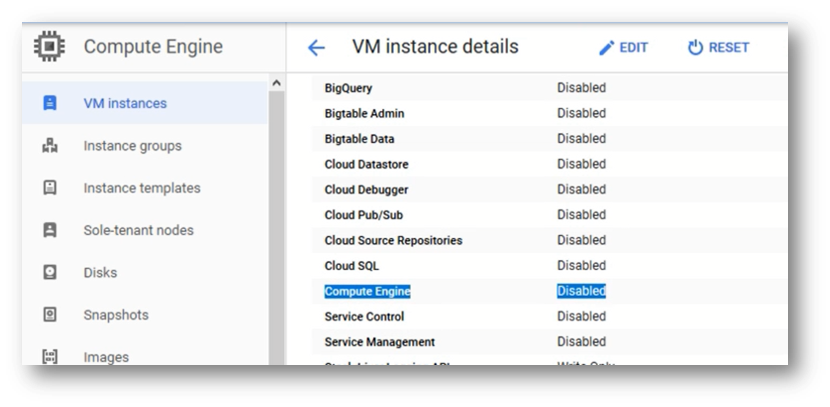
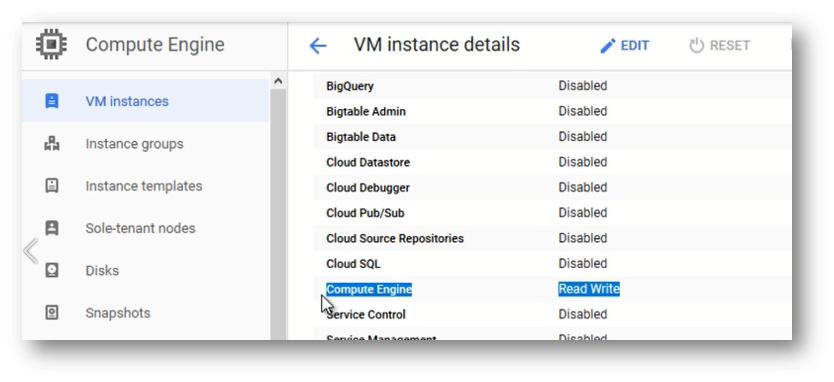
Click on the VM, it will open a details page.For this VM to work we need Access Scope of Compute Engine as Read/Write enabled
See also to:
Using Money-Saver VM to start VMs within the same project
Using Money-Saver VM to start VMs in other projects