Go back

Setup and installation of 'Hermes Agent – Build, Deploy & Scale Autonomous AI' on GCP

This section describes how to provision and connect to ‘Hermes Agent – Build, Deploy & Scale Autonomous AI’ VM solution on GCP.

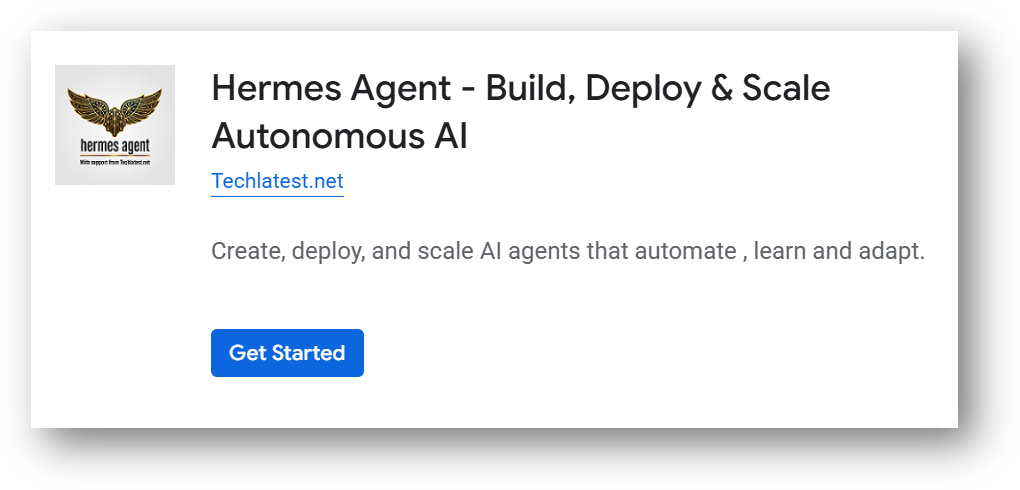
  1. Open Hermes Agent – Build, Deploy & Scale Autonomous AI listing on GCP Marketplace.

  2. Click Get Started.

/img/gcp/hermes-agent/marketplace.png

It will ask you to enable the API’s if they are not enabled already for your account. Please click on enable as shown in the screenshot.
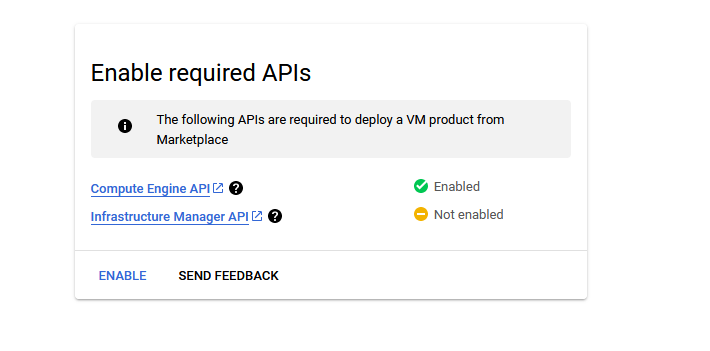
/img/gcp/nvidia-ubuntu/enable-api.png

  • It will take you to the agreement page. On this page, you can change the project from the project selector on top navigator bar as shown in the below screenshot.

  • Accept the Terms and agreements by ticking the checkbox and clicking on the AGREE button. /img/common/gcp_agreement_page.png
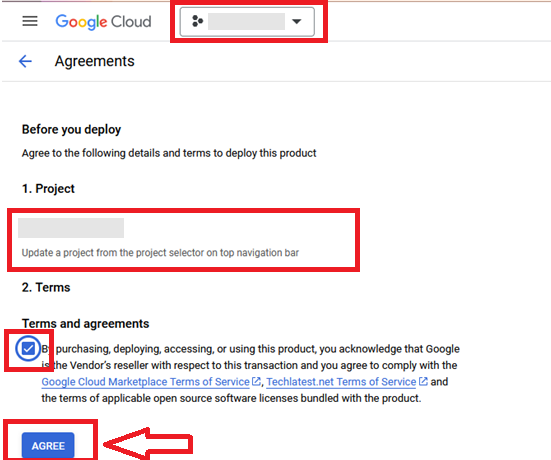
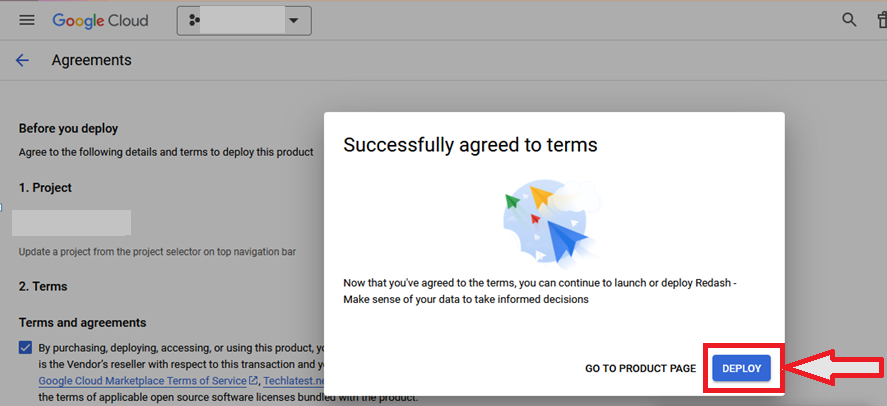
  • It will show you the successfully agreed popup page. Click on Deploy. /img/common/gcp_agreement_accept_page.png
  • On deployment page, give a name to your deployment.
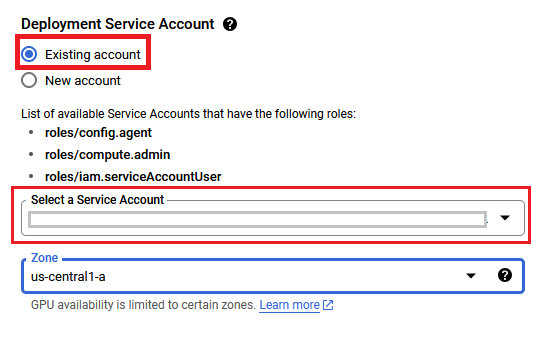
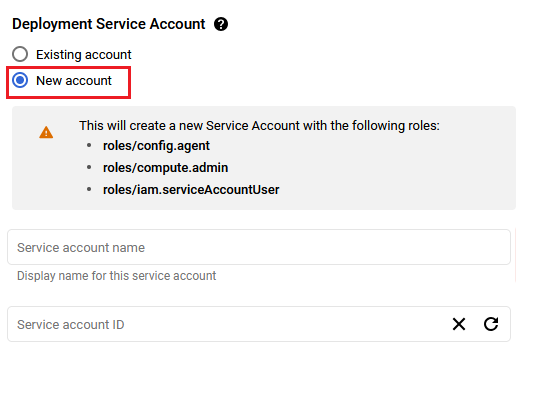
  • In Deployment Service Account section, click on Existing radio button and Choose a service account from the Select a Service Account dropdown.
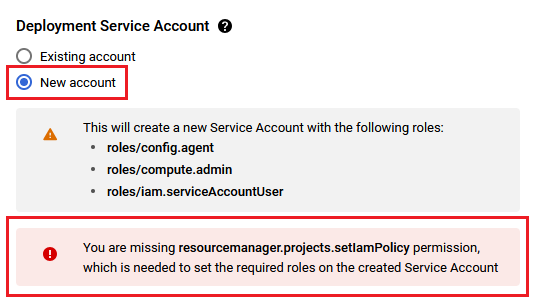
  • If you don't see any service account in dropdown, then change the radio button to New Account and create the new service account here.
  • If after selecting New Account option, you get below permission error message then please reach out to your GCP admin to create service account by following Step by step guide to create GCP Service Account and then refresh this deployment page once the service account is created, it should be available in the dropdown.

  • You are missing resourcemanager.projects.setIamPolicy permission, which is needed to set the required roles on the created Service Account
  • Select a zone where you want to launch the VM(such as us-east1-a)

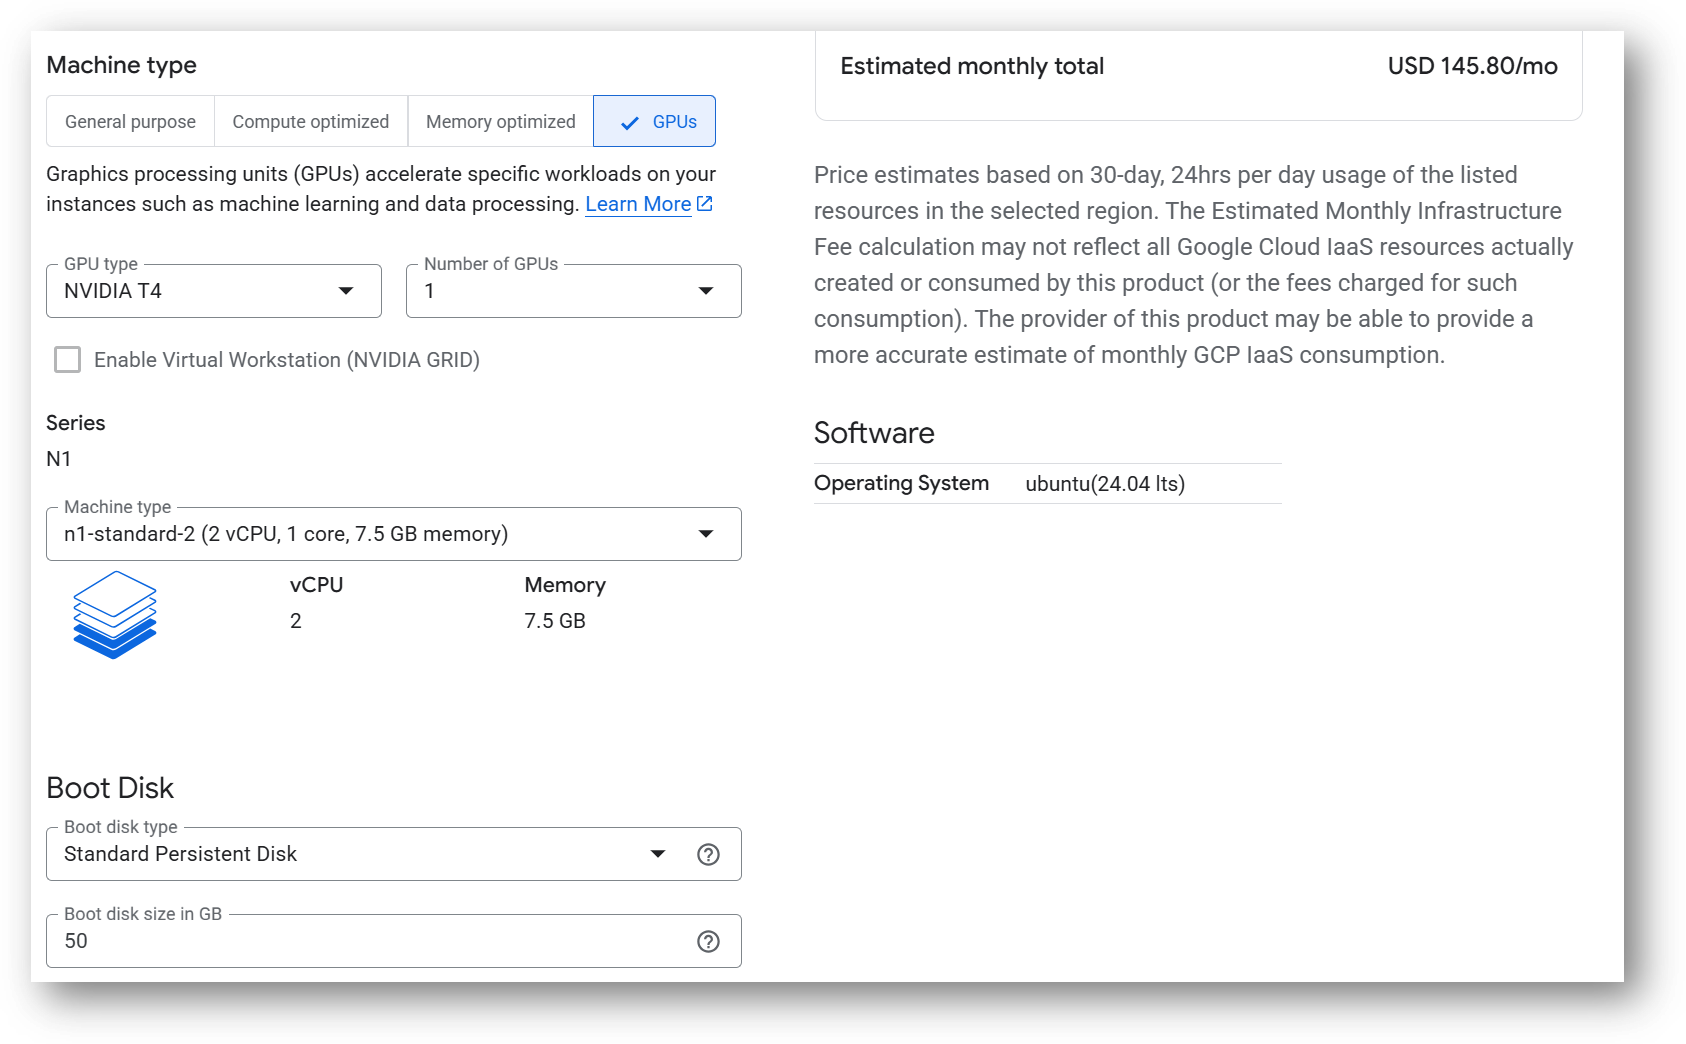
  • Optionally change the number of cores and amount of memory.

Minimum VM Specs : 15GB RAM /4vCPU
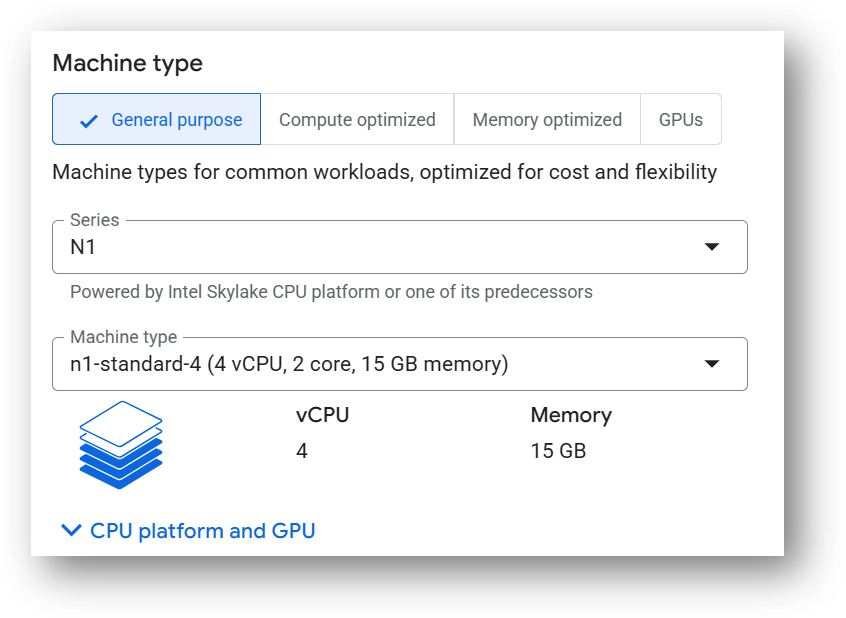
/img/gcp/hermes-agent/cpu-instance.png

This VM can also be deployed using an NVIDIA T4 GPU instance for faster inference. To deploy the VM with a GPU, click on the GPU tab as shown in below screenshot and select a NVIDIA T4 GPU instance. Please note that GPU availability is limited to specific regions, zones, and machine types. If you do not see a GPU option for your selected region, zone, or machine type, try adjusting those settings to find available configurations.
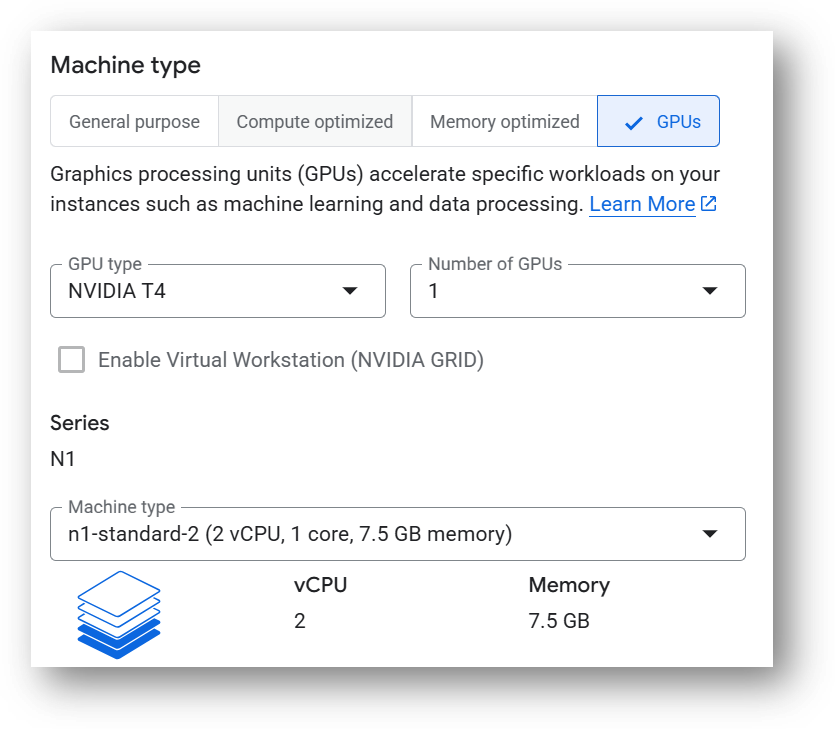
/img/gcp/hermes-agent/gpu-instance.png

  • Optionally change the boot disk type and size. (This defaults to ‘Standard Persistent Disk’ and 50GB respectively)

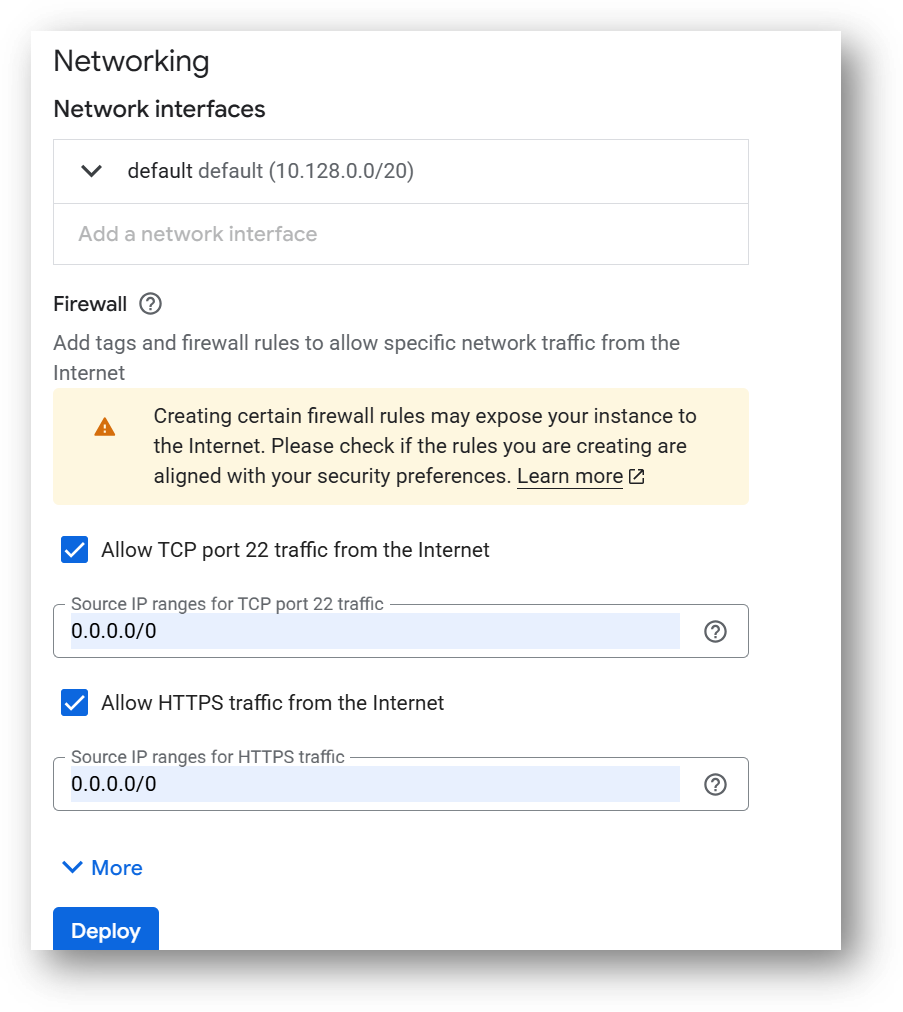
  • Optionally change the network name and subnetwork names. Be sure that whichever network you specify has ports 22 (for ssh) and 443 (for HTTPS) exposed.

  • Click Deploy when you are done.

  • Hermes Agent – Build, Deploy & Scale Autonomous AI will begin deploying.
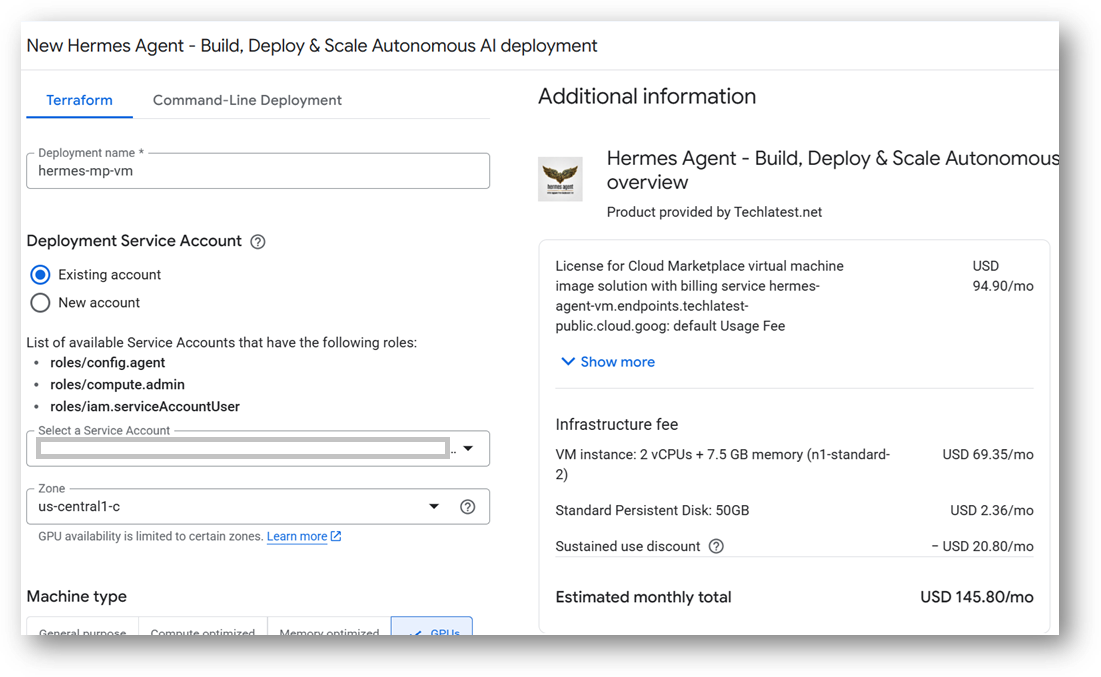
/img/gcp/hermes-agent/deployed-01.png

/img/gcp/hermes-agent/deployed-02.png

/img/gcp/hermes-agent/deployed-03.png

  1. A summary page displays when the compute engine is successfully deployed. Click on the Instance link to go to the instance page .

  2. On the instance page, click on the “SSH” button, select “Open in browser window”.
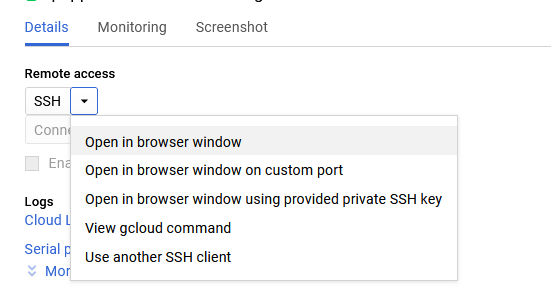
/img/gcp/puppet-support/ssh-option.png

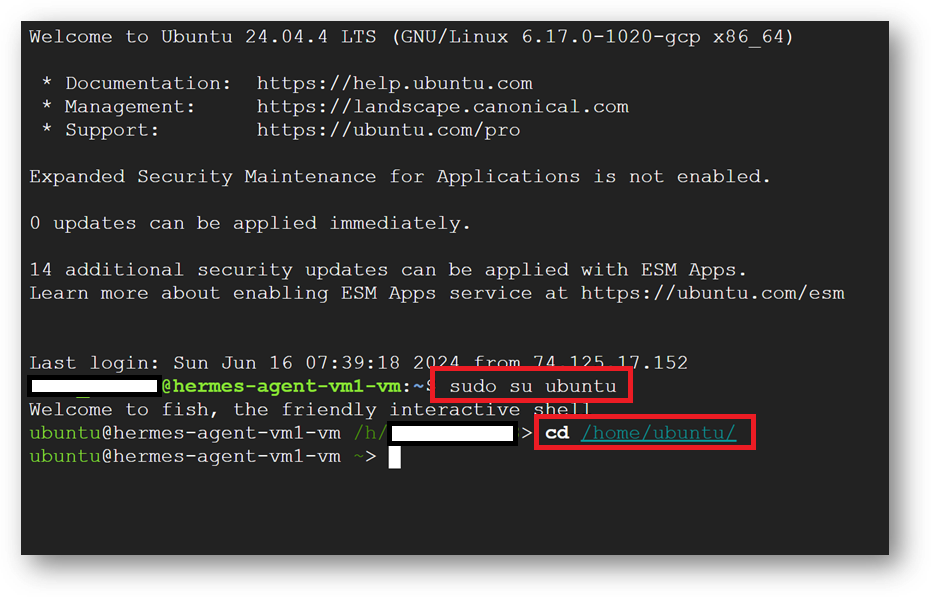
  1. This will open SSH window in a browser. Switch to ubuntu user and navigate to ubuntu home directory.
sudo su ubuntu
cd /home/ubuntu/

/img/gcp/hermes-agent/switch-user.png

  1. The VM will generate a random password to login to Hermes Web Interface. To get the password, connect via SSH terminal as shown in above step and run below command.
cat /home/ubuntu/.hermes/.env | grep HERMES_DASHBOARD_BASIC_AUTH
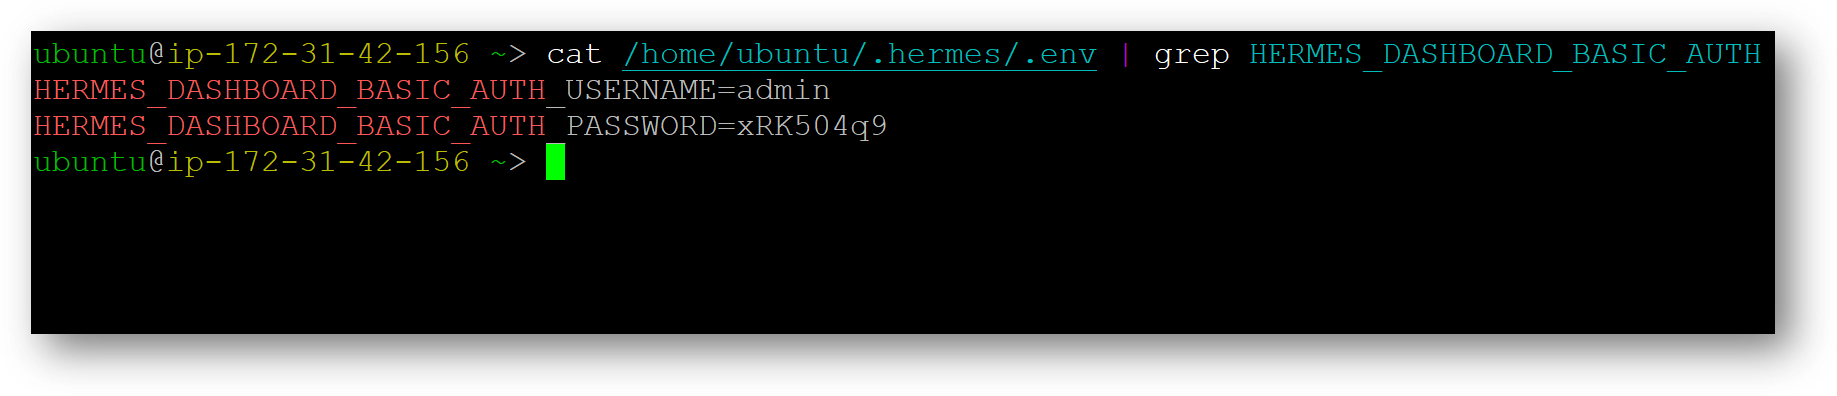
/img/aws/hermes-agent/hermes-password.png

  1. To access the Hermes Web Interface, copy the public IP address of the VM and paste it in your local browser as https://public_ip_of_vm. Make sure to use https and not http.

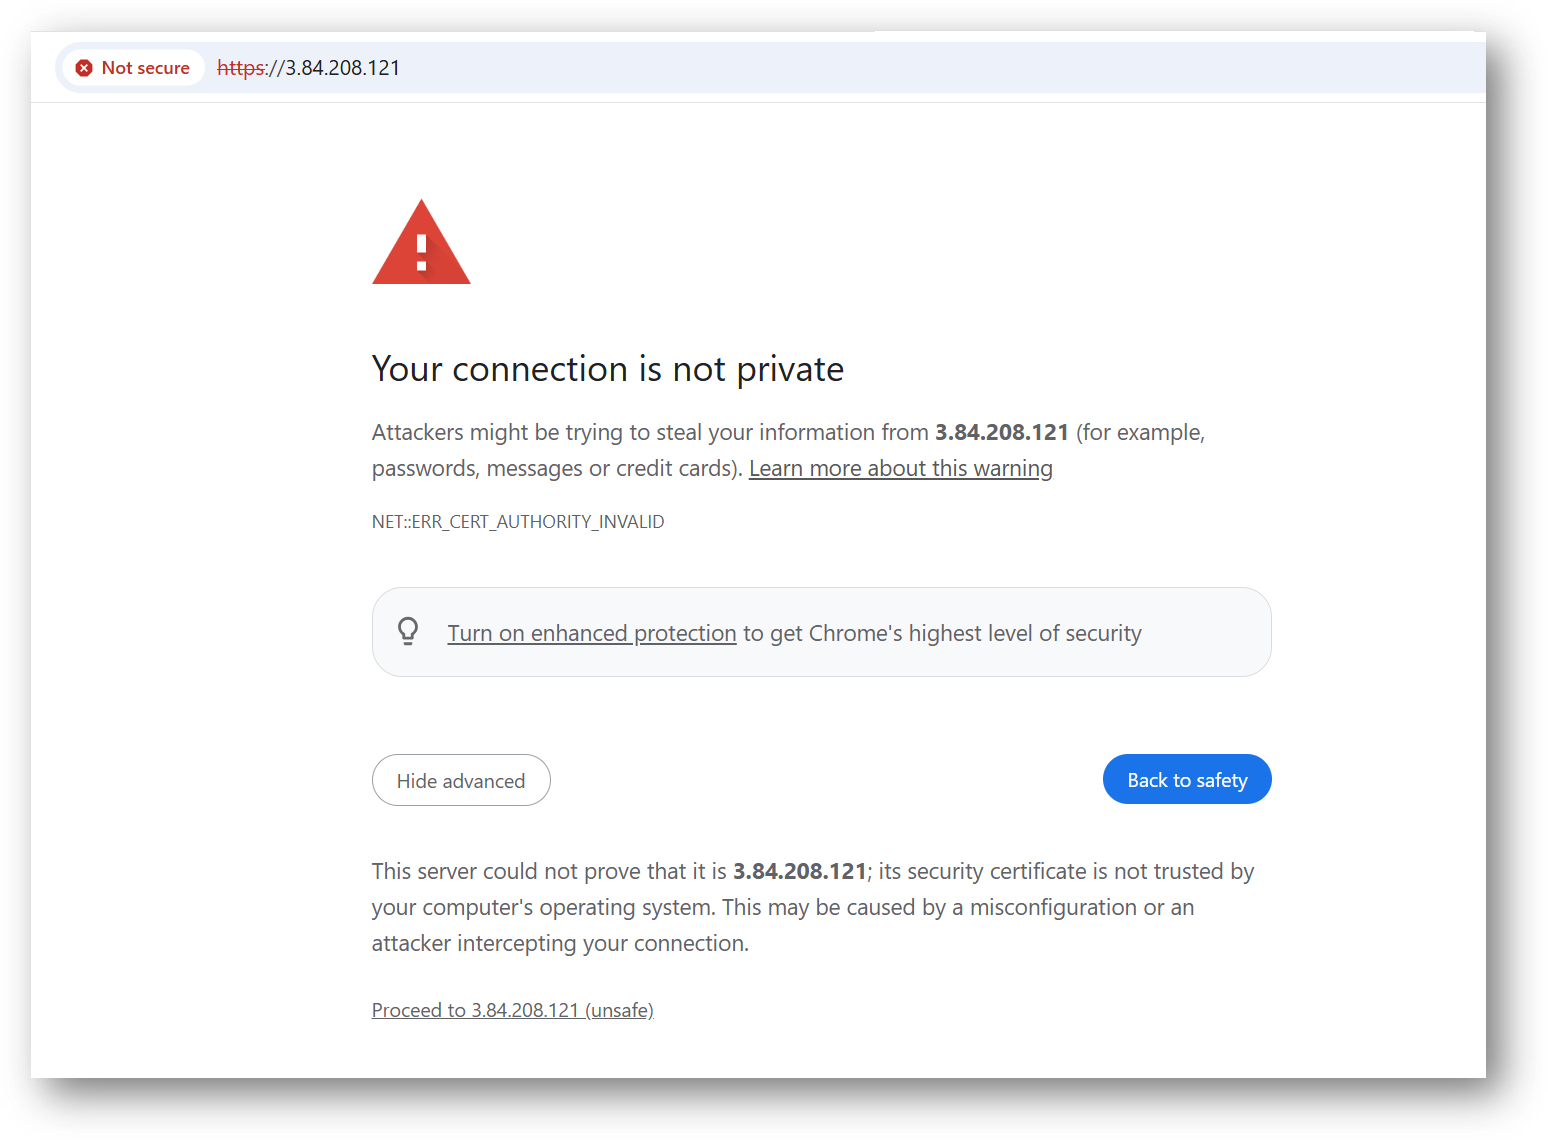
Browser will display an SSL certificate warning message. Expand the warning message, accept the certificate warning and Continue.
/img/aws/hermes-agent/browser-warning.png

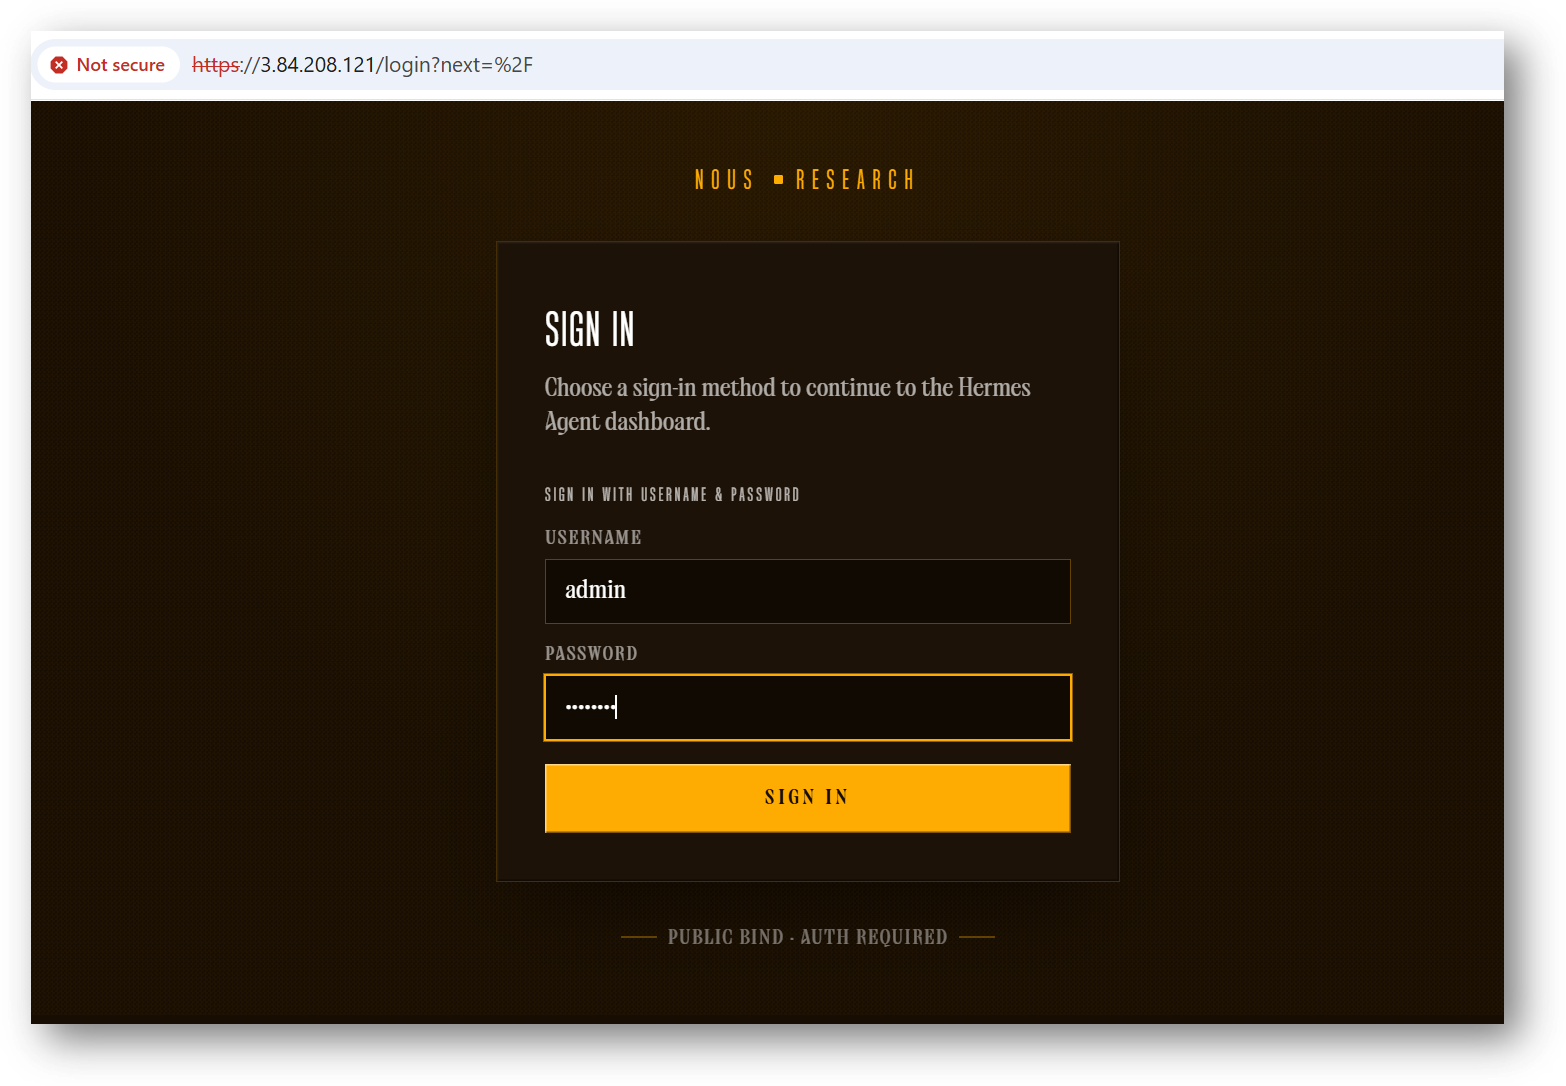
  1. It will open a login page. Provide the password we got at above step and click Sign In.

/img/aws/hermes-agent/hermes-login-page.png

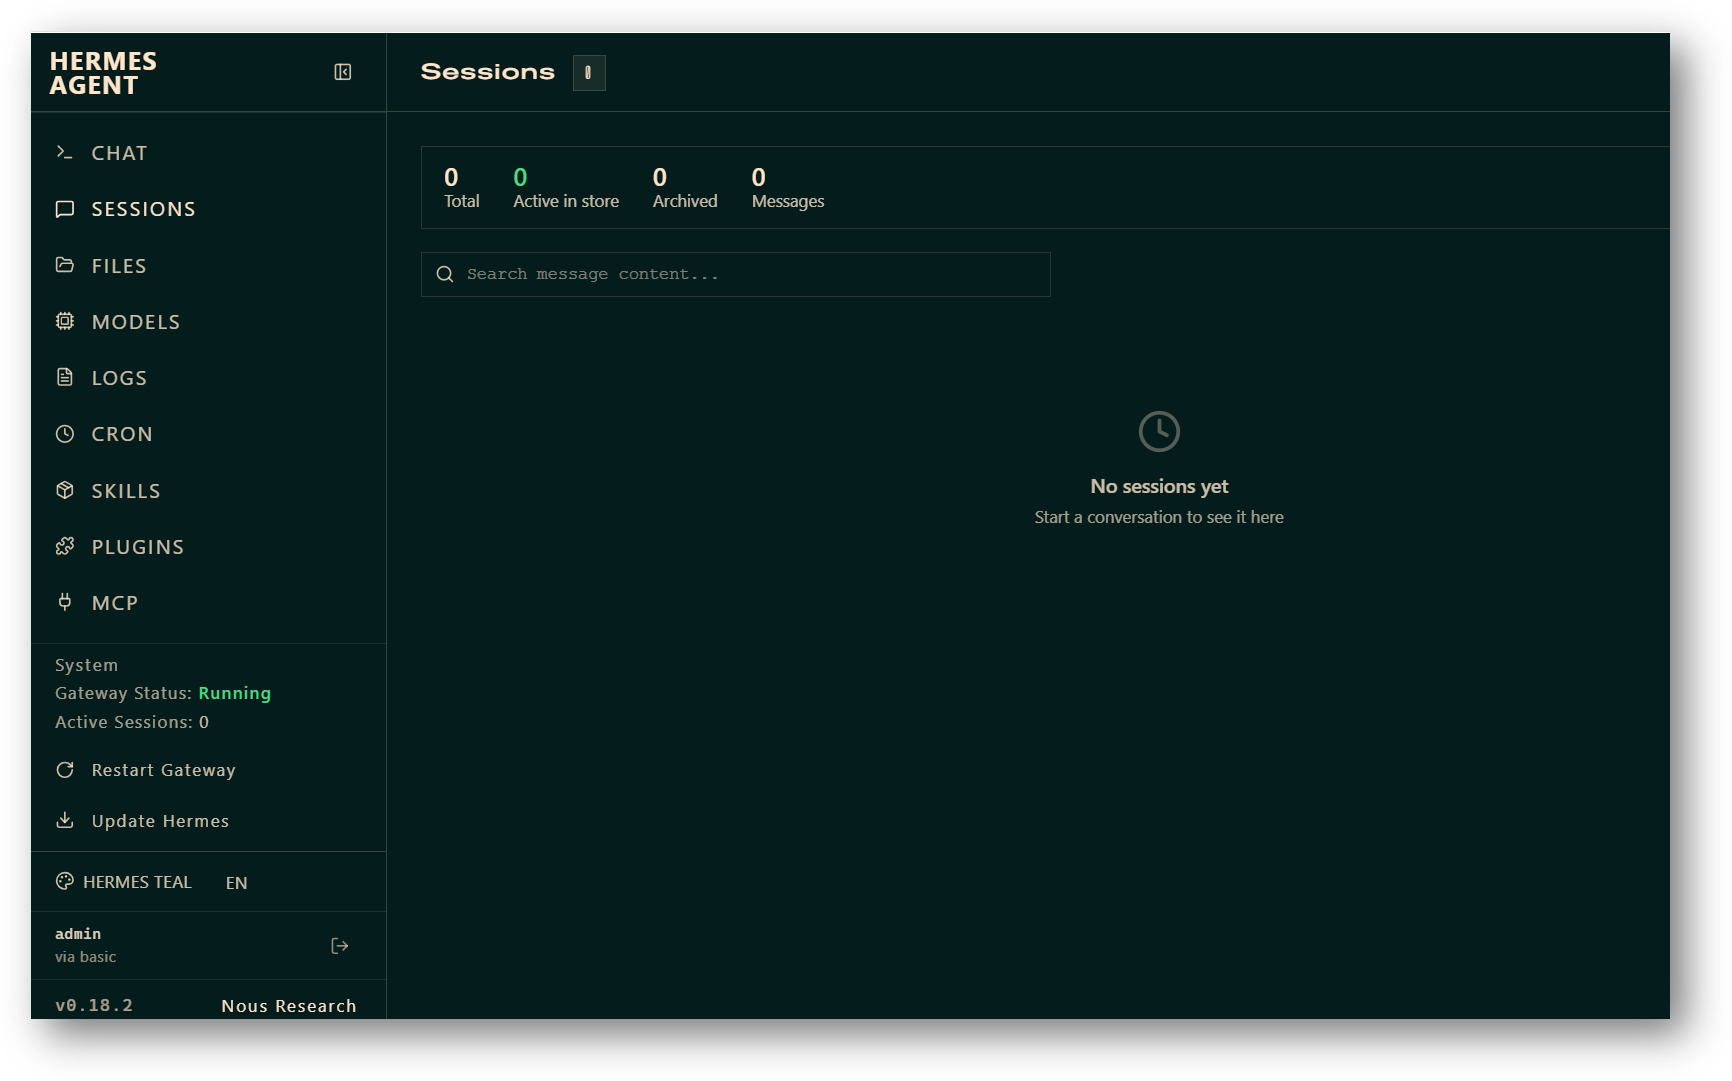
  1. Now you are connected to out of box Hermes Web Interface.

/img/aws/hermes-agent/hermes-dashboard.png

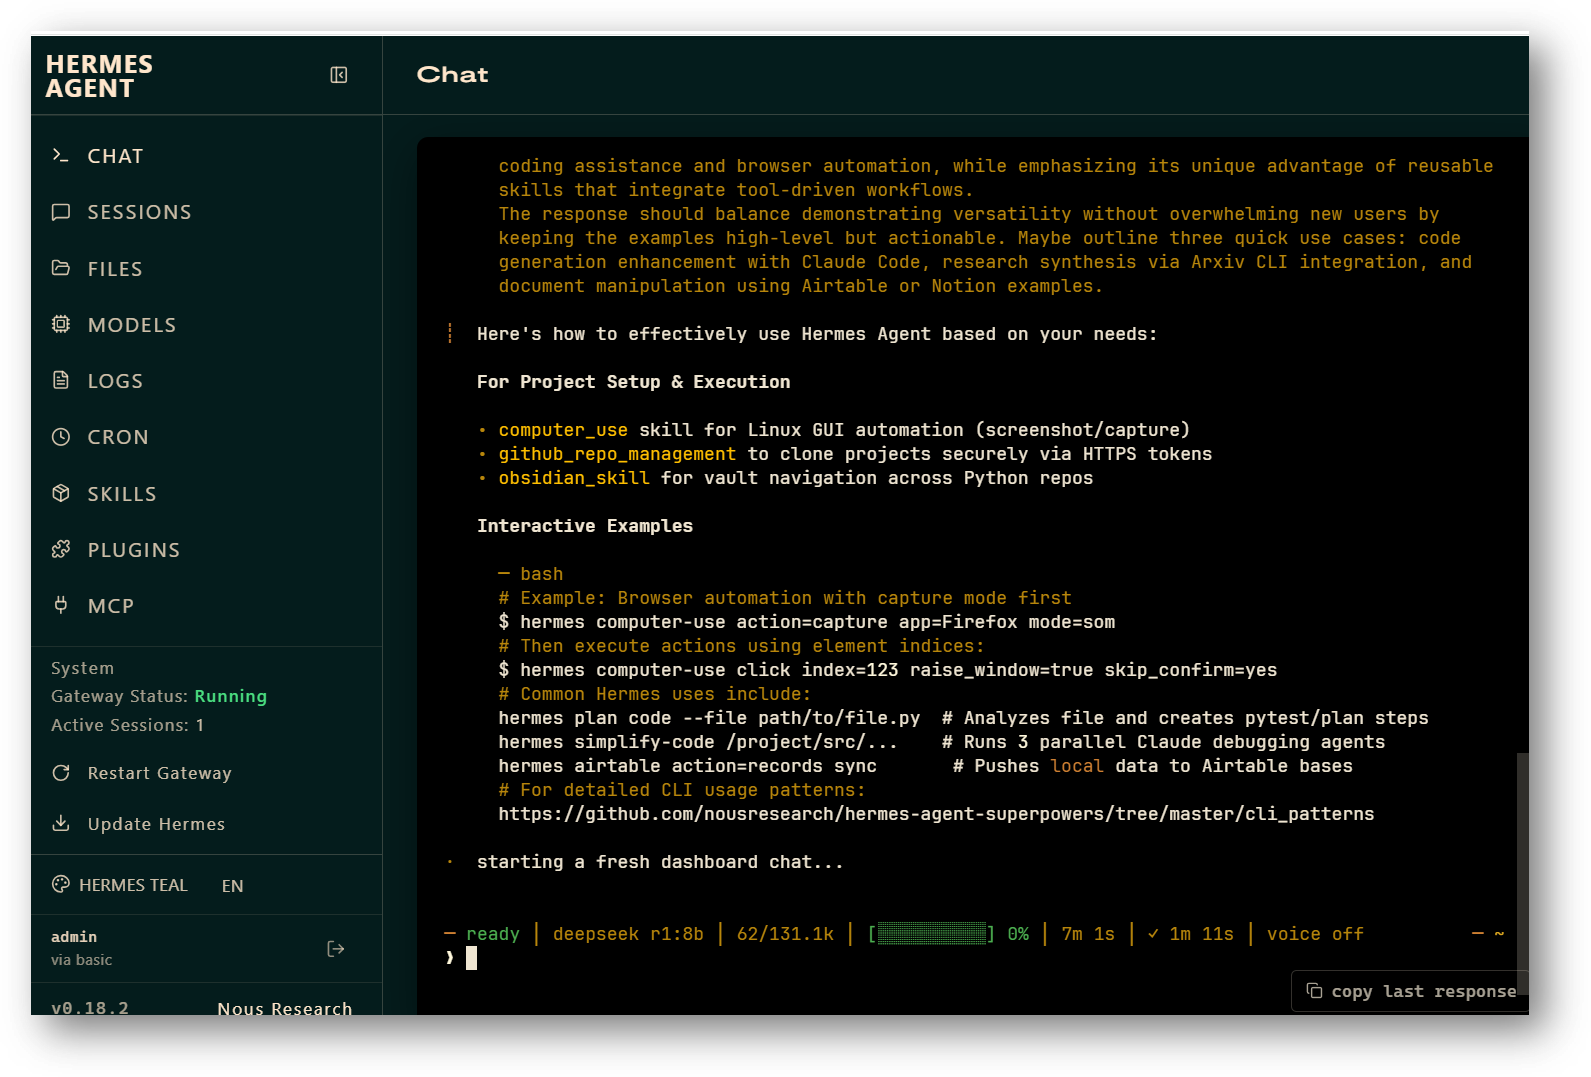
  1. You can use the Hermes chat feature to run tasks or ask questions.

/img/aws/hermes-agent/hermes-chat.png

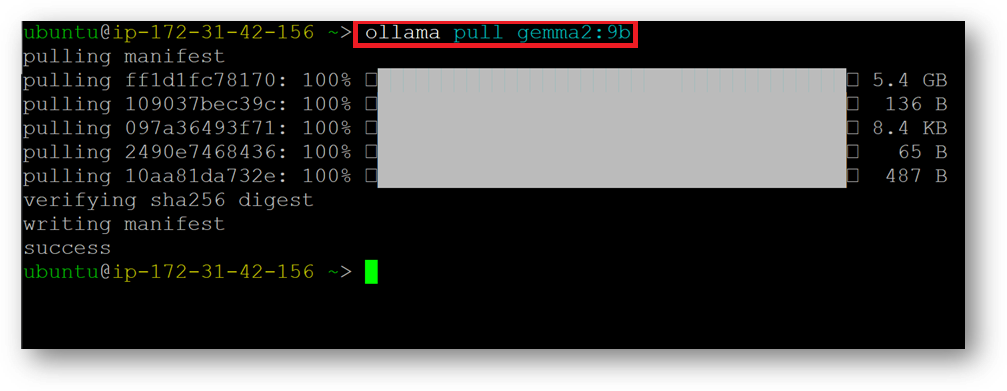
  1. By default the LLM model set is “deepseek-r1:8b"h. You can pull other ollama models using.
ollama pull <model_name>

e.g ollama pull gemma2:9b
/img/aws/hermes-agent/ollama-pull.png

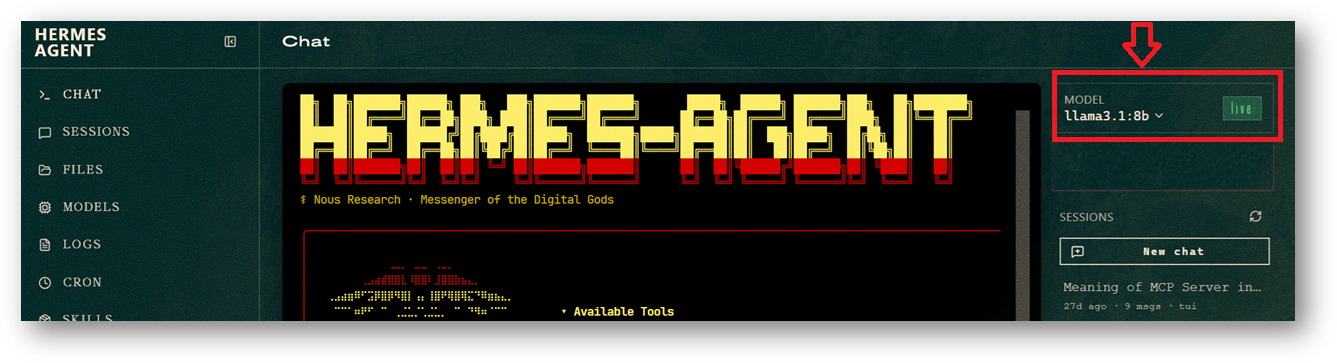
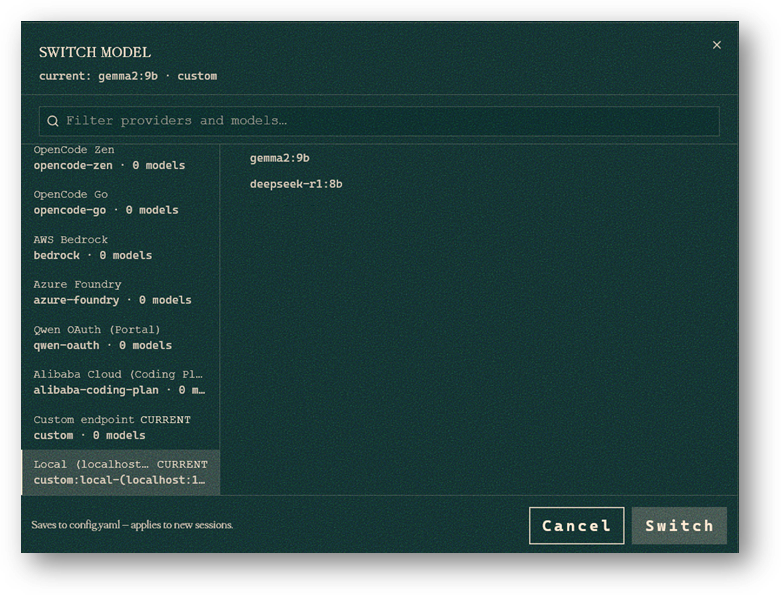
  1. Once your model is pulled you can set it to default from web interface as well as from terminal. To switch model from web interface, simply click on model dropdown from the right top of your chat window. Choose the model you want to set and click Switch

/img/aws/hermes-agent/model-dropdown.png

/img/aws/hermes-agent/switch-model-from-web-interface.png

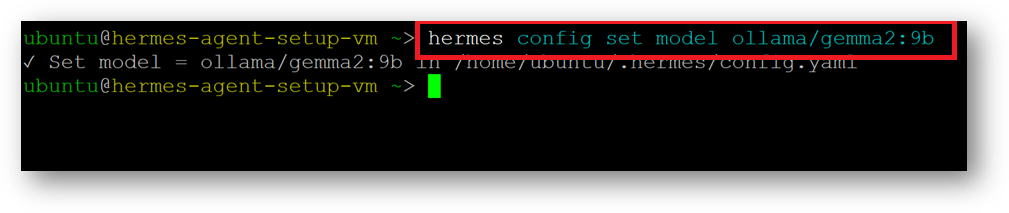
or from terminal you can run,

hermes config set model <provider_name>/<model_name>

e.g hermes config set model ollama/gemma2:9b
/img/aws/hermes-agent/switch-model-from-cli.png

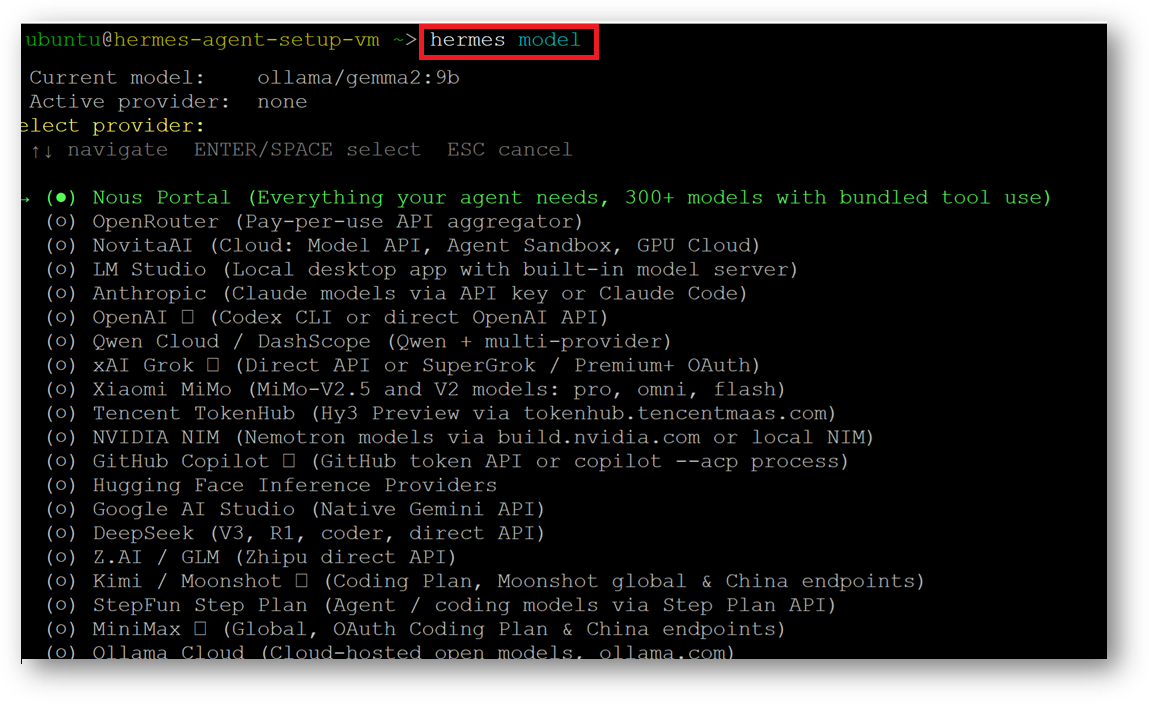
  1. To change the LLM provider and set the API Keys, please run below command.
hermes model

choose your provider of choice and follow the on screen instruction. Once the process is complete, go back to web interface and refresh the page to see the changes.
/img/aws/hermes-agent/switch-to-llm-provider.png

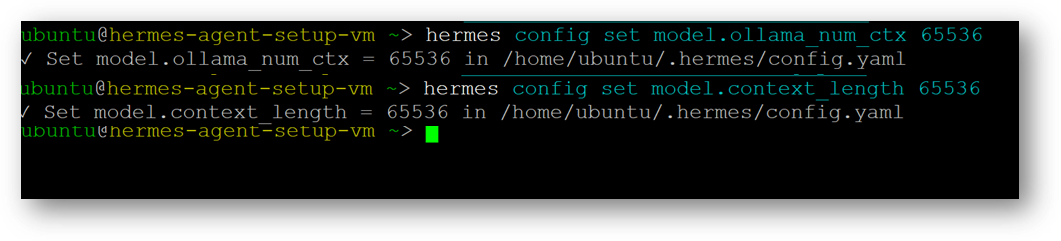
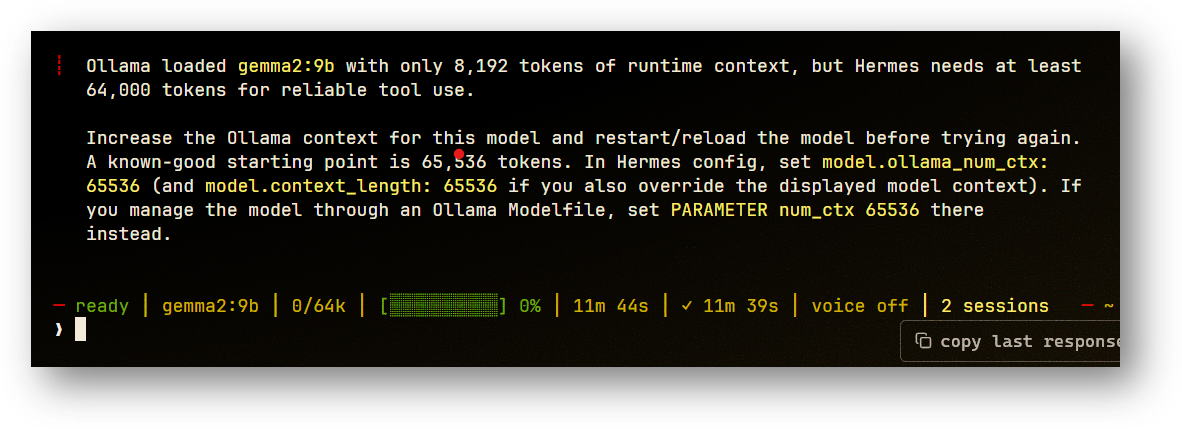
  1. If for any ollama model you are getting context length error as shown in below screenshot, while running the chat then set the context_length and ollama_num_ctx to required value by running below commands in terminal then refresh the WebUI.

Note: This is specific to ollama, if you want to do it for other providers then make the appropriate changes in below commands.

 hermes config set model.ollama_num_ctx 65536
hermes config set model.context_length 65536
/img/aws/hermes-agent/context-length-error.png

/img/aws/hermes-agent/update-context-length.png

For more details, please visit Official Documentation page

Go back