Configuring SaltStack
This section describe how to configure and automate SaltStack tasks with Semaphore UI.
- By default, the VM acts as both Salt master and minions. The configuration details for master and minion is available in /etc/salt/master and /etc/salt/minion files respectively.

- To verify the configuration of VM being both master and minion, you can run the example salt configuration which comes with the vm. This example will install Apache server on the vm.

- To execute the example, follow below steps:
- On first boot of the VM, new keys will be generated. To proceed further you need to accept the keys first. Connect to vm using terminal and run below command to list the available keys.

- There is one key in the Unaccepted keys section. To accept this key run below command and press Y.

- Now the keys should be available in the Accepted Keys section. Check again with list command.

- Now run apache2 command, it will return with error Command apache2 not found as the apache is not available on this VM.
apache2


- Befor running the template , review it by clicking the edit button on top right corner, and check the Script Filename field which has value of ’*’ .

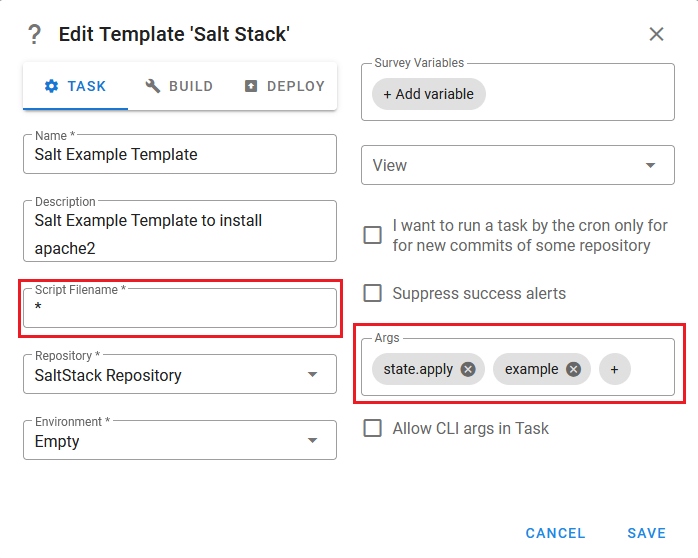
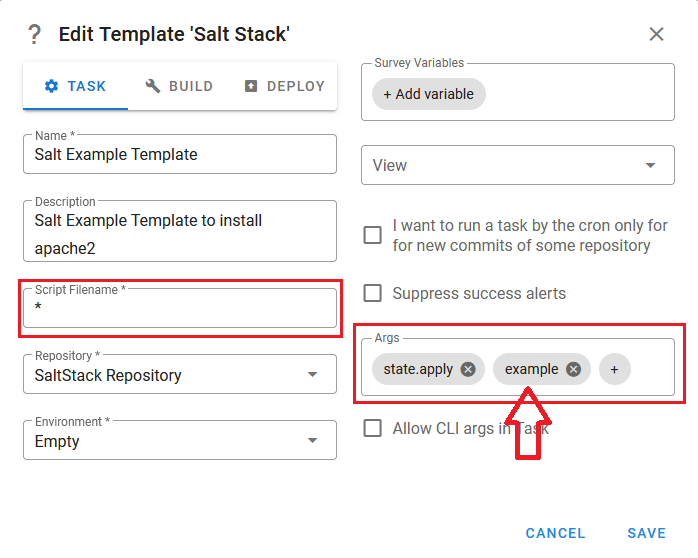
Note that For Saltstack templates to run, the script Filename here does not indicate the saltstack template, rather this field should have the name of minion where the script should be executed. ’*’ indicates that the script will be applied to all the minions.
- If you want to execute it to specific minion, replace * with minion name.
- To identify the minion name, you can run salt-key -L command in the terminal to list all the minions associated with the master.
salt-key -L

The actual saltstack script to execute is listed in the args section, in this case, the script is ’example’ and the actual script is stored under /srv/salt folder which is the default SaltStack Repository.

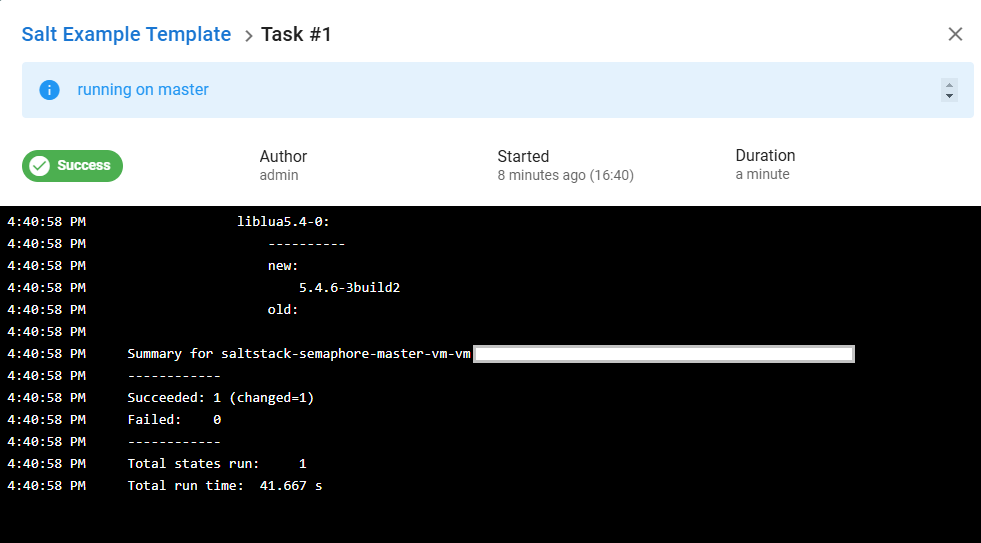
- Click on Run button to execute the template and wait for it to finish. If the template is not showing any progress update even after 1-2 minute, please refresh the page.
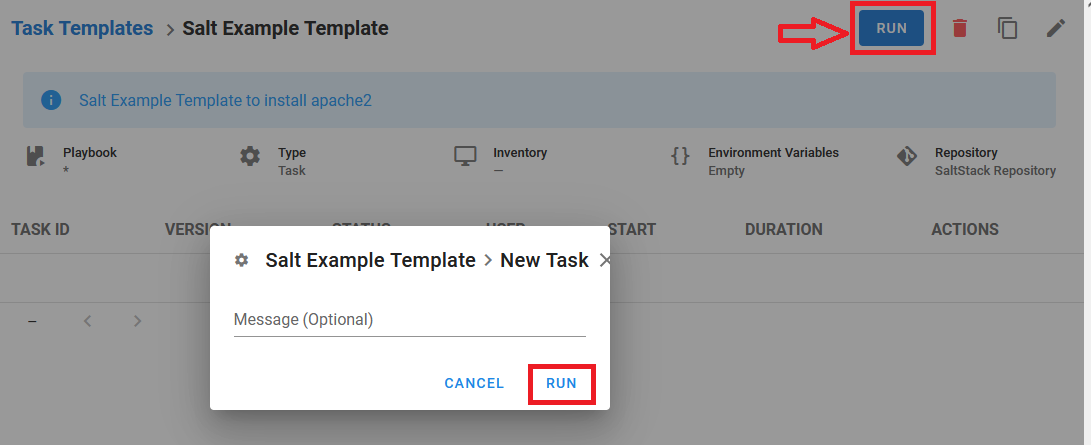
- Once template is executed successfully, goto terminal and execute ‘apache2’ command, now the command will be available

- Now run below command to uninstall apache2 server from the VM-
sudo apt remove apache2 -y && sudo apt autoremove -y

- If you want to add a new salt minion vm to existing Salt master vm , follow below steps:
-
Deploy the new SaltStack VM from cloud marketplace by following the ‘Getting Started’ Guide of respective cloud providers given below.
-
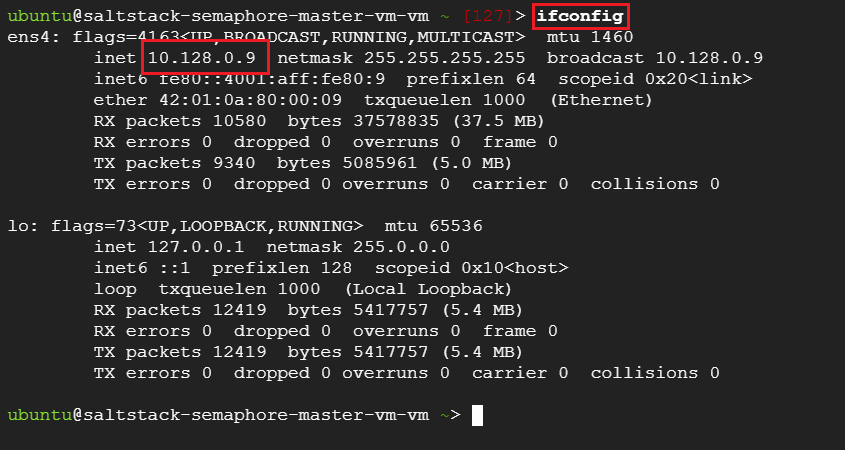
Go back to the Saltstack master vm, and note its Private IP by running below command -
ifconfig
- Once the new vm is running, connect to the vm using ssh and edit /etc/salt/minion file.
sudo vi /etc/salt/minion

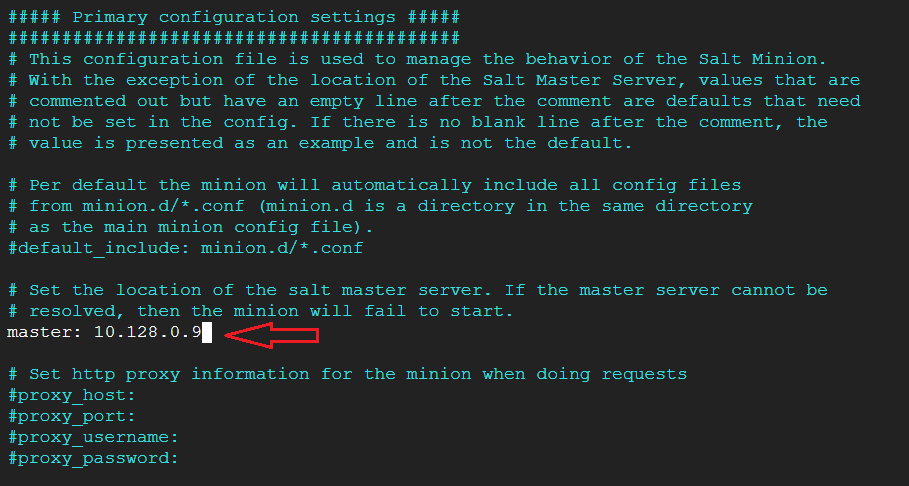
- Press ‘i’ to enable insert mode. Look for line master: 127.0.0.1 and change 127.0.0.1 to the master private ip you noted in previous step as shown in below screenshot. Once done save the file by pressing Escape key and :wq.
- Now execute below commands in the minion vm terminal -
sudo systemctl stop salt-master
sudo systemctl disable salt-master
sudo systemctl restart salt-minion

- Now, go to Salt master vm and run below command to accept the new minion vm keys -
salt-key -A
- This command will show a prompt to add the minion to the server, type y to add the minion.

- Run the salt list command to see the list of all minions. It should show you 2 Accepted Keys.
salt-key -L

-
Finally, to test the new minion, rerun the Salt Example Template by going to ‘Task Template’ menu on Salt master VM, this time Salt master will install apache2 on the new minion vm as well.
-
First Check the apache2 on minion vm using -
apache2

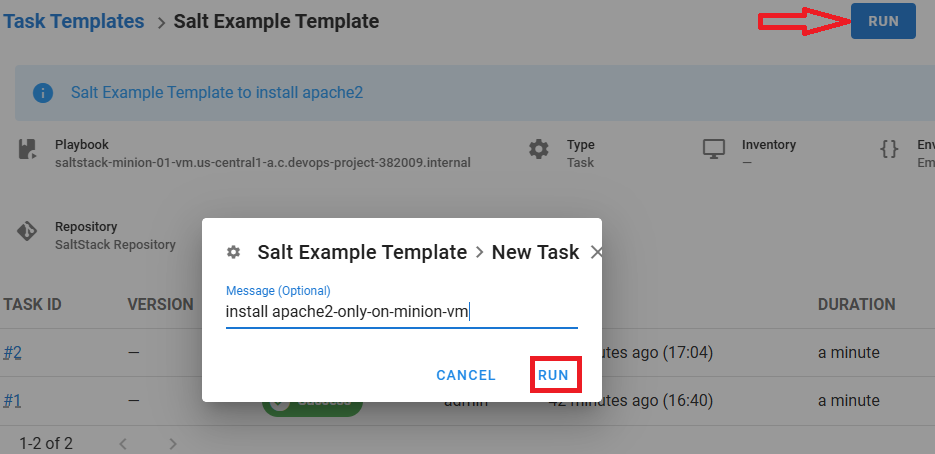
- Now run the Template on Salt master
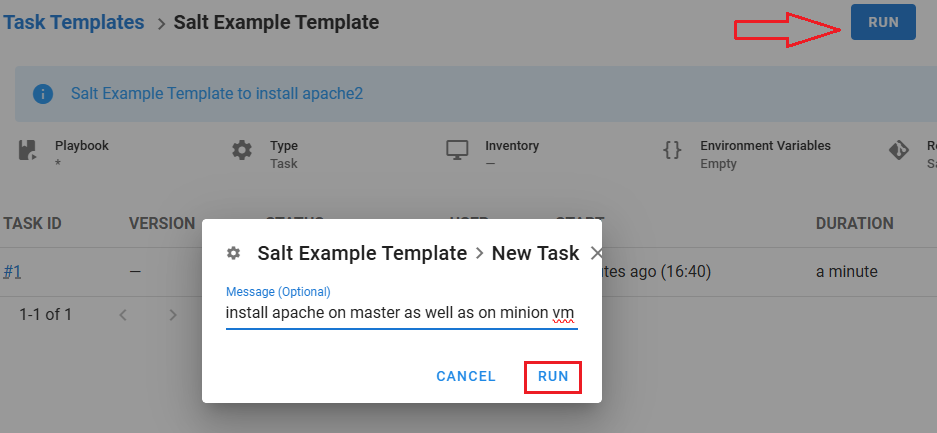
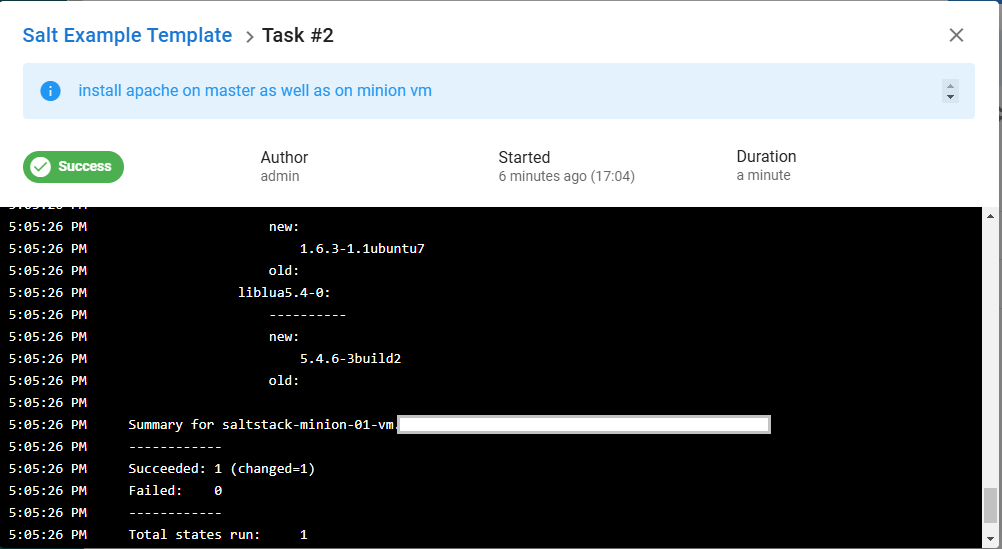
- Confirm apache2 is installed on minion vm by running ‘apache2’ command on minion vm terminal. Simillarly it will install apache2 on master vm as well.

- If you want to run the ‘Salt Example Template’ on only the new minion, follow below steps:
- Connect to new minion using ssh and uninstall apache2 by running below command to remove apache2 installed in previous execution of ‘Salt Example Template’.
sudo apt remove apache2 -y && sudo apt autoremove -y

- Similarly , now connect to master vm using ssh and run below command to remove apache2 from master as well.
sudo apt remove apache2 -y && sudo apt autoremove -y

- Then run salt-key -L on master vm and copy the new minion name from the output.

Make sure to copy new minion name and not the master name as the command output will show two minions in the list.
- Then go back to Semaphore UI, open ‘Salt Example Template’, click edit button and replace * in script name to new minion name copied in above step, save the template.
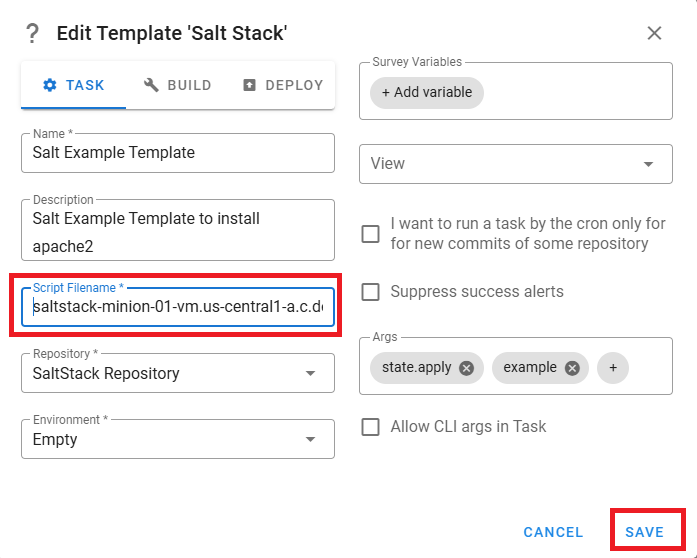
- Execute the template again and this time it should reinstall apache2 only on the new minion vm and not on master minion
