Setup and installation of 'Open Notebook - The AI Podcast creator' on Azure
This section describes how to launch and connect to ‘Open Notebook - The AI Podcast creator’ VM solution on Azure Platform.
- Open Open Notebook - The AI Podcast creator VM listing on Azure Marketplace.
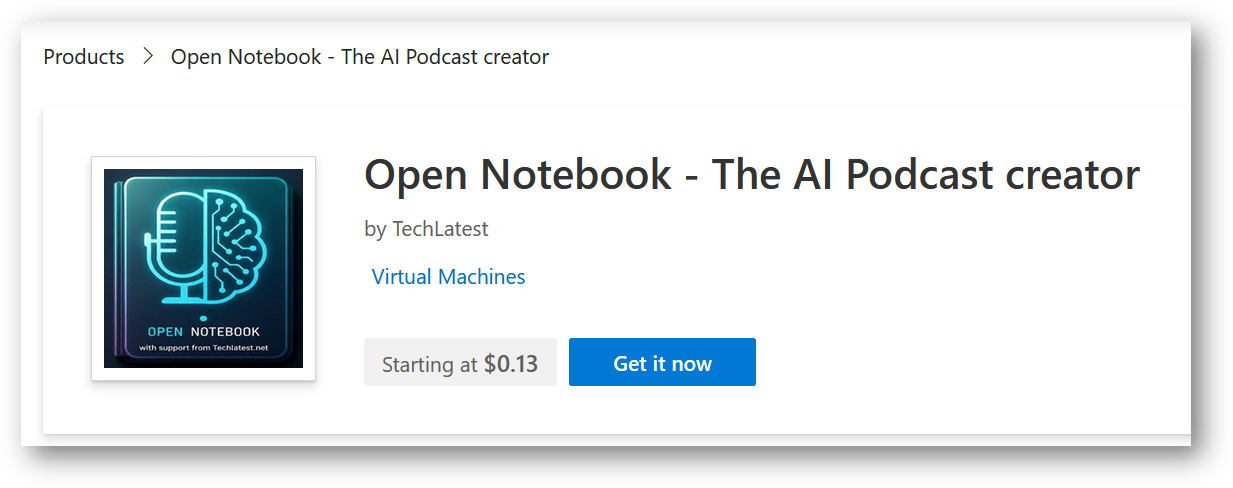
- Click on Get It Now
-
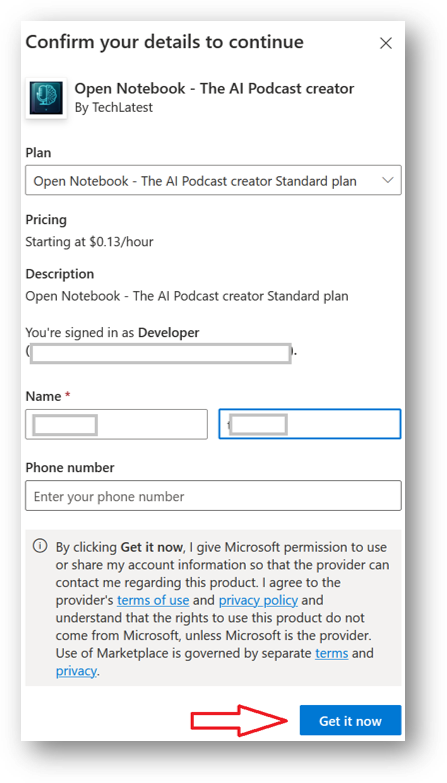
Login with your credentials, provide the details here. Once done click on Get it now button at the bottom.
-
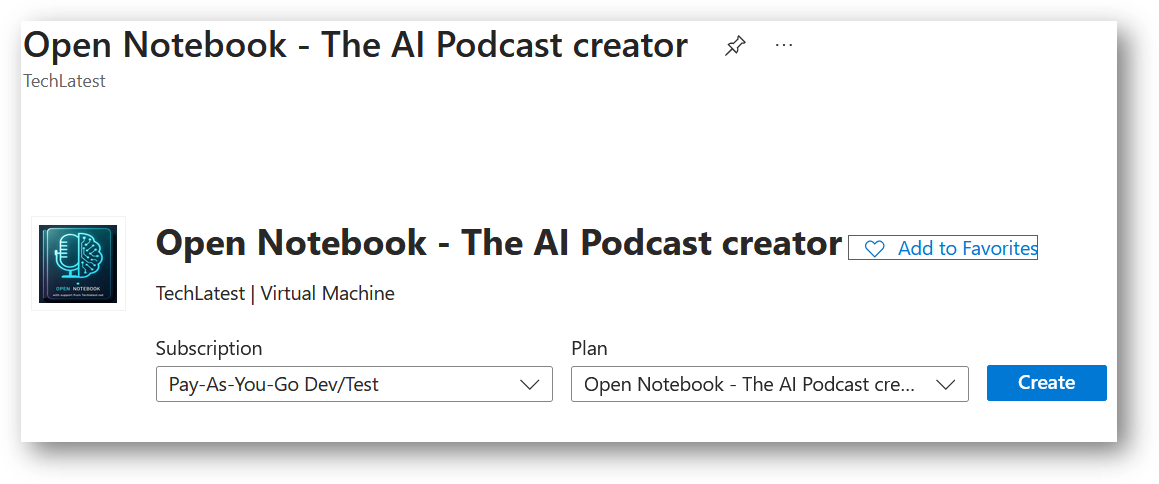
It will take you to the Product details page. Click on Create.
-
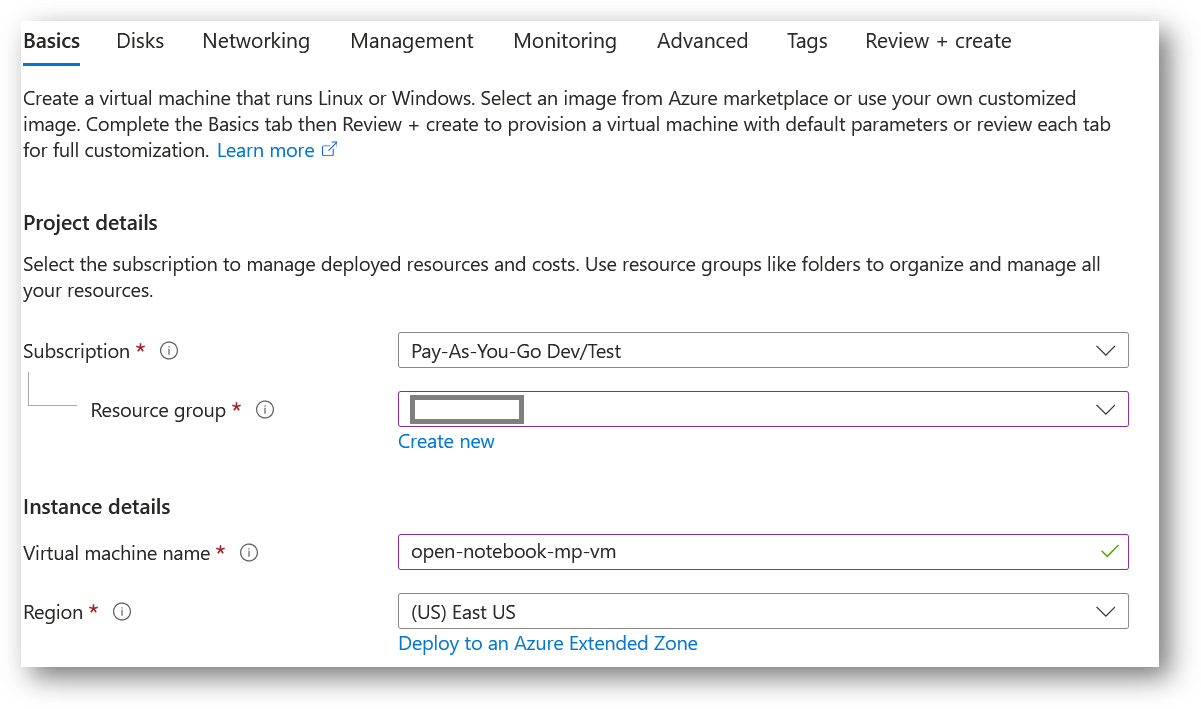
Select a Resource group for your virtual machine
-
Select a Region where you want to launch the VM(such as East US)
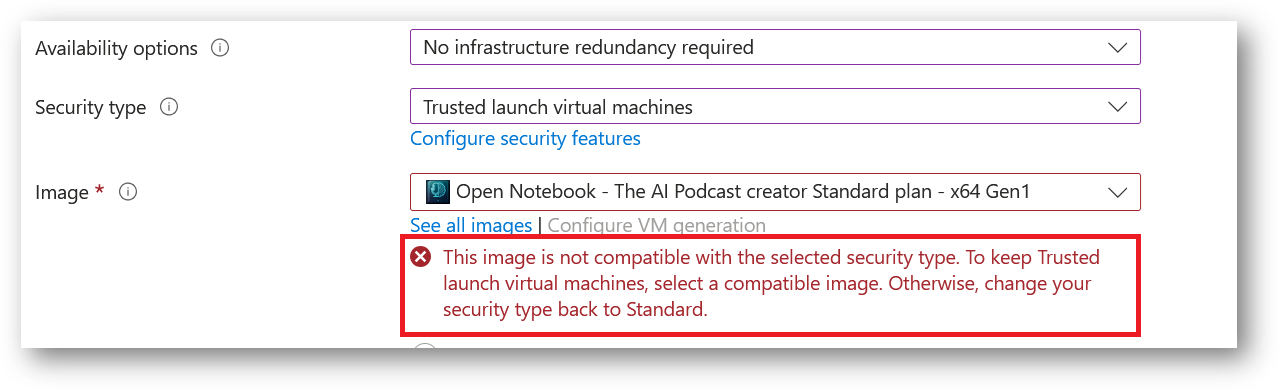
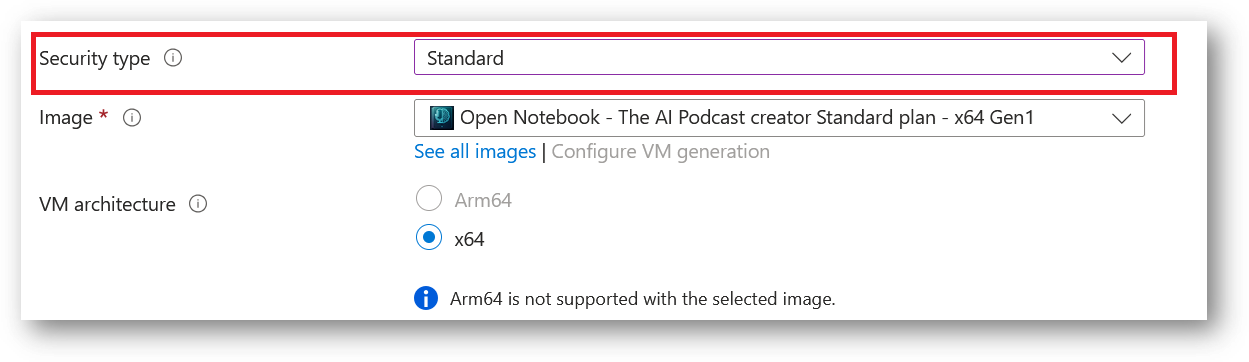
- Note: If you see “This image is not compatible with selected security type. To keep trusted launch virtual machines, select a compatible image. Otherwise change your security type back to Standard” error message below the Image name as shown in the screenshot below then please change the Security type to Standard.
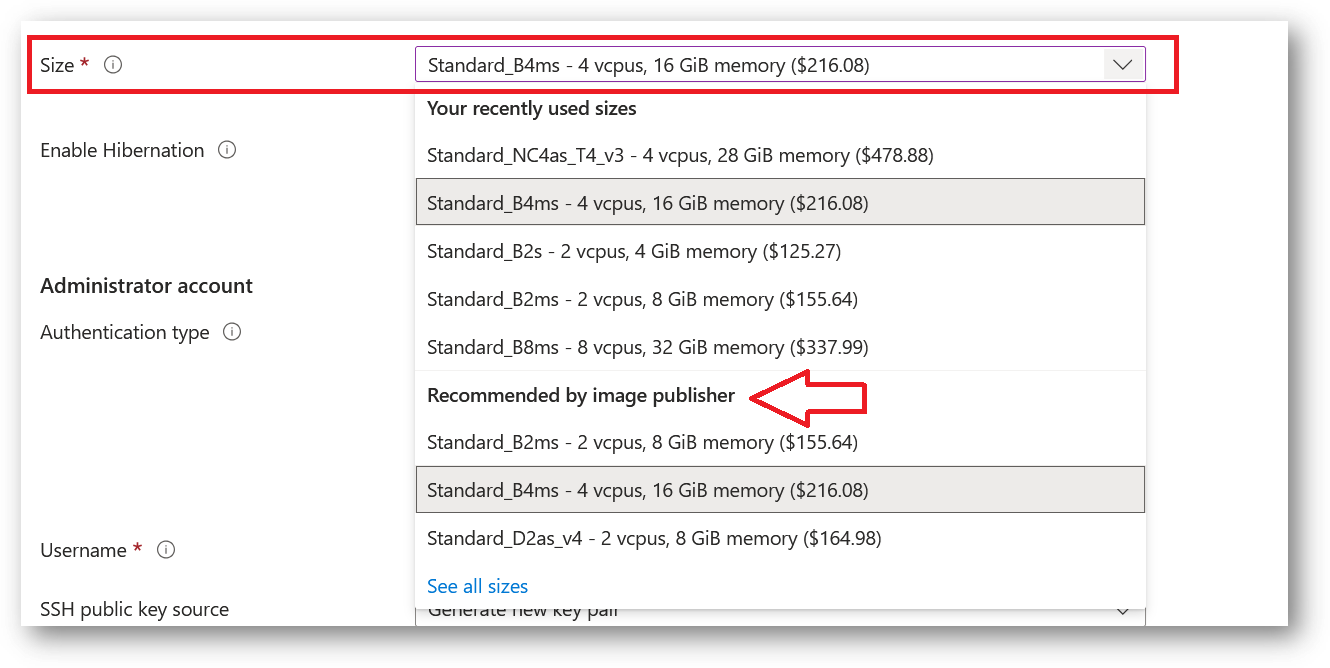
- Optionally change the number of cores and amount of memory.
Minimum VM Specs : 16GB RAM /4vCPU. Please also check publisher recommendations for more instance options.
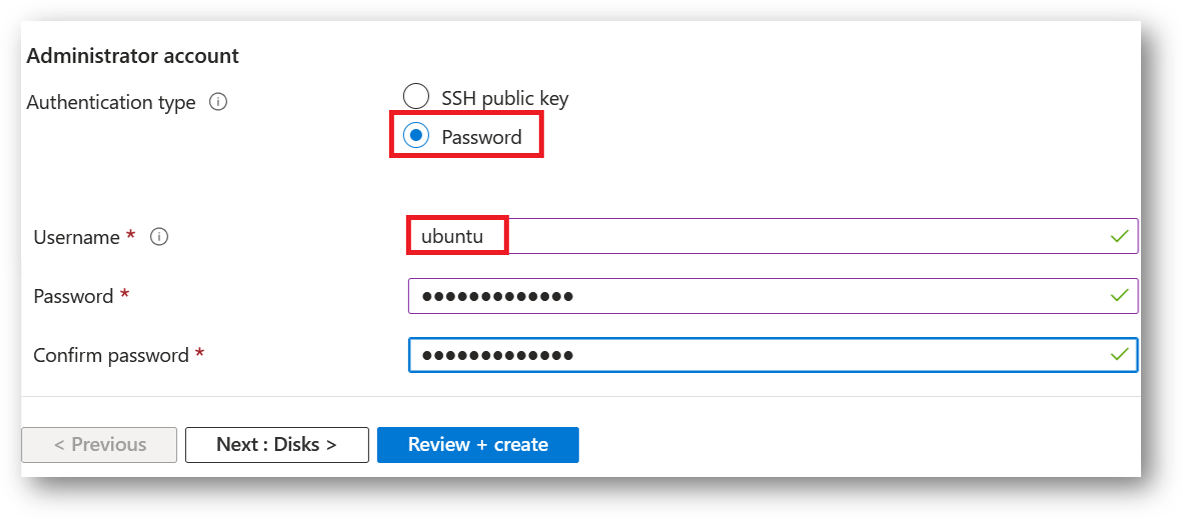
Select the Authentication type as Password and enter Username as ubuntu and Password of your choice.
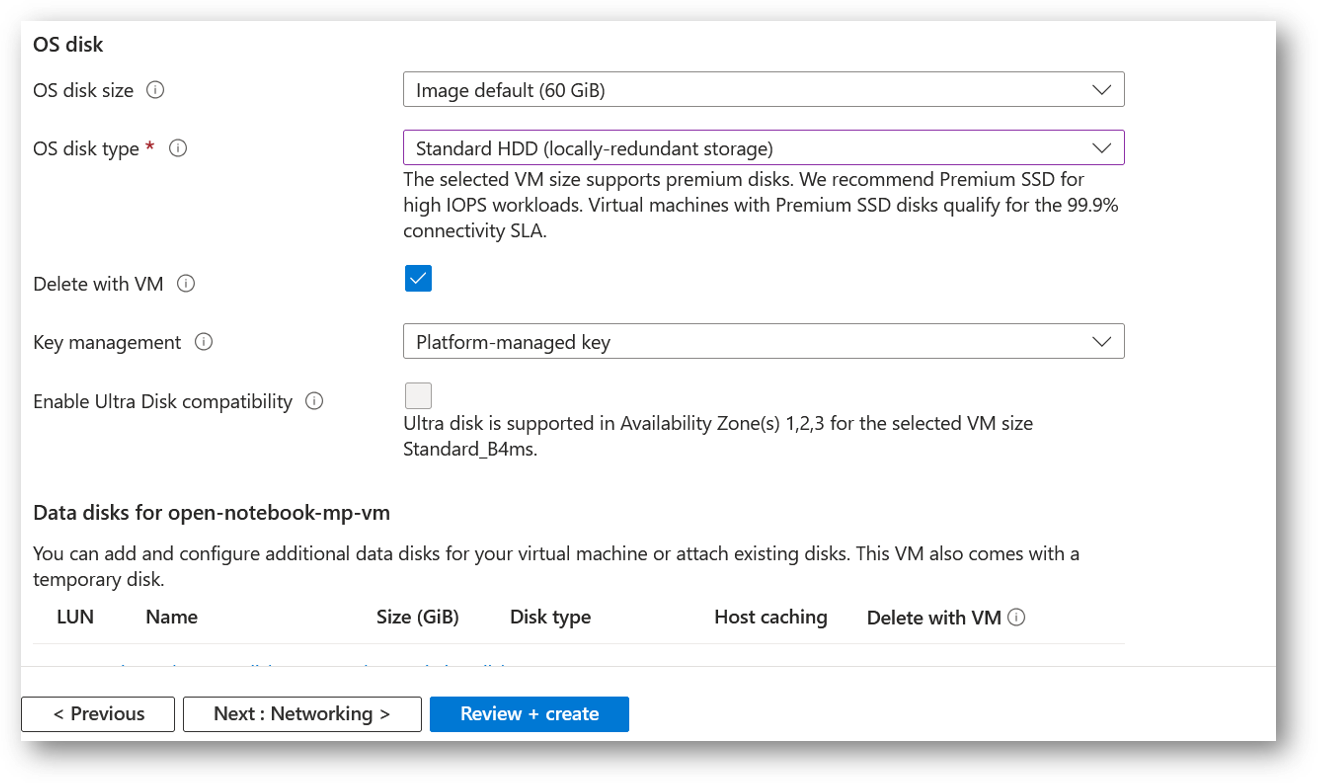
- Optionally change the OS disk size and its type. By default the VM comes with 60GB of disk.
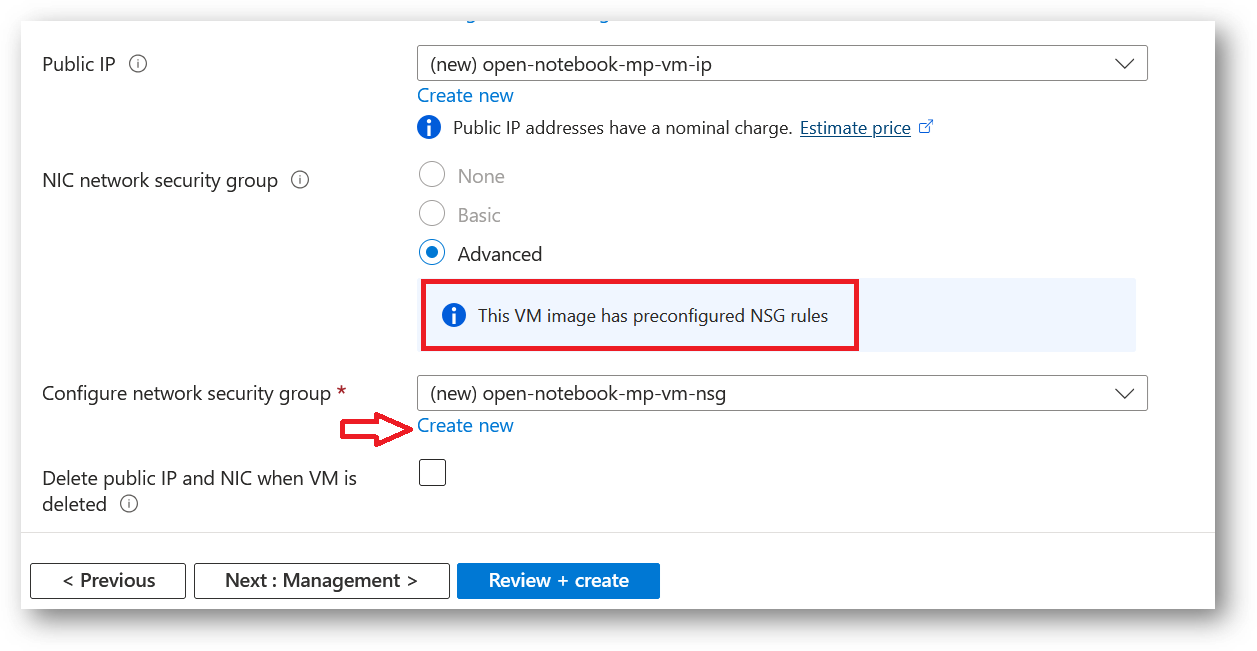
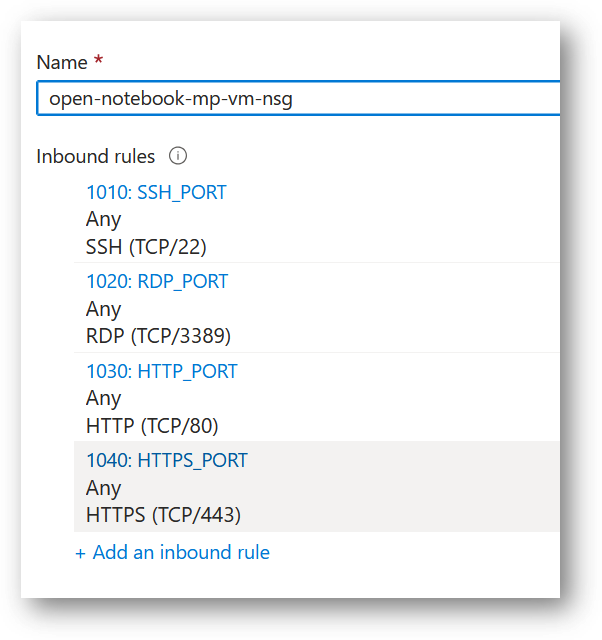
- Optionally change the network and subnetwork names. Be sure that whichever network you specify has ports 22 (for ssh), 3389 (for RDP) , 80 (for HTTP) and 443 (for HTTPS) exposed.
The VM comes with the preconfigured NSG rules. You can check them by clicking on Create New option available under the security group option.
- Optionally go to the Management, Advanced and Tags tabs for any advance settings you want for the VM.
- Click on Review + create and then click on Create when you are done.
Virtual Machine will begin deploying.
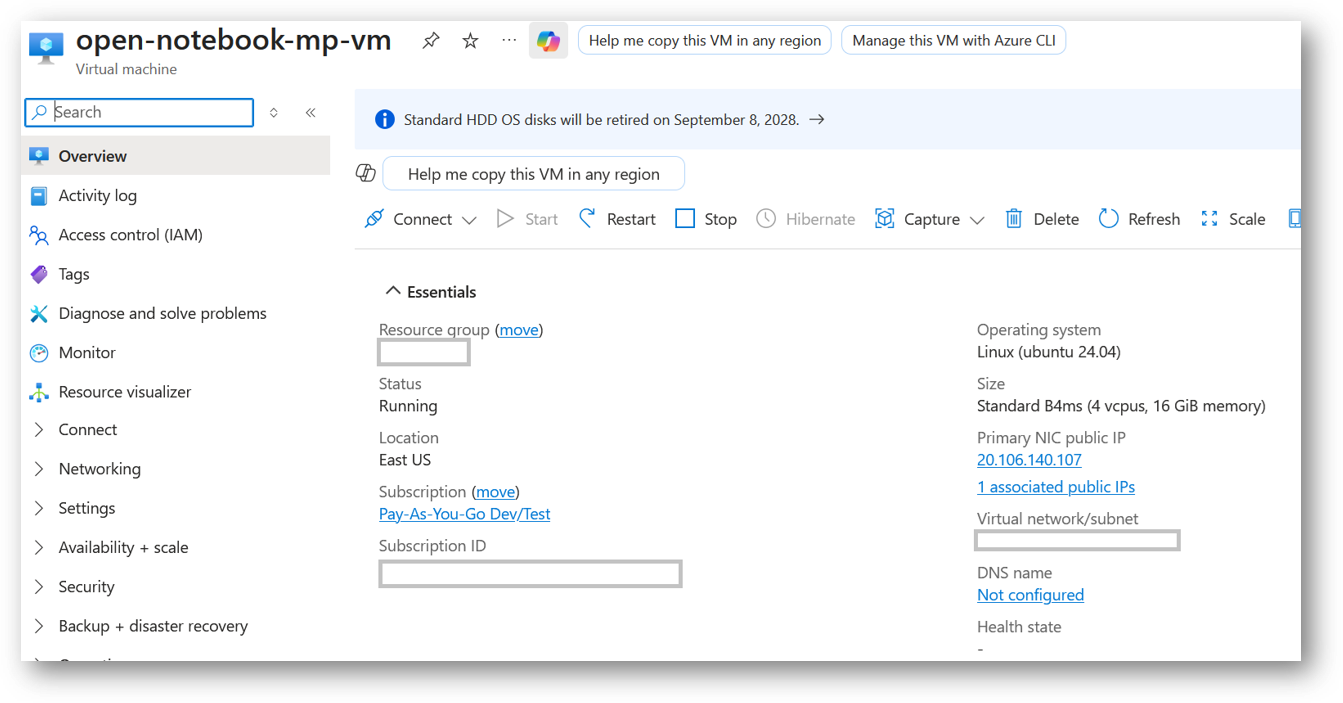
- A summary page displays when the virtual machine is successfully created. Click on Go to resource link to go to the resource page. It will open an overview page of virtual machine.
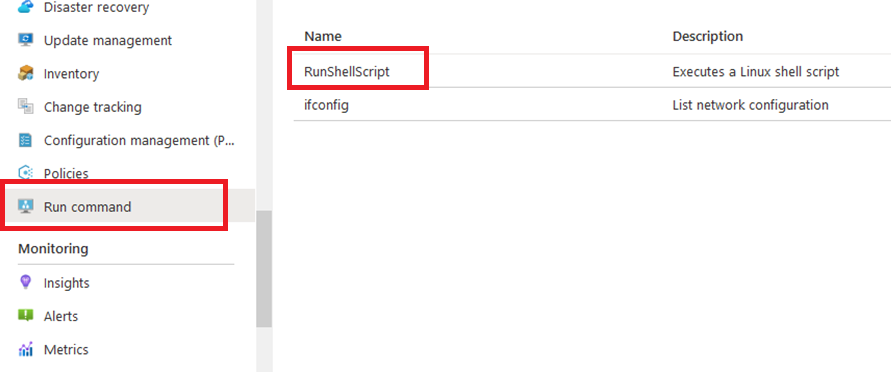
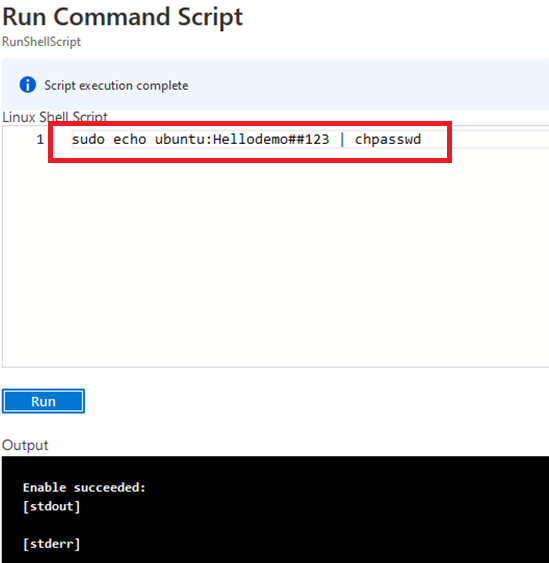
- If you want to update your password then open up the left navigation pane, select Run command, select RunShellScript and enter following command to change the password of the vm .
sudo echo ubuntu:yourpassword | chpasswd
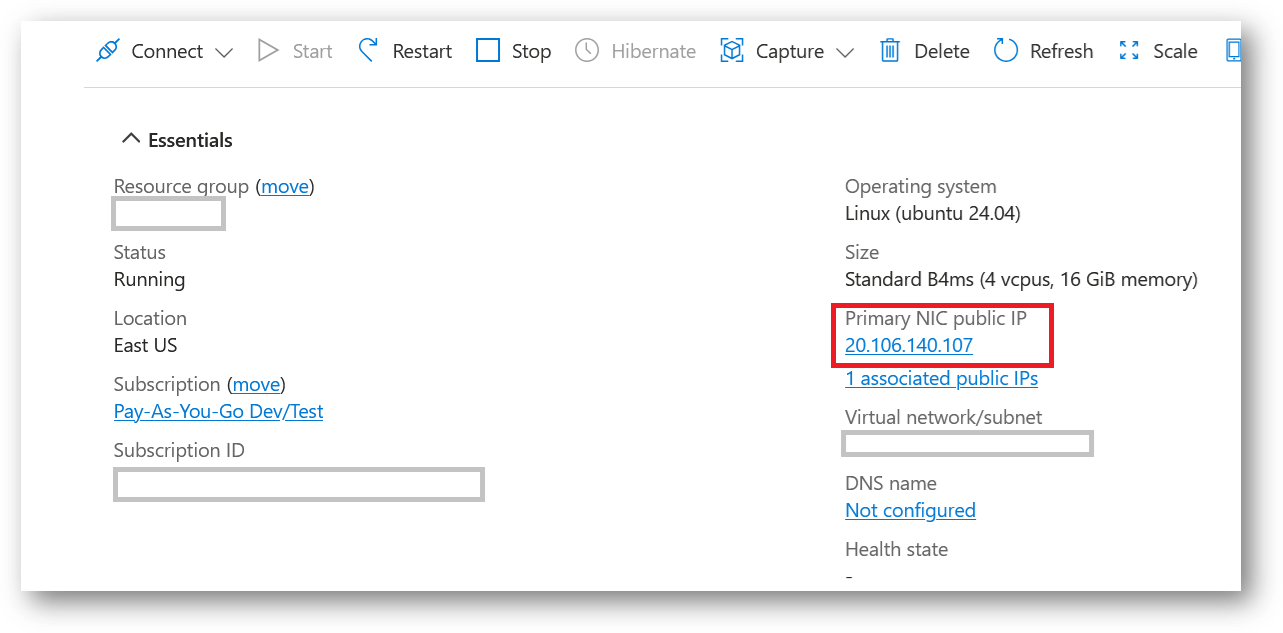
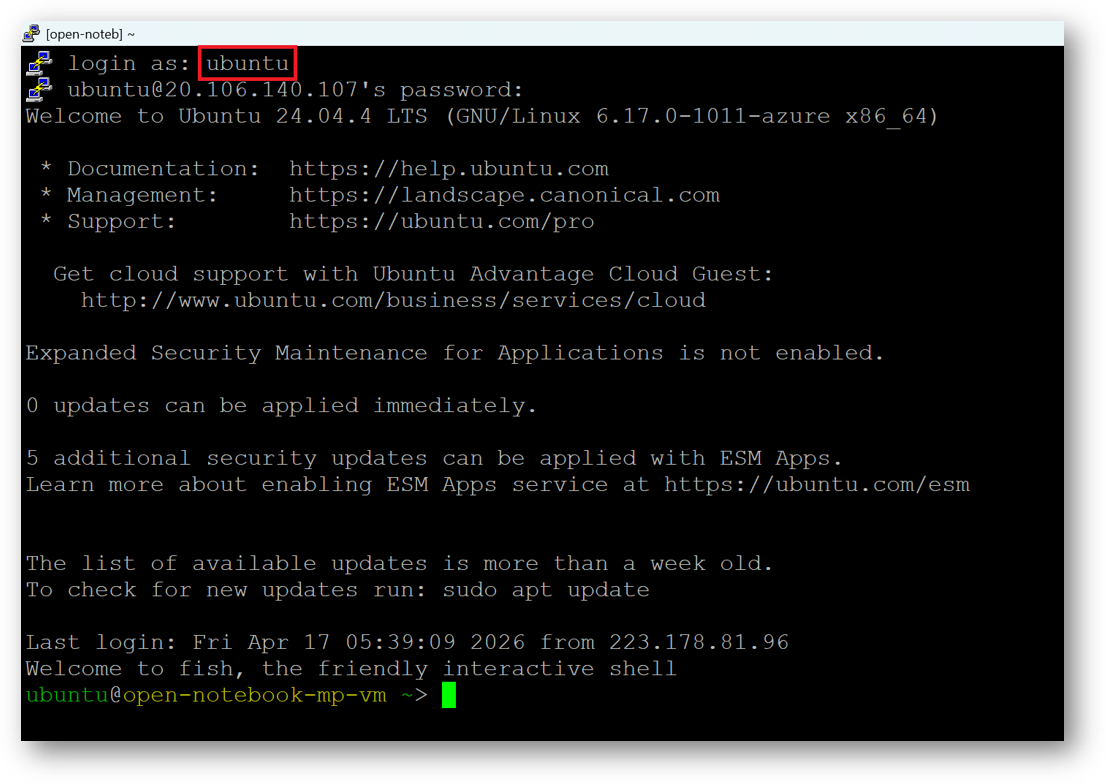
Now the password for ubuntu user is set, you can SSH to the VM. To do so, first note the public IP address of the VM from VM details page as highlighted below
Open putty, paste the IP address and click on Open.
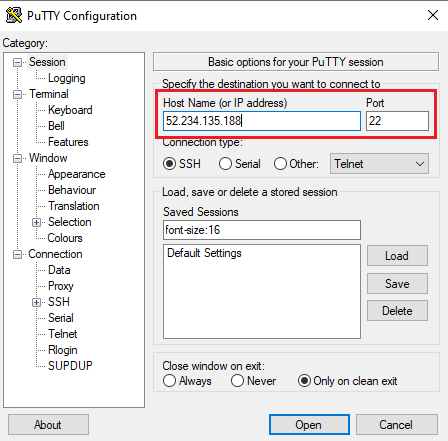
login as ubuntu and provide the password for ‘ubuntu’ user.
-
You can also connect to the VM’s desktop environment from any local windows machine using RDP protocol or local linux machine using Remmina.
-
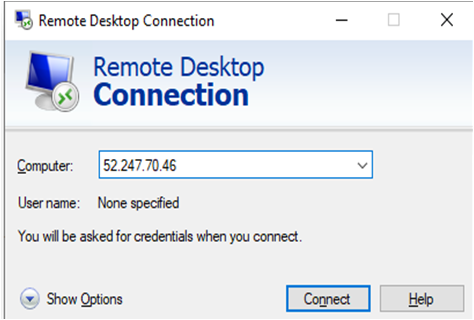
To connect using RDP via Windows Machine, first note the public IP address of the VM from VM details page as highlighted below
- Then From your local windows machine, goto “start” menu, in the search box type and select “Remote desktop connection”.
In the “Remote Desktop connection” wizard, copy the public IP address and click connect
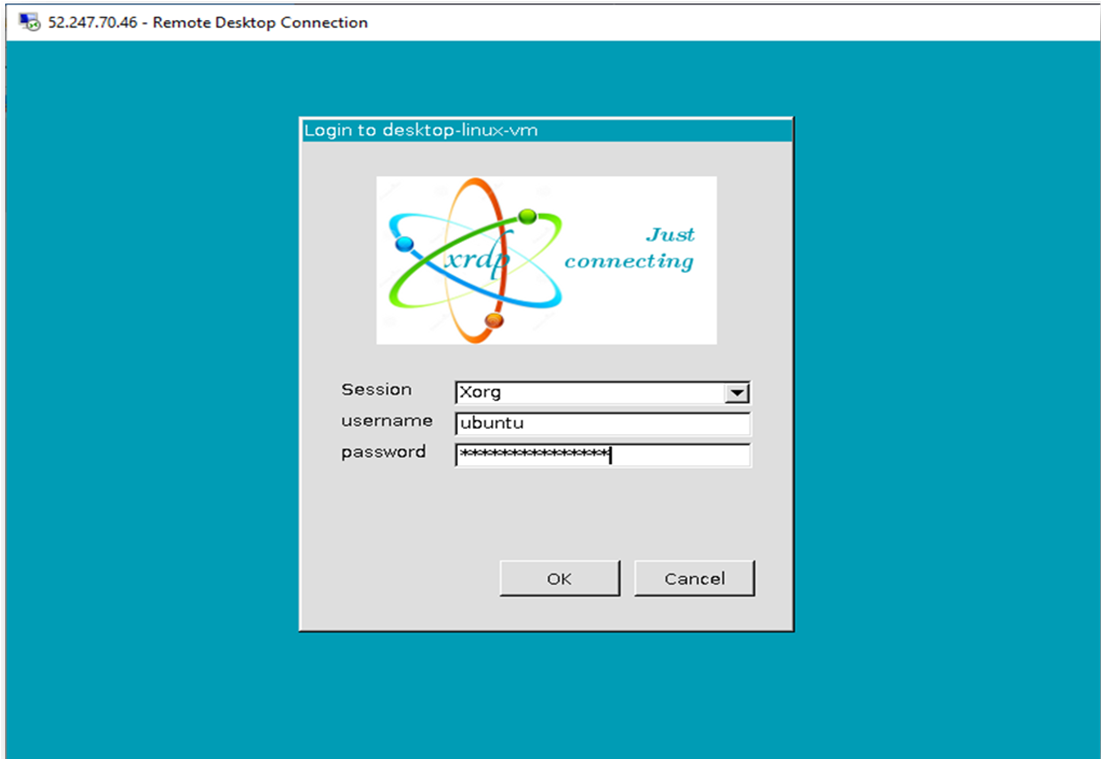
- This will connect you to the VM’s desktop environment. Provide the username (e.g “ubuntu”) and the password set in the step4 to authenticate. Click OK
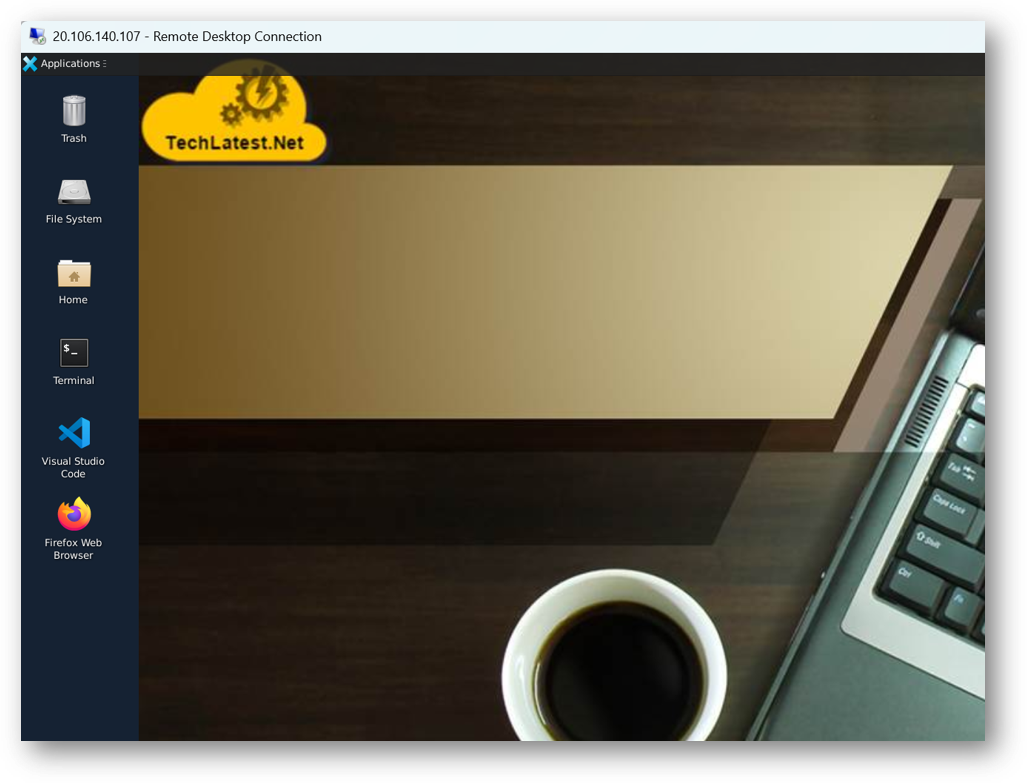
- Now you are connected to the out of box “Open Notebook - The AI Podcast creator” VM’s desktop environment via Windows Machine.
- To connect using RDP via Linux machine, first note the external IP of the VM from VM details page, then from your local Linux machine, goto menu, in the search box type and select “Remmina”.
Note: If you don’t have Remmina installed on your Linux machine, first Install Remmina as per your linux distribution.

- In the “Remmina Remote Desktop Client” wizard, select the RDP option from dropdown and paste the external ip and click enter.

- This will connect you to the VM’s desktop environment. Provide “ubuntu” as the userid and the password set in above reset password step to authenticate. Click OK

- Now you are connected to out of box “Open Notebook - The AI Podcast creator” VM’s desktop environment via Linux machine.
- The VM will generate a random password to login to Open Notebook Web Interface as well as an encryption key for database access. To get the password, connect via SSH terminal as shown in above steps and run below command.
cat /home/ubuntu/open-notebook-local/open_notebook_credentials.txt

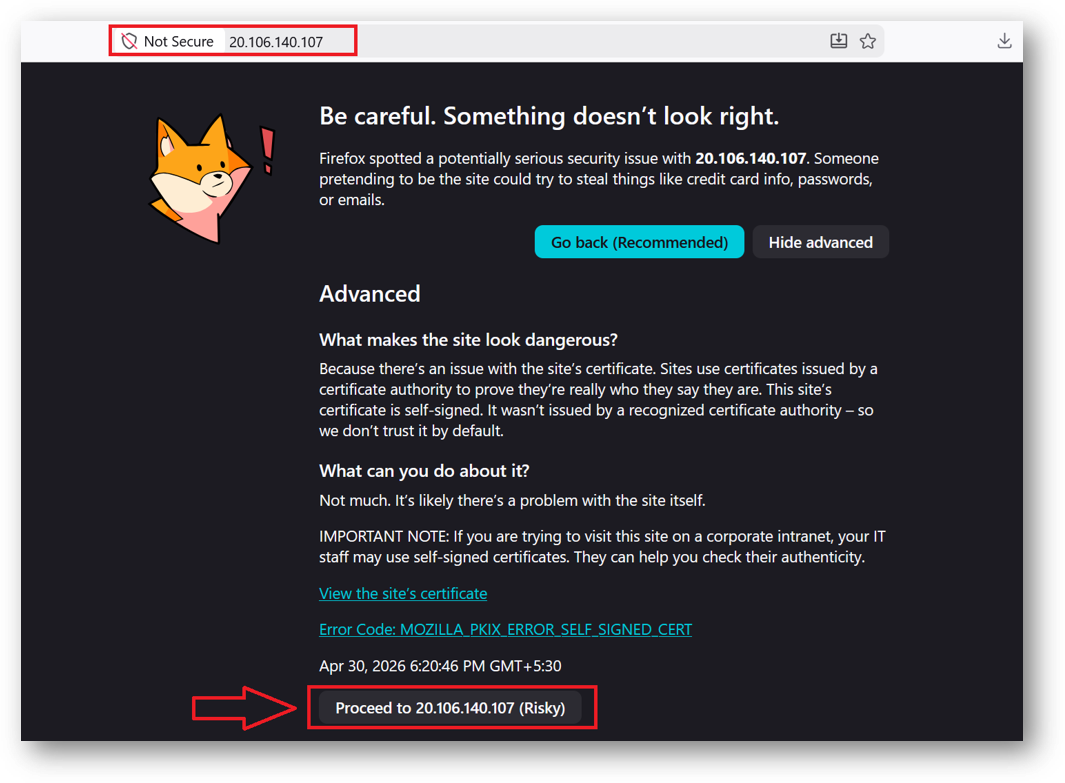
- To access the Open Notebook Web Interface, copy the public IP address of the VM and paste it in your local browser as https://public_ip_of_vm. Make sure to use https and not http.
Browser will display an SSL certificate warning message. Expand the warning message, accept the certificate warning and Continue.
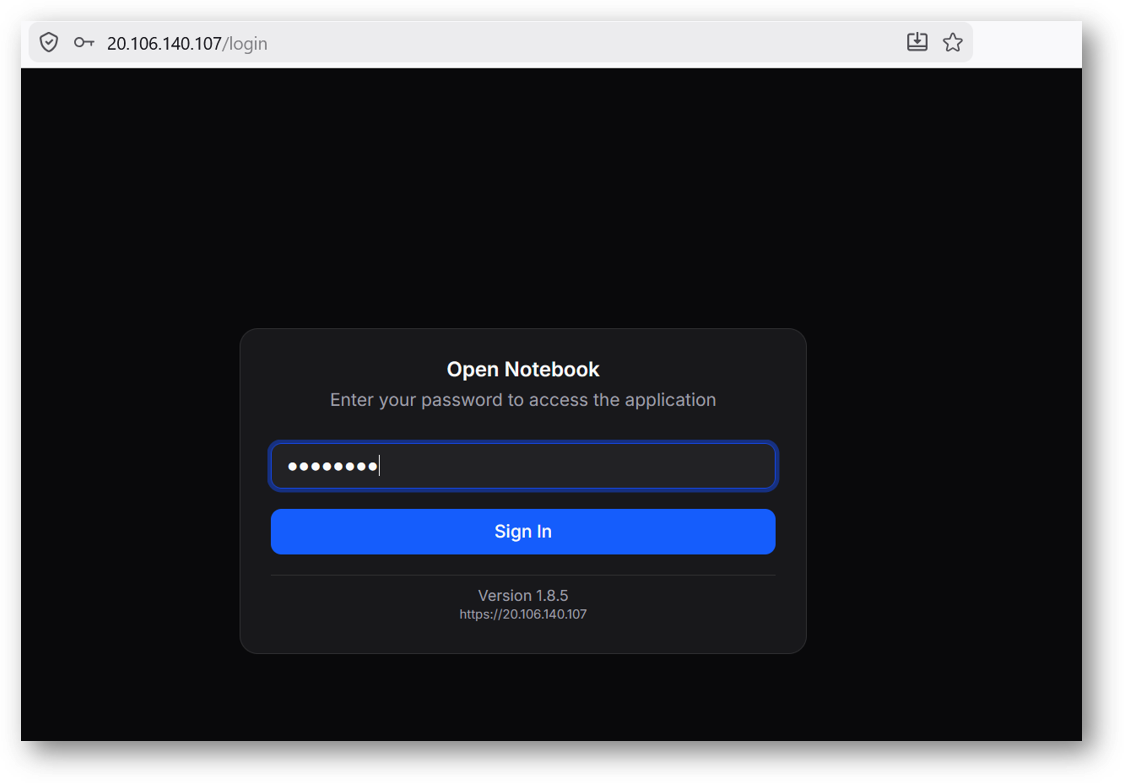
- It will open a login page. Provide the password we got at step 14 above and click Sign In.
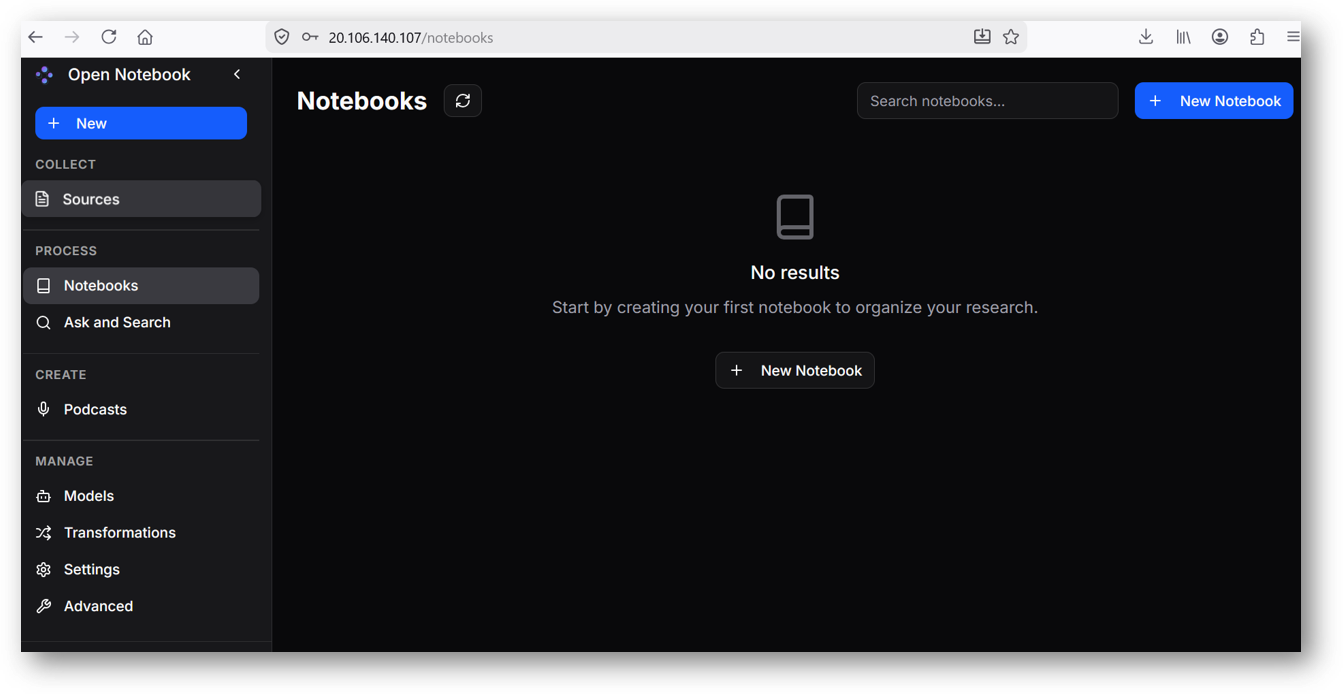
- Now you are logged in to Open Notebook Web Interface.
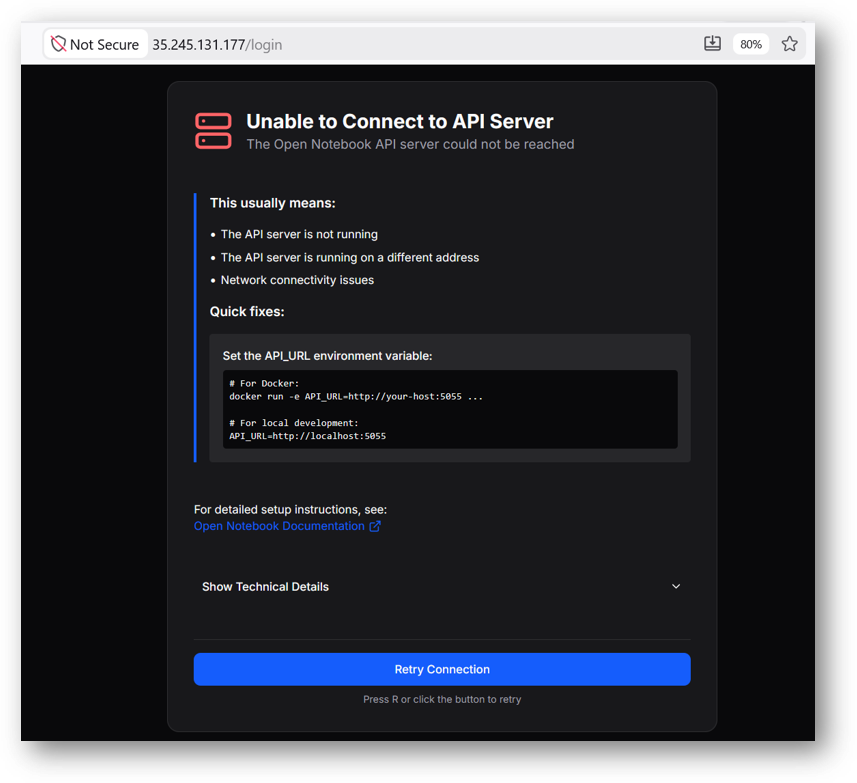
Note: If you encounter API Connection Error as shown in the below screenshot then please reboot the vm and access the Web Interface at https://public_ip_of_vm.
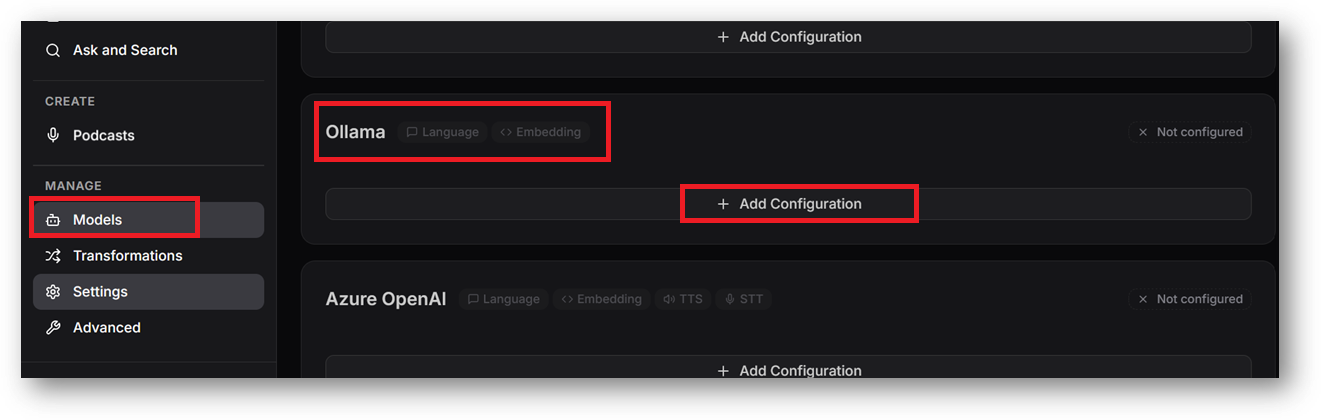
- The VM comes with “Ollama setup” and few models are already pulled for you to get started. To begin with the Open Notebook, first you need to configure the ollama models. To do so, Click on Models option from left menu and scroll down to Ollama section. Click on Add Configuration button.
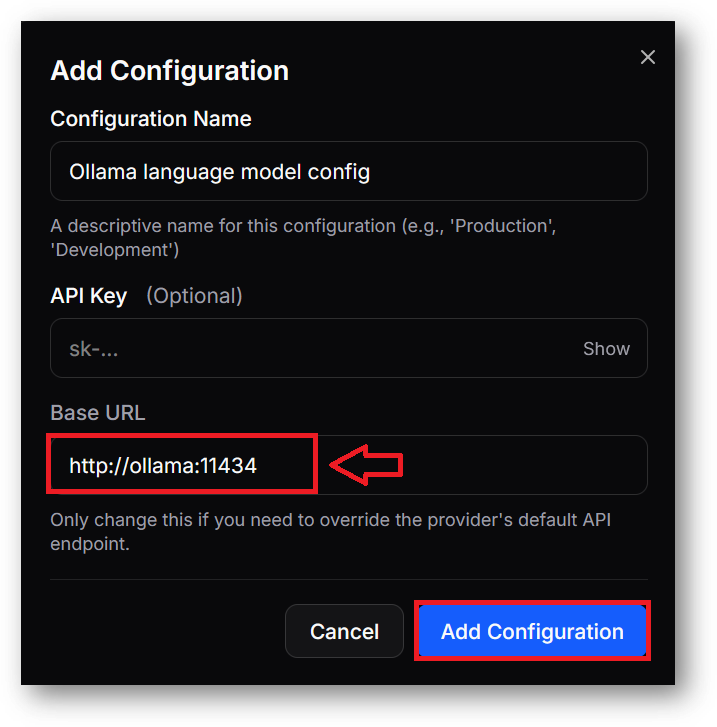
- Give a name to your configuration, leave API Key blank, for Base URL enter http://ollama:11434 . As the ollama is running in container make sure to enter Base URL as http://ollama:11434 and not http://localhost:11434.
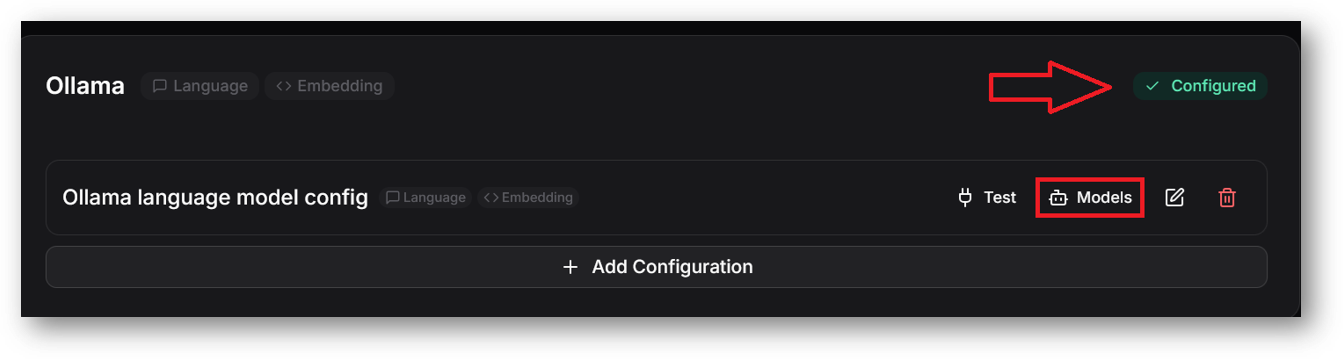
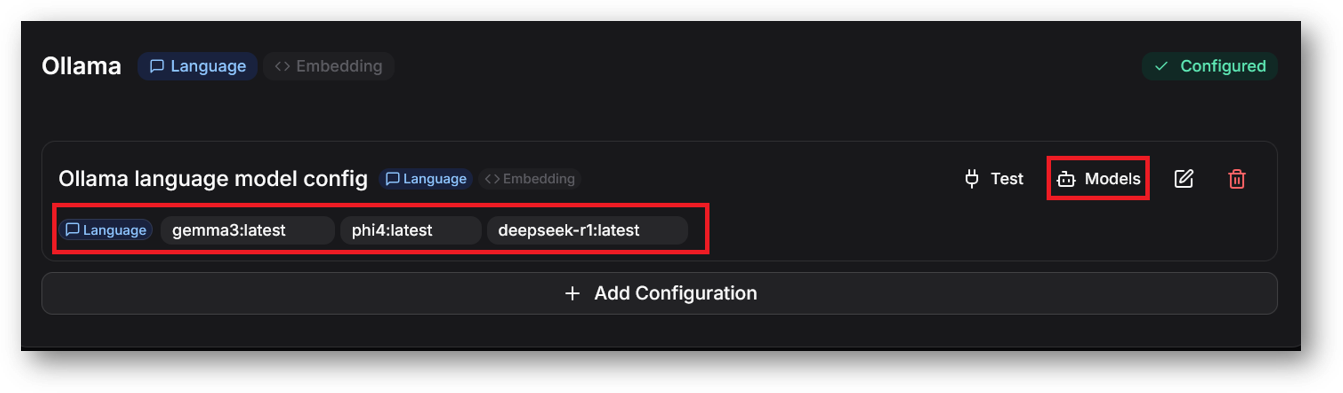
- Scroll up and you should see ollama successfully configured. Now next we need to add language and embedding models. For that click on models option as shown in the below screenshot.
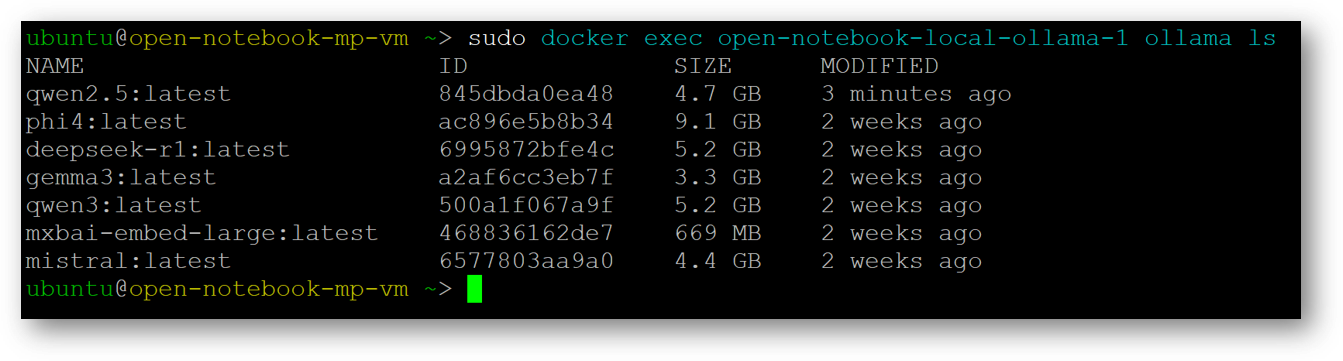
- Select Model Type as Language. By default following ollama models are already pulled on this VM. Select language model(s) from the list of available models.
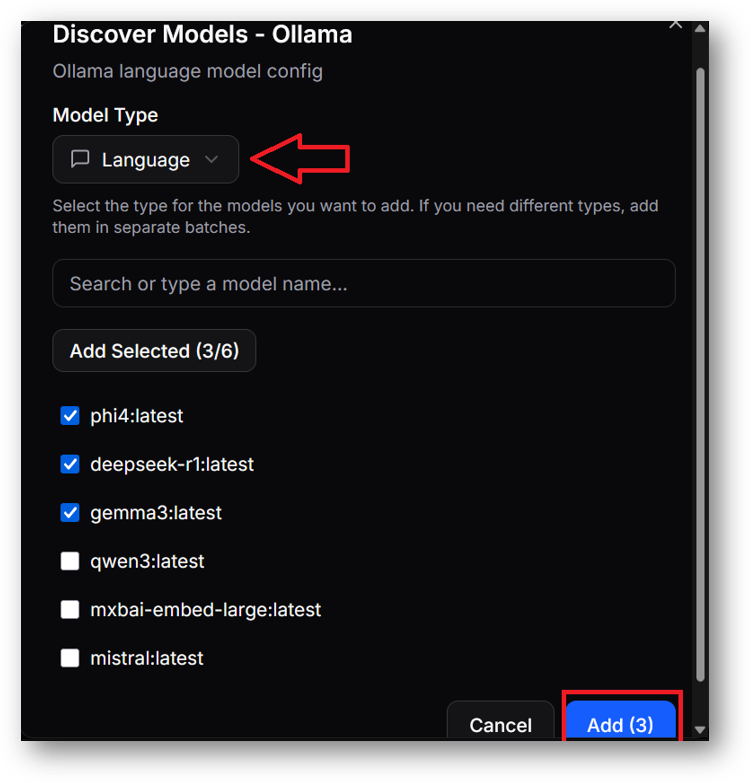
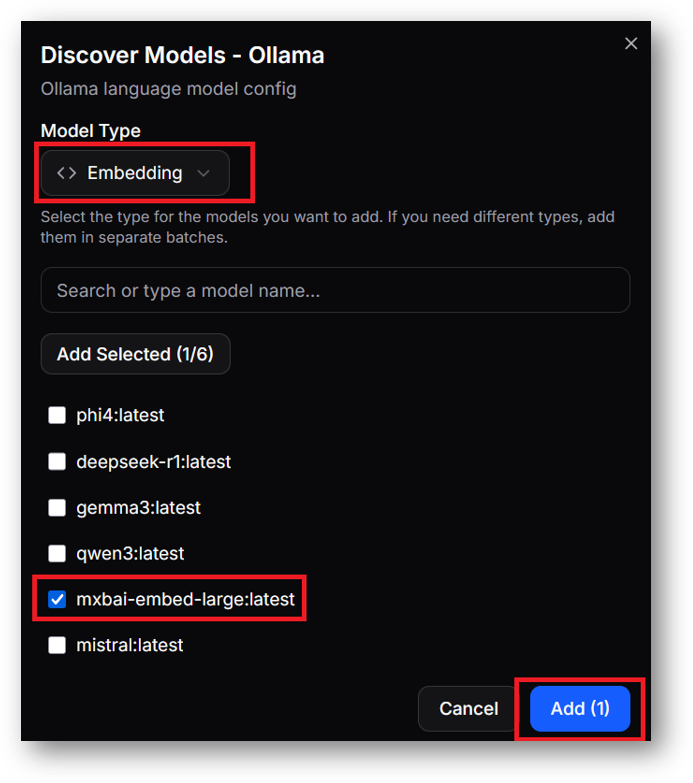
- Selected models will get added as shown below. Similarly again click on models option to add embedding models. Select Model Type as Embedding and tick mxbai-embed-large:latest from the list of available models.
Note: If you want to go with other LLM providers like OpenAI/Anthropic etc, then configure the same from this Models page.
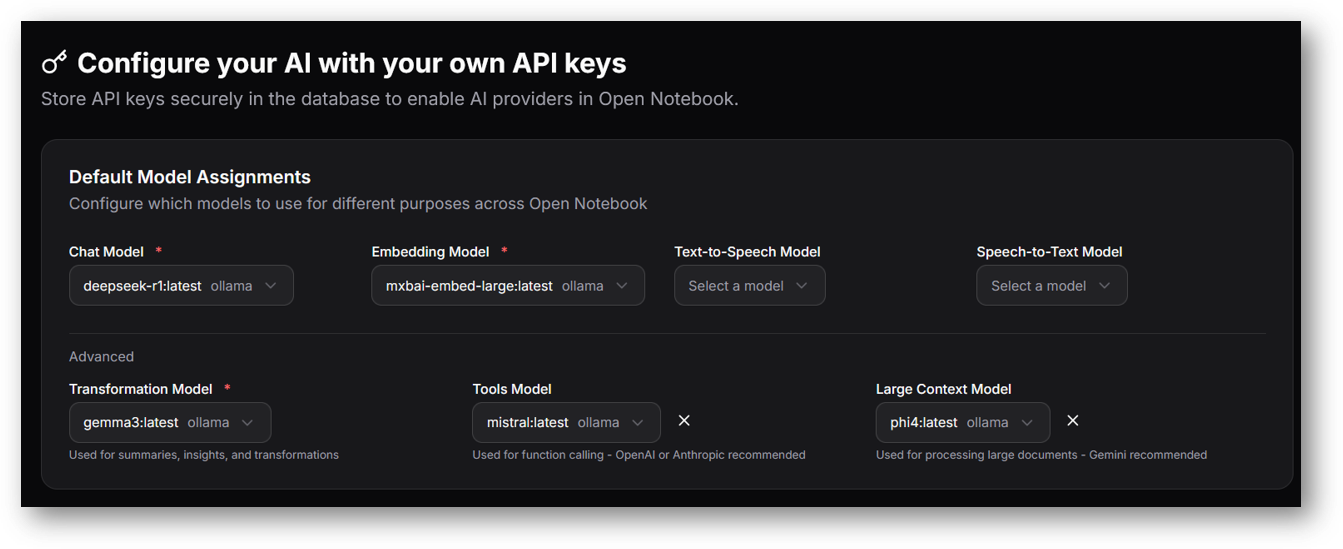
- Now we configured the ollama models, we need to set the default models. On the same Models page, scroll up to the top to Default Model Assignments section. Select various models from the dropdown.
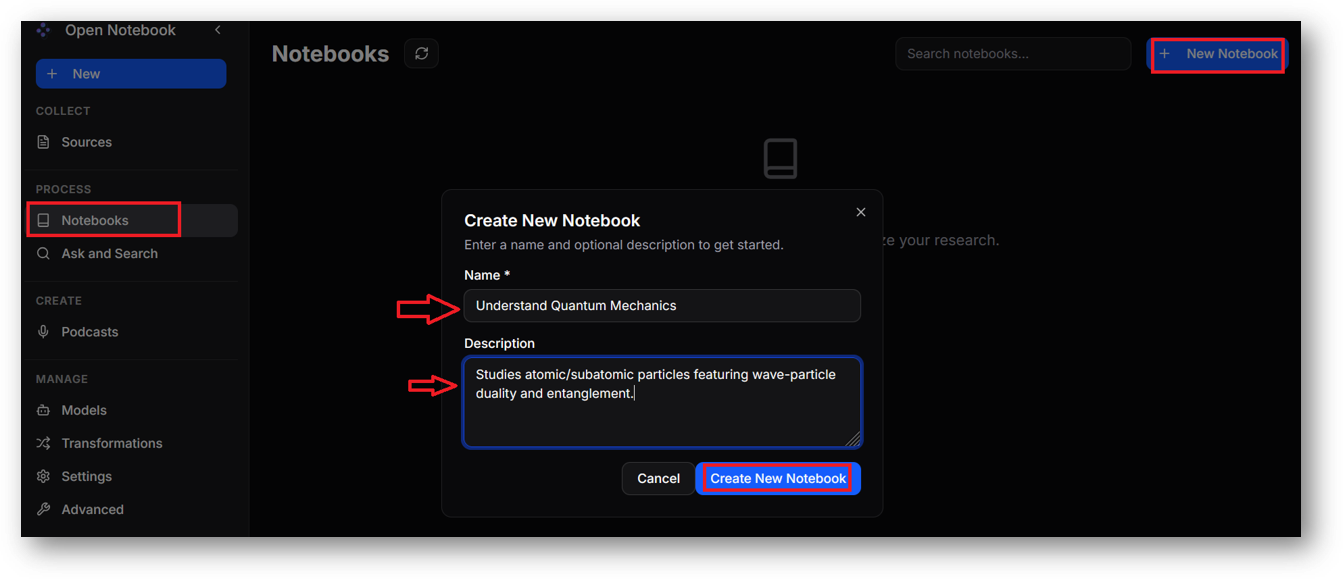
- Now you are all set to use Open Notebook. The basic workflow include, creating a new notebook with a detailed description (as detailed description helps LLM to understand the context of the notebook and provide you with better answers), add sources , gather insights from the added sources using transformations and finally talk to Assistant.
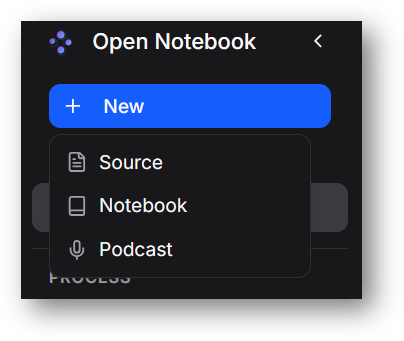
- To add the sources, click on New from left menu and select Sources option. Choose from various options.
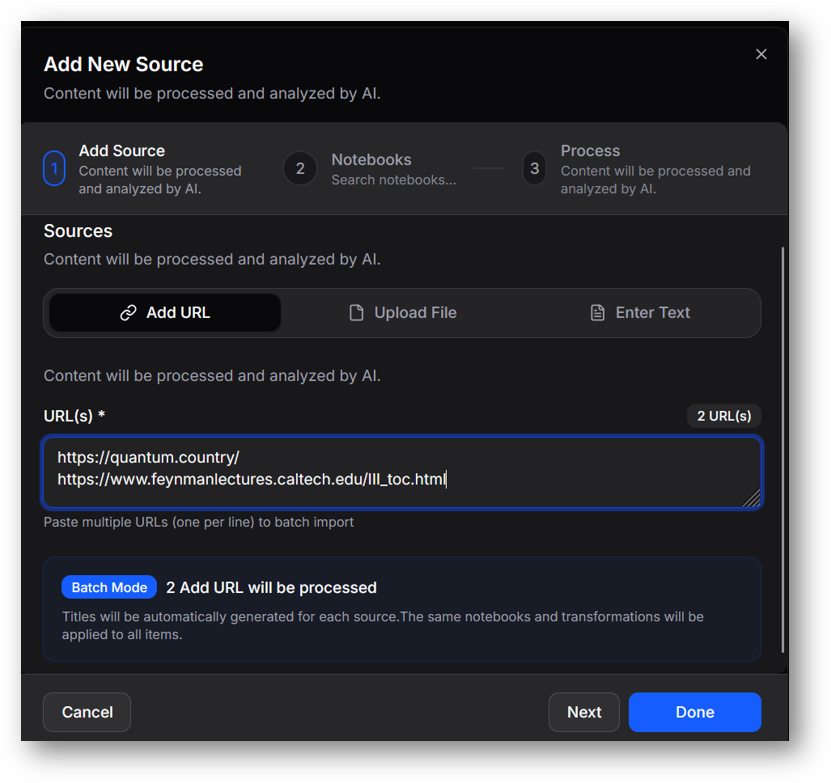
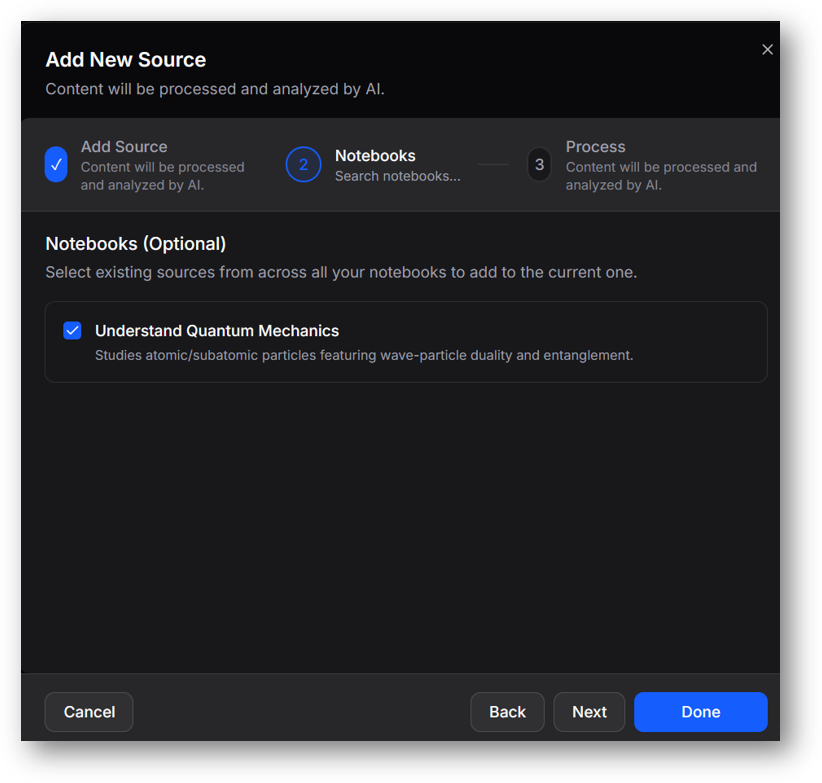
Click on Next to select the Notebook for this sources.
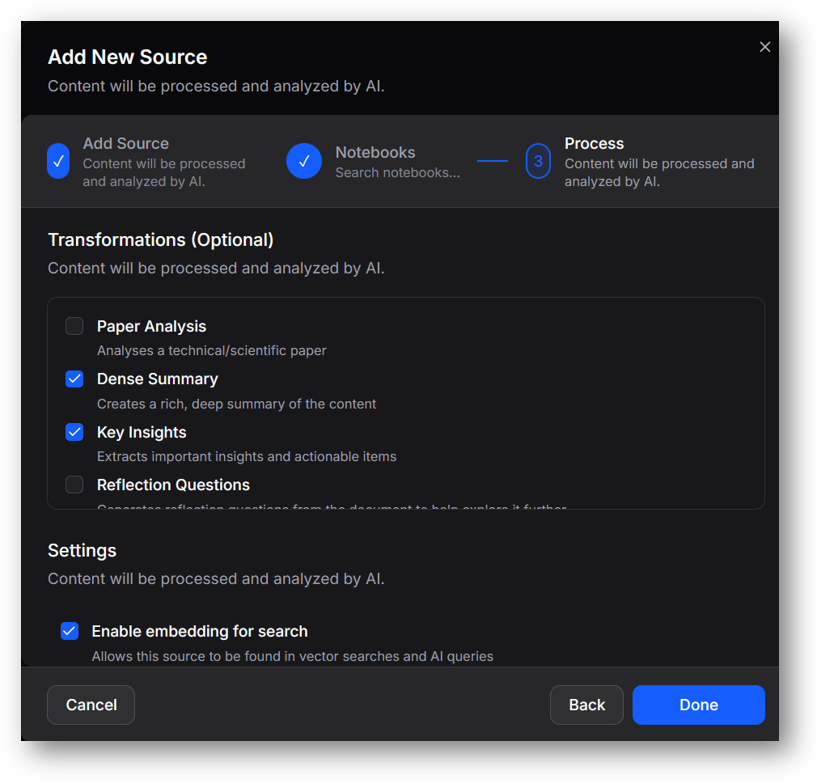
Click on Next and lastly select the Transformation option.
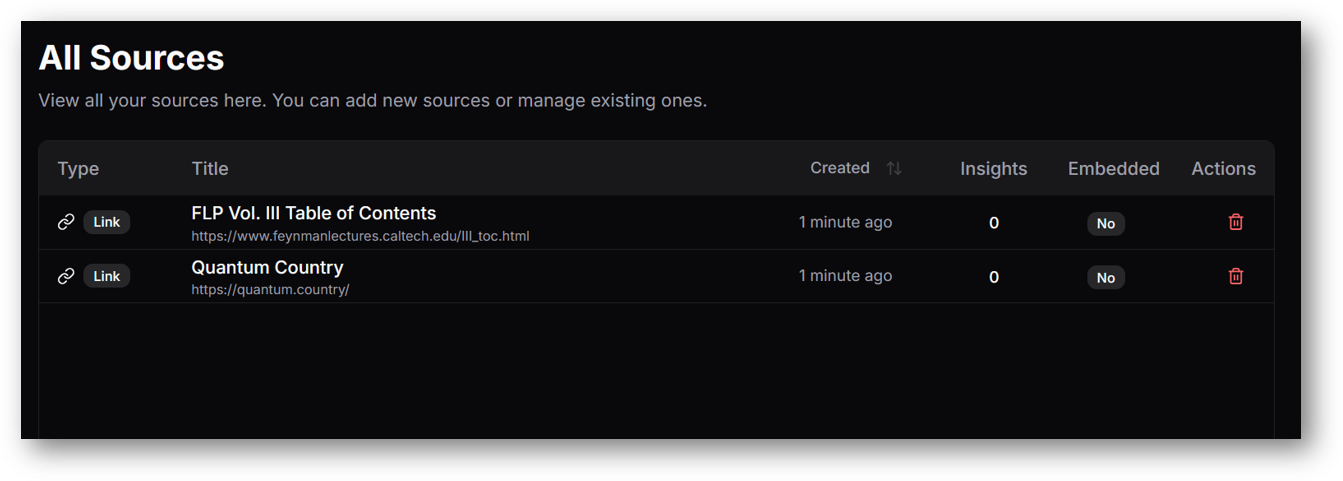
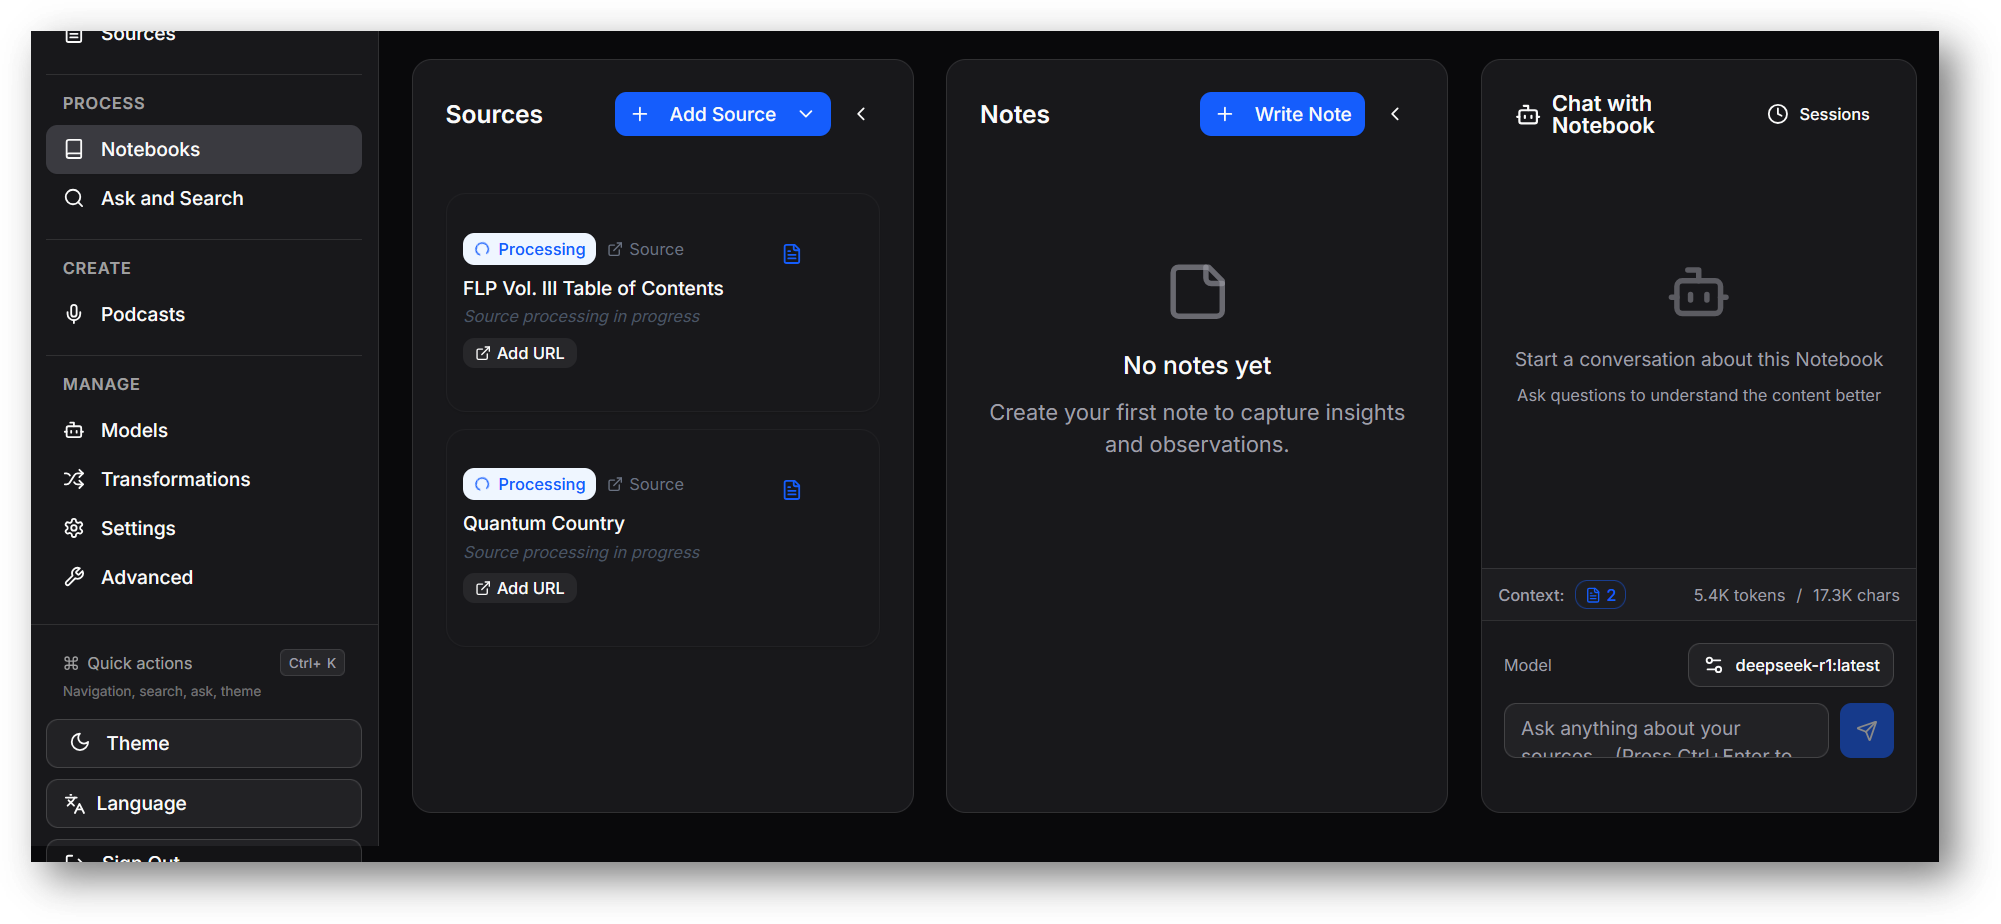
You can see the list of added sources here.
- Once your sources are ready, you can use notebook, Ask and Search and Podcast features.
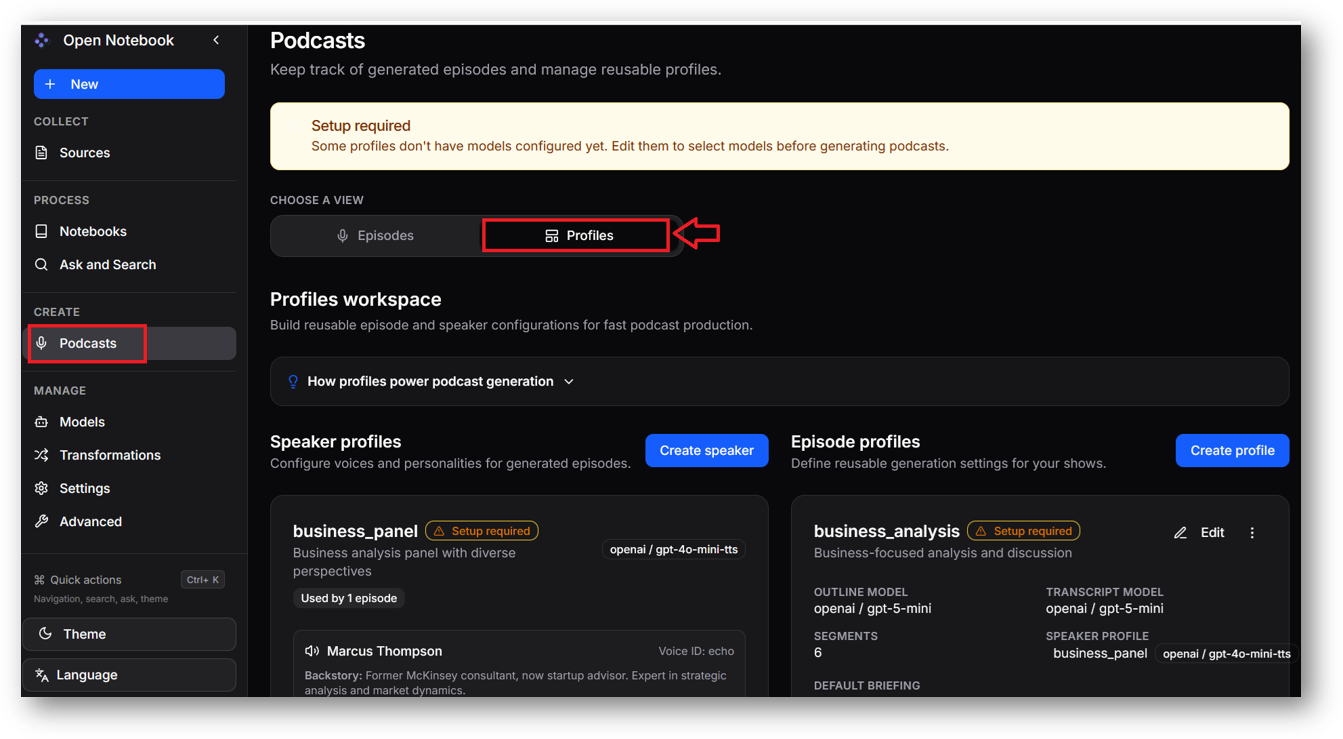
- For Podcast feature, you will need some extra configuration. you will need to update the podcast profiles and need to provide the various models including voice. Once it is ready, go to podcast tab from left pane, clik on Generate podcast and provide the details here. For more details please refer to official documentation here

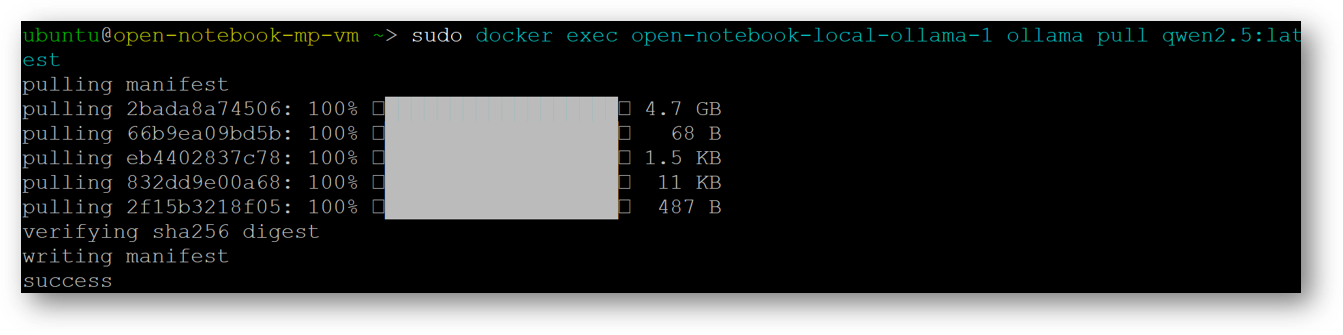
- Lastly, to pull more ollama models on this VM, connect via SSH terminal and run below command.
sudo docker exec open-notebook-local-ollama-1 ollama pull <modelname>
e.g sudo docker exec open-notebook-local-ollama-1 ollama pull qwen2.5:latest
For more details, please visit Official Documentation page