How to get NVIDIA LLM, AI and ML optimized VM on Azure
This section describes how to provision and connect to NVIDIA LLM, AI and ML optimized VM on Azure.
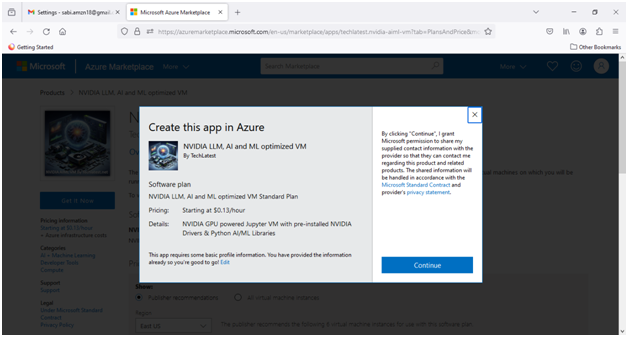
- Open NVIDIA LLM, AI and ML optimized VM VM listing on Azure Marketplace

- Click on Get It Now. Login with your credentials if not logged in already. A pop up menu will appear, click on Continue button.
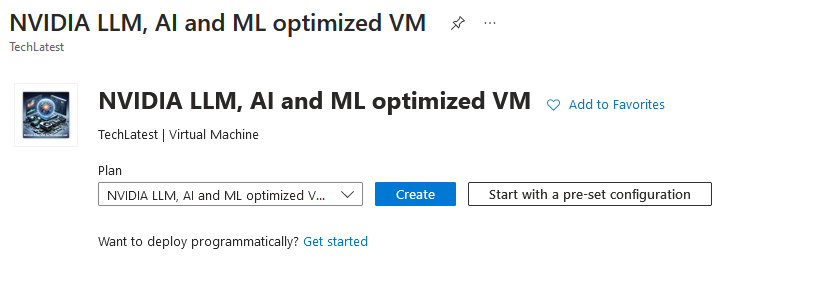
It will take you to the Product details page. Click on Create
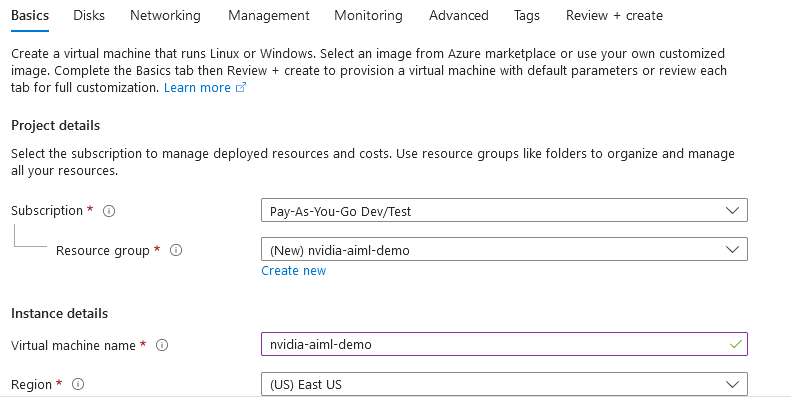
Select a Resource group for your virtual machine
Select a Region where you want to launch the VM(such as East US)
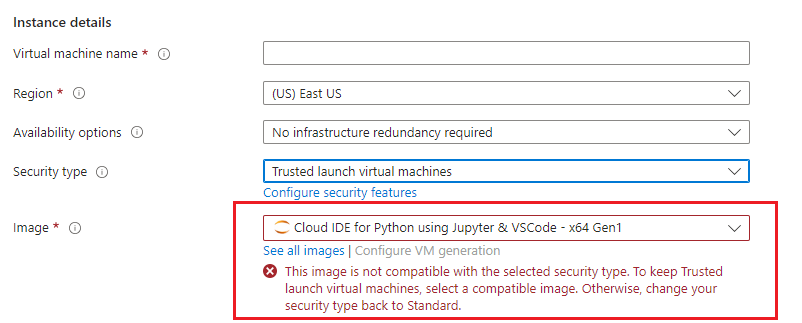
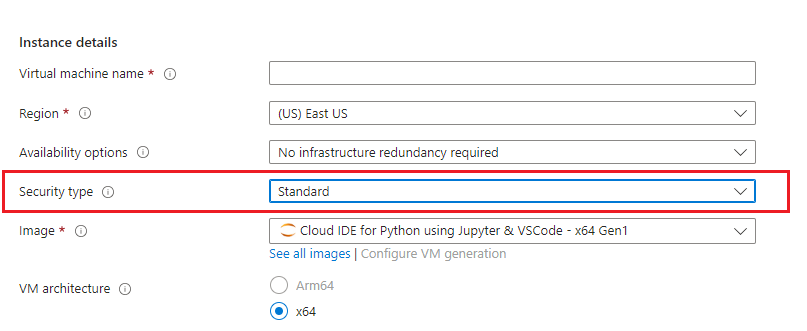
- Note: If you see “This image is not compatible with selected security type. To keep trusted launch virtual machines, select a compatible image. Otherwise change your security type back to Standard” error message below the Image name as shown in the screenshot below then please change the Security type to Standard.
Optionally change the number of cores and amount of memory.
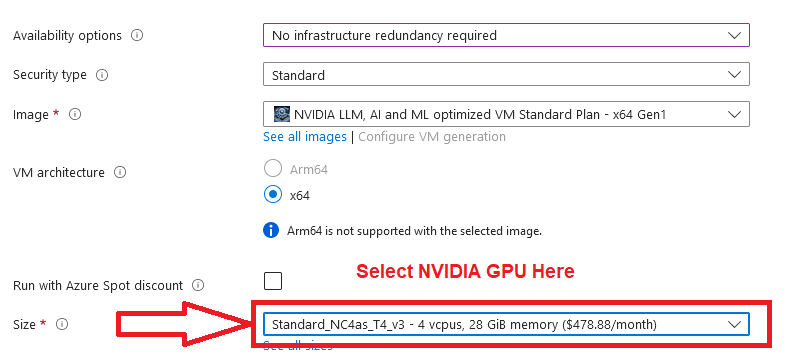
Note: Make sure to select NVIDIA based GPU instance for the deployment.
- The VM can only be deployed with the NVIDIA GPU instance.
GPU availability is limited to certain region and zones
NOTE: While deploying the instance on GPU, if you encounter the quota exhaust error or you are unable to deploy the instance on GPU VM then please refer to our Request Quota on Azure Cloud Platform
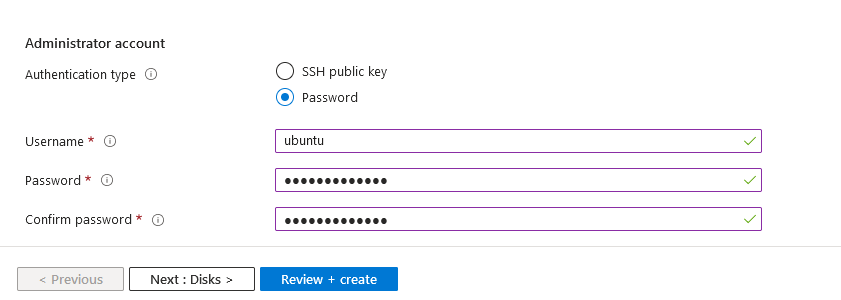
Select the Authentication type as Password and enter Username as ubuntu and Password of your choice.
Click on Next.
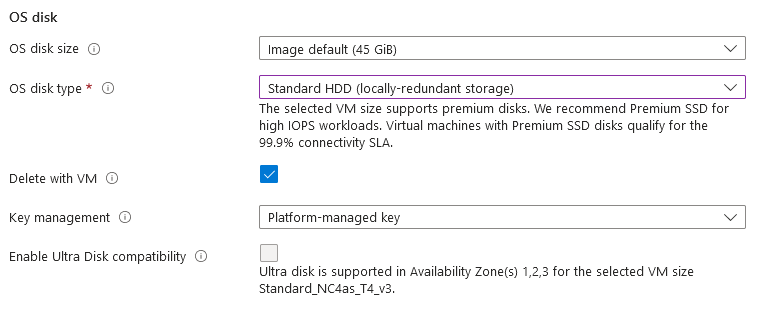
Optionally change the OS disk type. Click on Next.
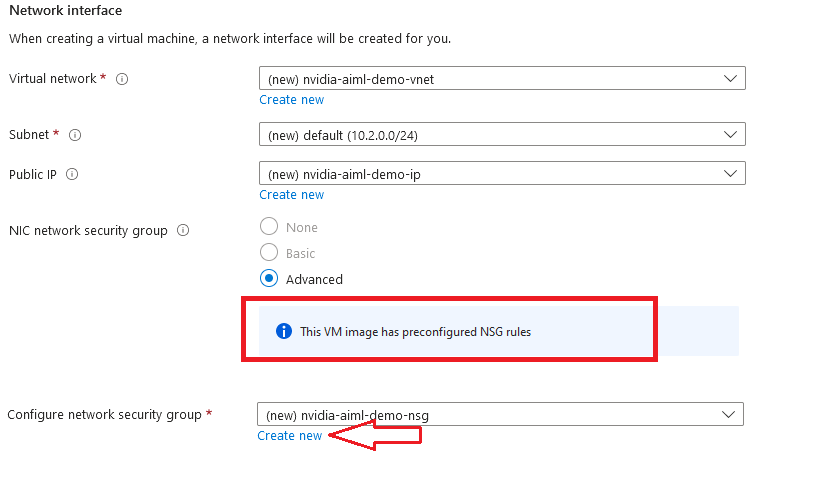
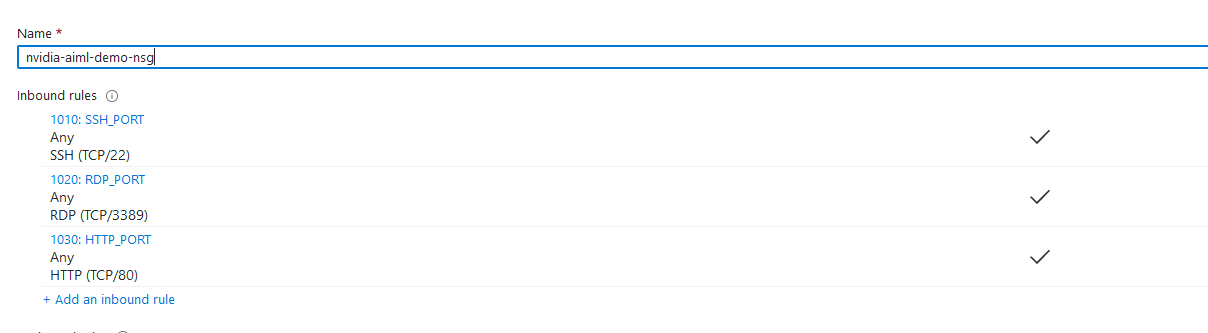
Optionally change the network and subnetwork names. Be sure that whichever network you specify has ports 22 (for ssh), 3389 (for RDP) and 80 (for HTTP) exposed.
The VM comes with the preconfigured NSG rules. You can check them by clicking on Create New option available under the security group option.
Optionally go to the Management, Advanced and Tags tabs for any advance settings you want for the VM.
Click on Review + create and then click on Create when you are done.
Virtual Machine will begin deploying.
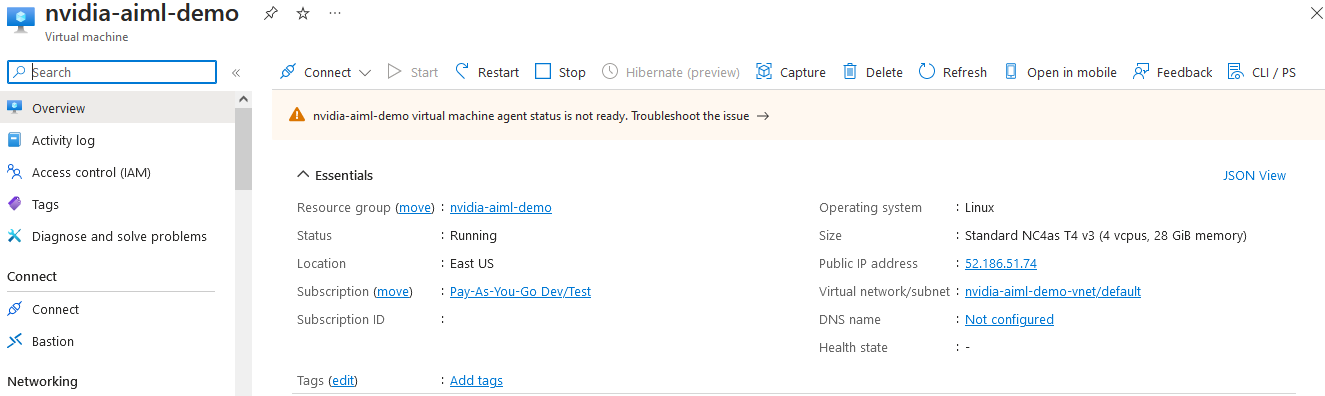
- A summary page displays when the virtual machine is successfully created. Click on Go to resource link to go to the resource page. It will open an overview page of virtual machine.
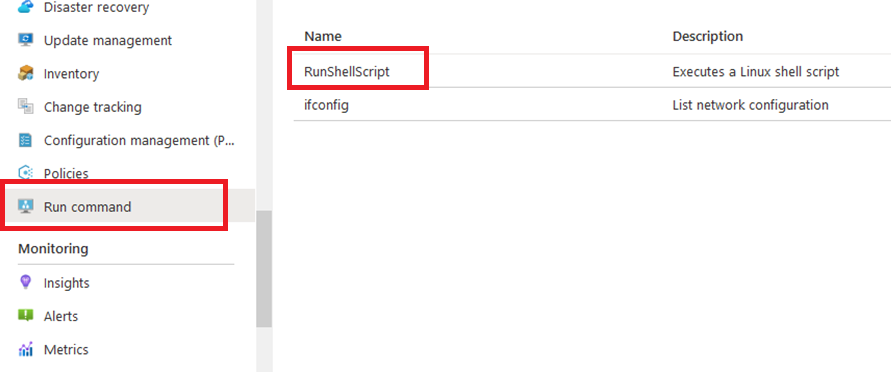
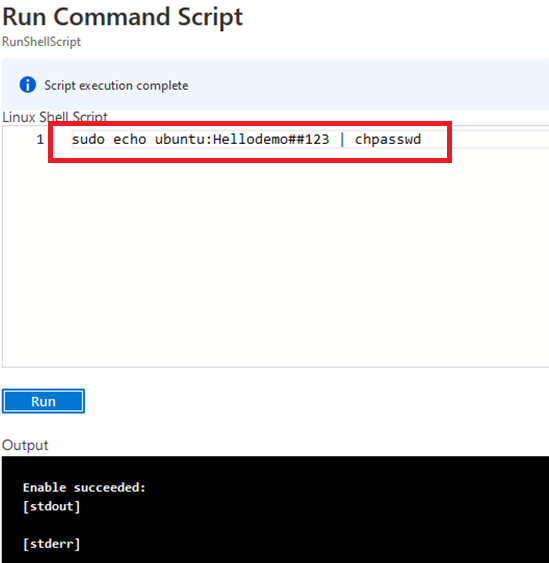
- If you want to update your password, go to the left navigation pane, select Run command, select RunShellScript and enter following command to change the password of the vm .
sudo echo ubuntu:yourpassword | chpasswd
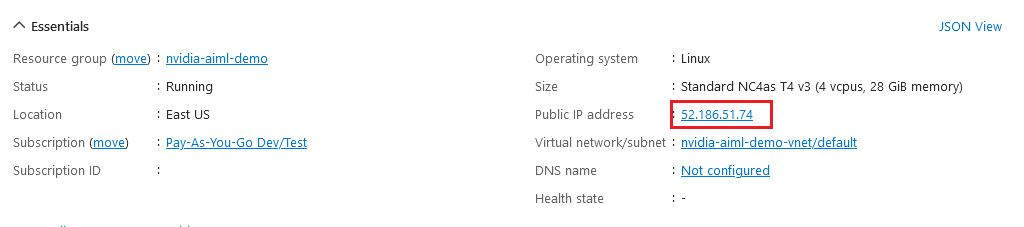
Now the password for ubuntu user is set, you can SSH to the VM. To do so, first note the public IP address of the VM from VM details page as highlighted below
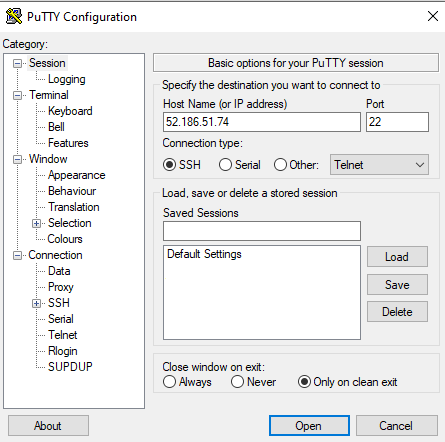
Open putty, paste the IP address and click on Open.
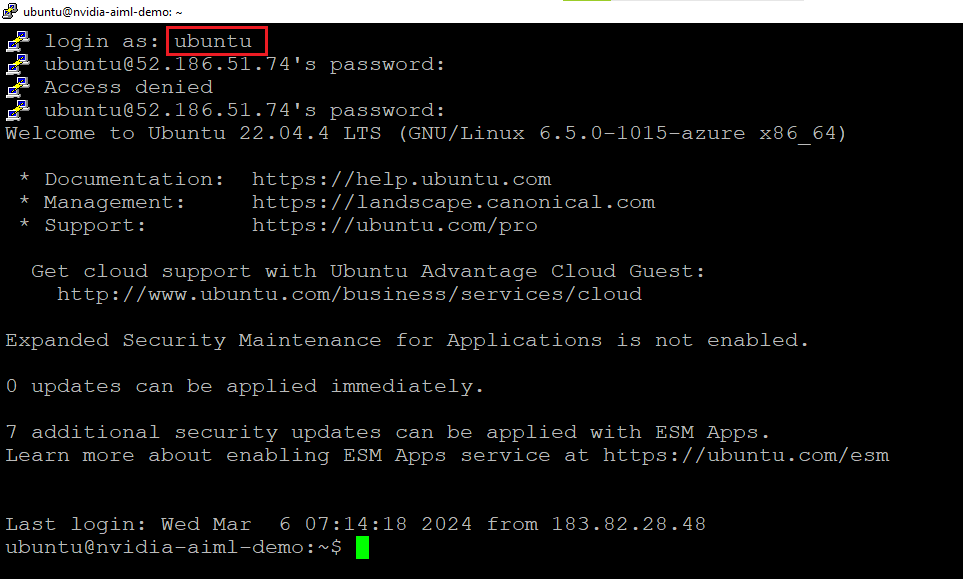
login as ubuntu and provide the password for ‘ubuntu’ user.
-
You can also connect to the VM’s desktop environment from any local windows machine using RDP protocol or local linux machine using Remmina.
-
To connect using RDP via Windows Machine, note the public IP of the VM.
-
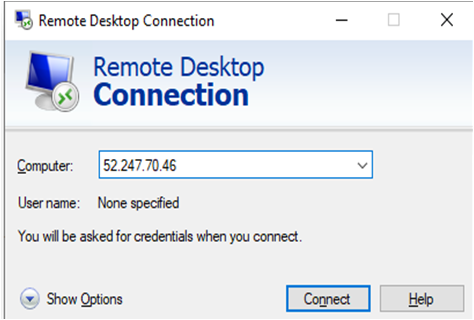
Then From you local windows machine, goto “start” menu, in the search box type and select “Remote desktop connection”.
In the “Remote Desktop connection” wizard, copy the public IP address and click connect
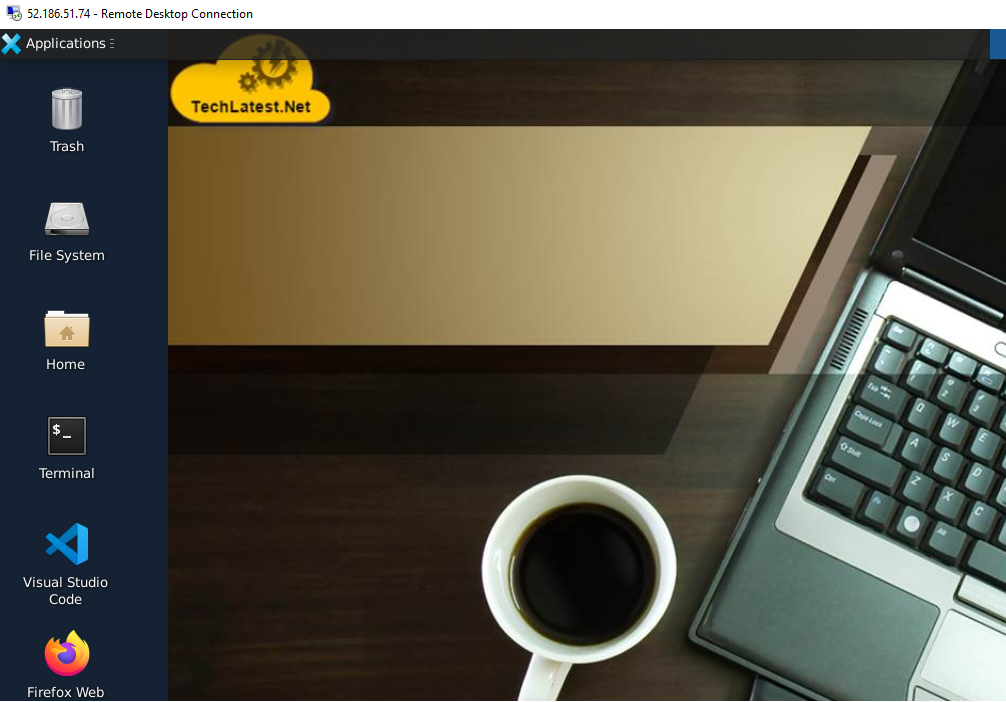
- This will connect you to the VM’s desktop environment. Provide the username (e.g “ubuntu”) and the password set in the step4 to authenticate. Click OK

- Now you are connected to the out of box NVIDIA LLM, AI and ML optimized VM environment via Windows Machine.
- To connect using RDP via Linux machine, first note the external IP of the VM from VM details page,then from your local Linux machine, goto menu, in the search box type and select “Remmina”.
Note: If you don’t have Remmina installed on your Linux machine, firstInstall Remmina as per your linux distribution.

- In the “Remmina Remote Desktop Client” wizard, select the RDP option from dropdown and paste the external ip and click enter.

- This will connect you to the VM’s desktop environment. Provide “ubuntu” as the userid and the password set in above reset password step to authenticate. Click OK

- Now you are connected to out of box NVIDIA LLM, AI and ML optimized VM environment via Linux machine.
- You can use the remote desktop you connected in above step for using the VM, however, more convenient and better method is to use the Jupyter/Ipython notebook which comes with the VM.
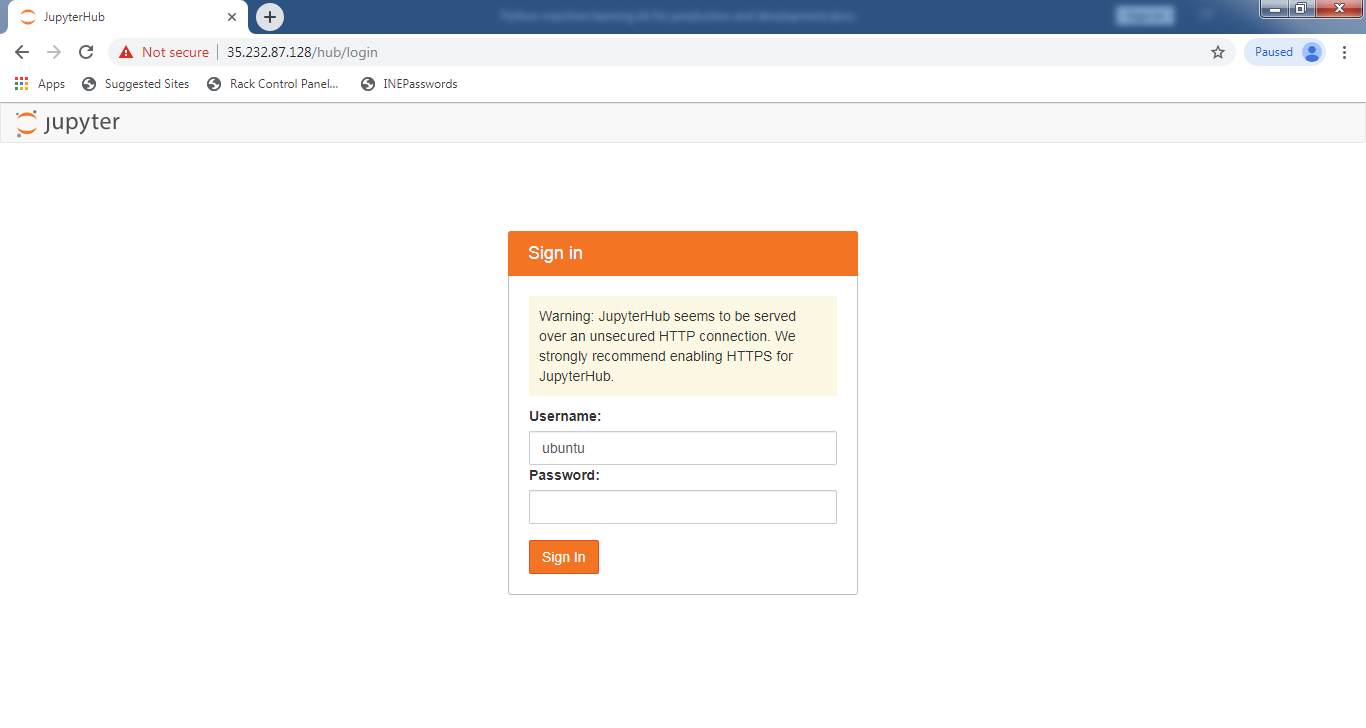
The Notebook is available on the same public IP you used for remote desktop and accessible via any browser. Just open the browser and type the public IP address and you will get below screen for login.
The Jupyter Notebook is configured with the ubuntu as an admin user. Login with ubuntu as username and ubuntu user password.
Note: Make sure you use “http” and not “https” in the url
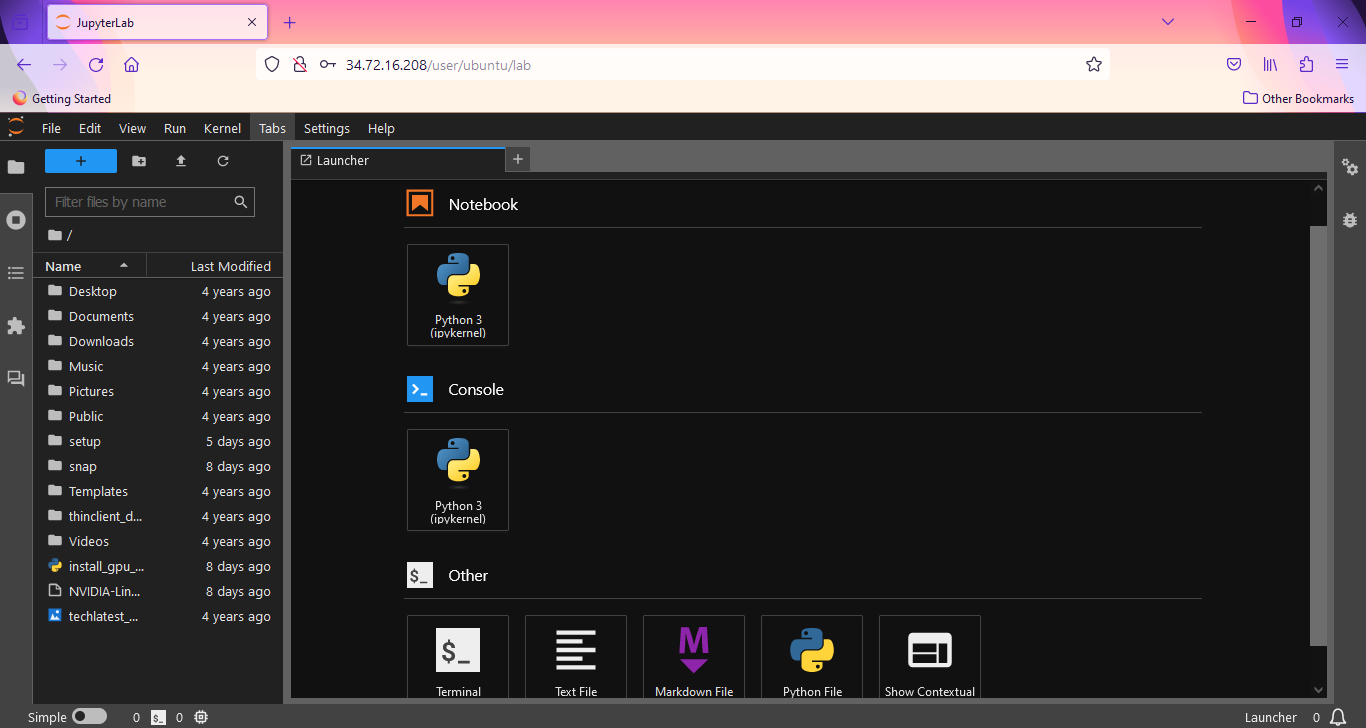
- After Login , you will see below screen. This is JupyterLab. You will find various options here. You can Access Jupyter Notebook, Console, Files and Folders, etc.
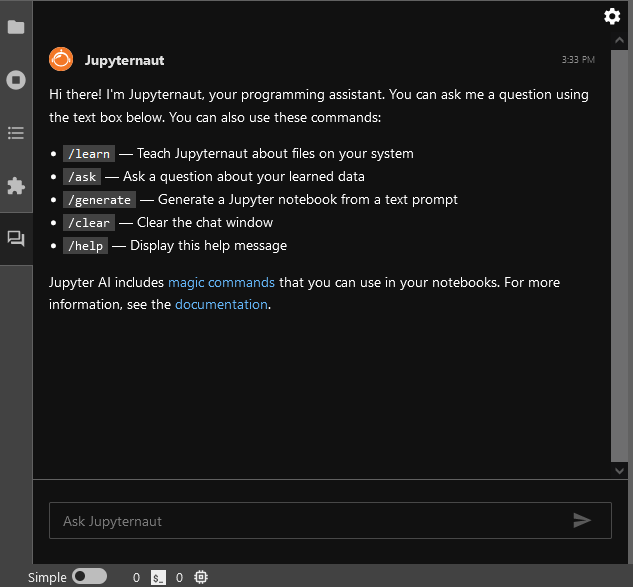
- This VM comes with the JuputerAI plugin installed out of the box which allow you to access Chat UI in the JupyterLab. This can be used for AI-conversation with lots of LLMs via APIs. It has support for chatgpt and lots of other LLMs.
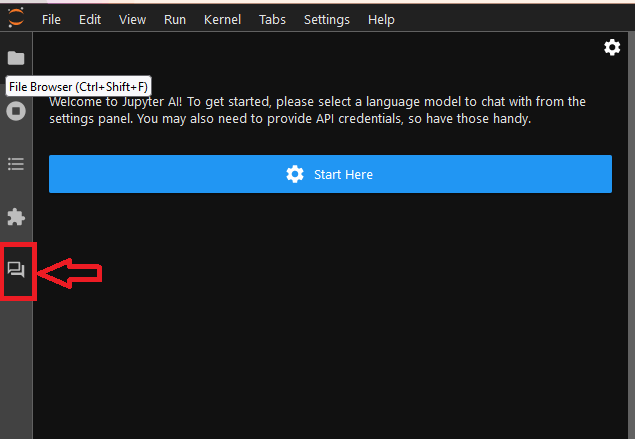
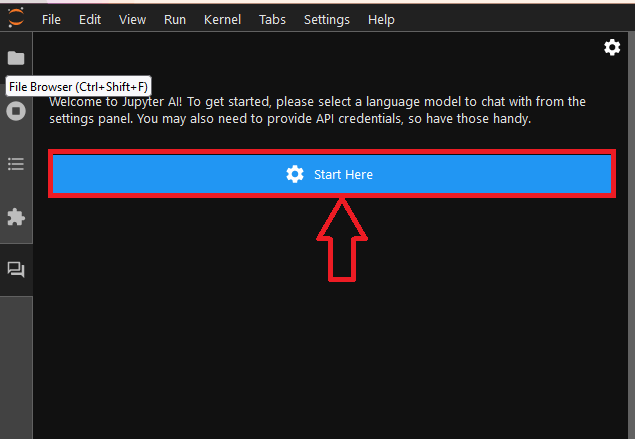
- To configure your Jupyternaut(ChatUI official name), You need to select a language model and an embedding model to chat. Once you have made your selections, the UI may display text boxes for one or more settings keys. So keep your keys ready with you. click on Start Here.
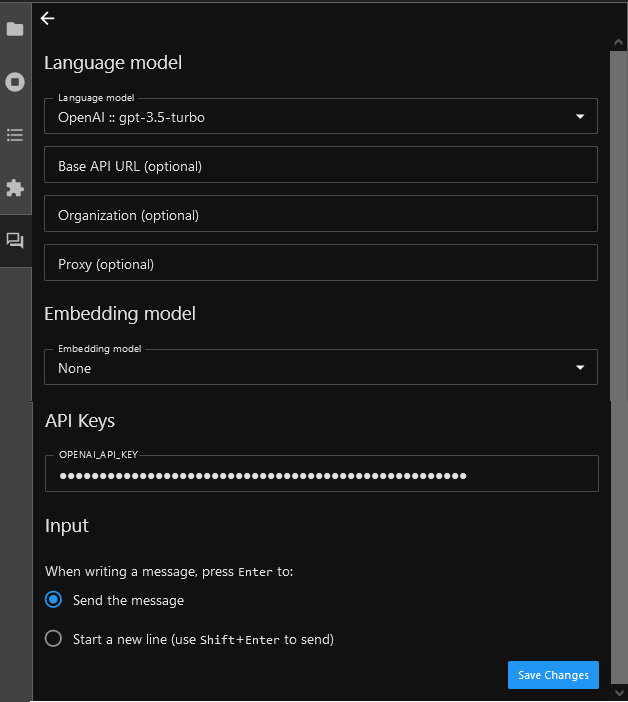
- Select a Language Model and Embedding model from the dropdown. If your selected model needs API keys, provide the API Keys. You need to get the API keys from the selected model providers.
For example, for OpenAI provider you can get the API keys as explained here.
Select the Input Type.
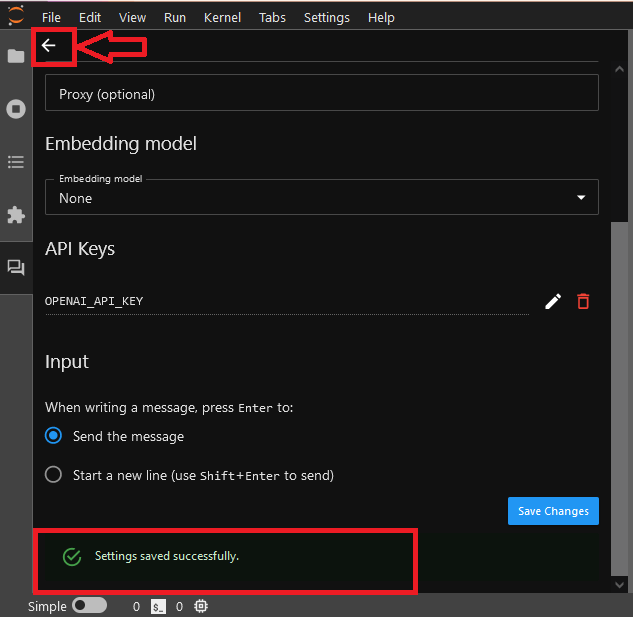
- Click on Save Changes. Once settings are saved successfully, click the “back” (left arrow) button in the upper-left corner of the Jupyter AI side panel. The chat interface now appears.
- Now your personal assistance is ready. Seek code suggestions, debugging tips, or even have code snippets generated for you by interacting with the chat UI.
For more details on how to use Chat UI , please refer The chat interface Documentations.
- This VM also comes with the magics package jupyter_ai_magics installed out of the box. These magic commands %%ai and %ai turns your Jupyter into a generative AI playground anywhere the IPython kernel runs.
Before you send your first prompt to an AI model, load the IPython extension by running the following code in a notebook cell or IPython shell: -
%load_ext jupyter_ai_magics
To use these magic commands, open Jupyter Notebook. Run %ai help for help with syntax.
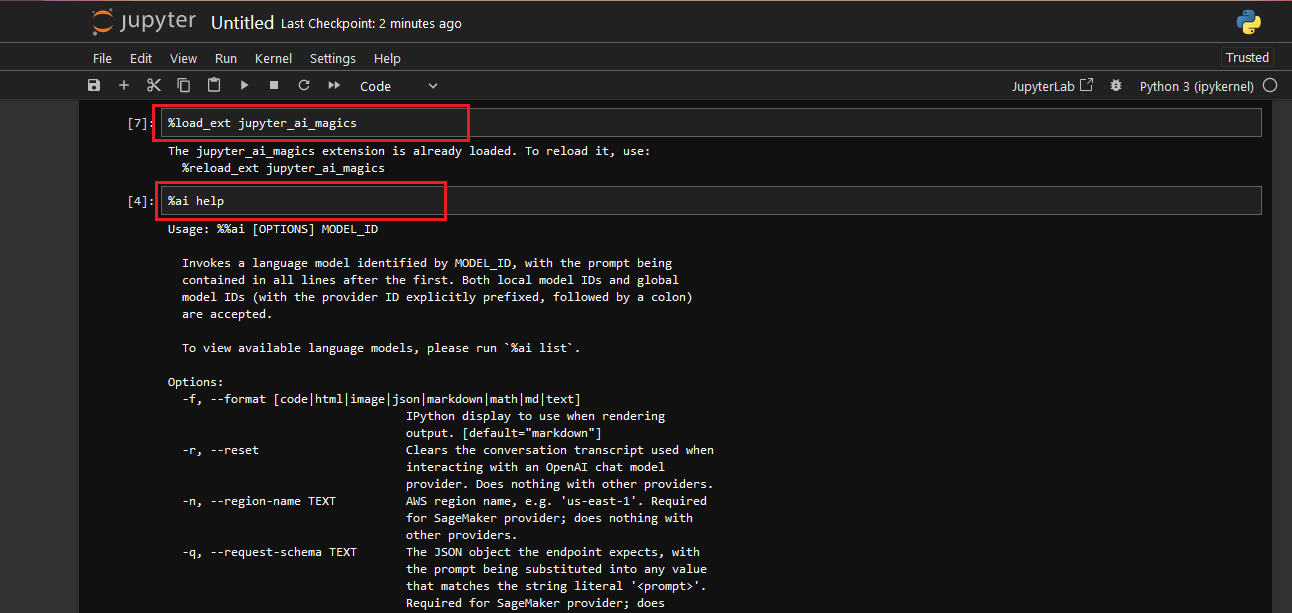
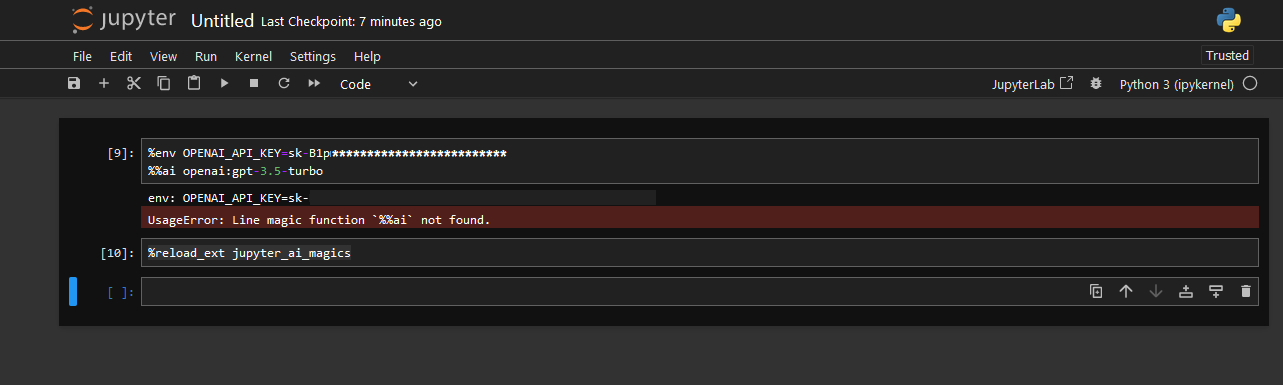
- The %%ai cell magic allows you to invoke a language model of your choice with a given prompt.The model is identified with a global model ID, which is a string with the syntax provider-id:local-model-id, where provider-id is the ID of the provider and local-model-id is the ID of the model scoped to that provider Set your model API keys using environment variable and your model of choice as shown below. Reload the IPython extension.
  %env OPENAI_API_KEY=Your API Key
  %%ai <provider-id>:<local-model-id>
  %reload_ext jupyter_ai_magics
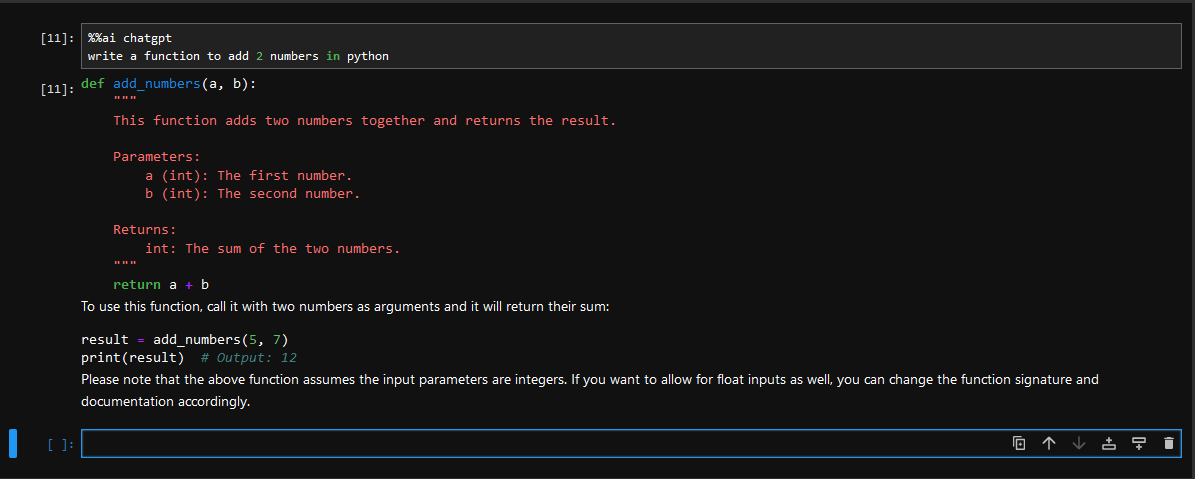
- Now you can invoke a model as follows. The prompt begins on the second line of the cell.
   %%ai model
   Your prompt here
- Jupyter AI also includes multiple subcommands, which may be invoked via the %ai line magic.
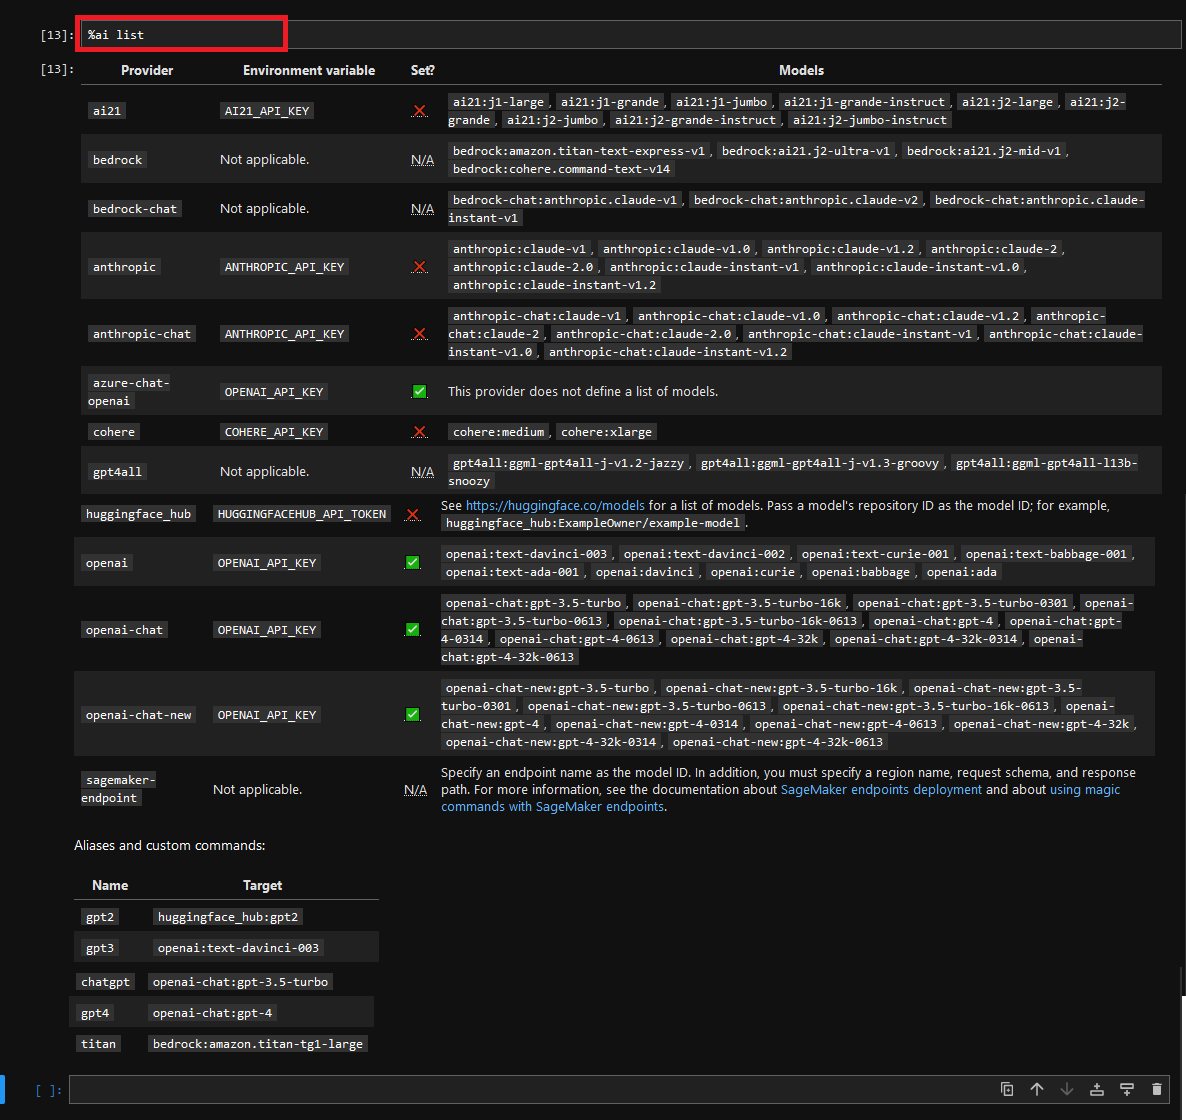
The %ai list subcommand prints a list of available providers and models.
Please refer The %ai and %%ai magic commands Documentations for more details.
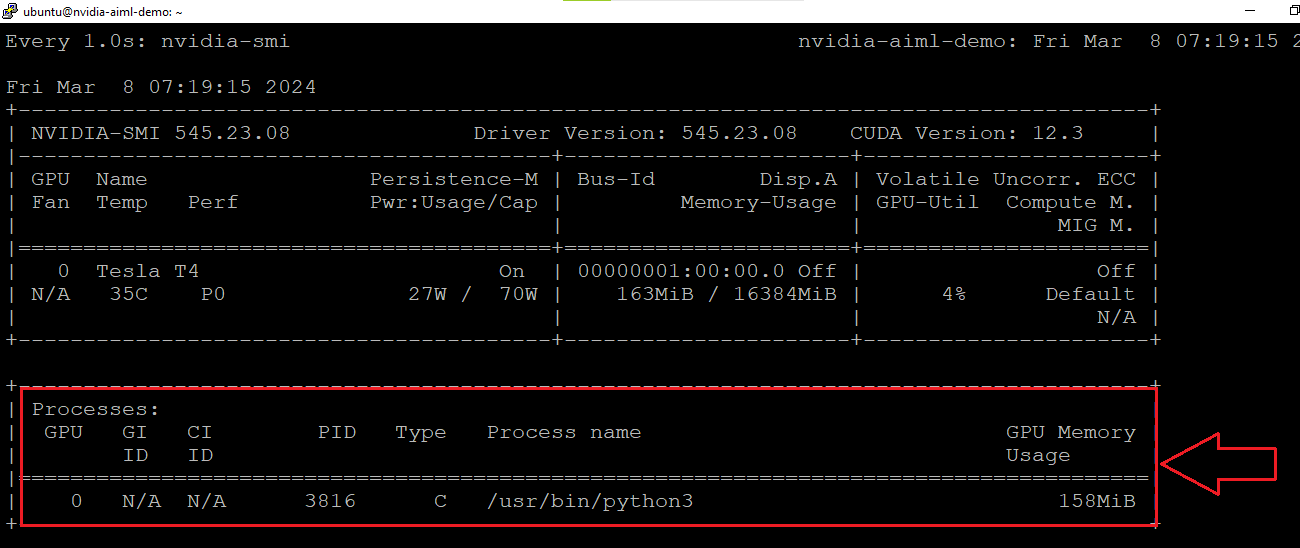
- You can check if NVIDIA GPU is being used by AIML code. For that connect to VM via terminal and run watch -n 1 nvidia-smi . This will continuously monitor nvidia-smi output and update it every 1 second. Initially, it will show no processes utilizing nvidia gpu in the output. Keep the watch command running. Open the jupyter Notebook and run the some cuda code. Check the watch command output and it should show you the python process running
Additional resources:
How to enable HTTPS for JupyterHub
Enable Multiuser Environment
How to install additional packages