This section describes how to enable SSL for your NocoDB VM.
Make sure you have port 443 opened for this VM. Before running below steps on your existing NocoDB instance, we recommend to create the backup image of the VM and then continue with the below setup. This way you can revert back to your existing instance if anything goes wrong.
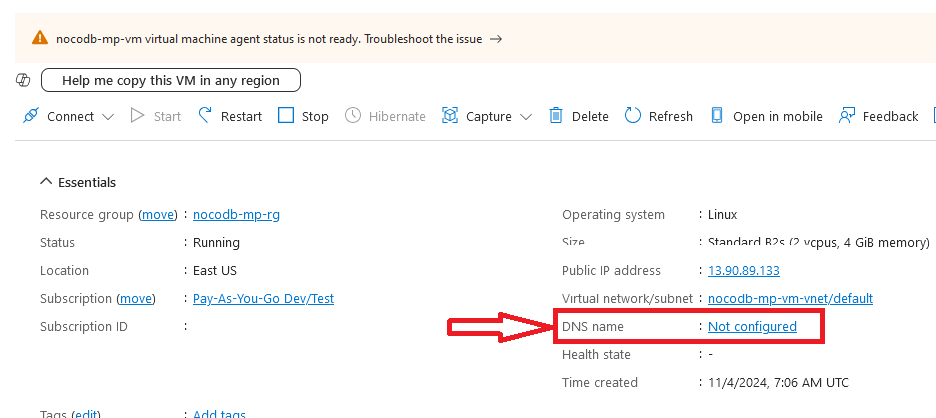
Only for Azure Platform, you can create and use DNS name to access NocoDB UI securely over HTTPS using https://dns_name_of_the_vm.
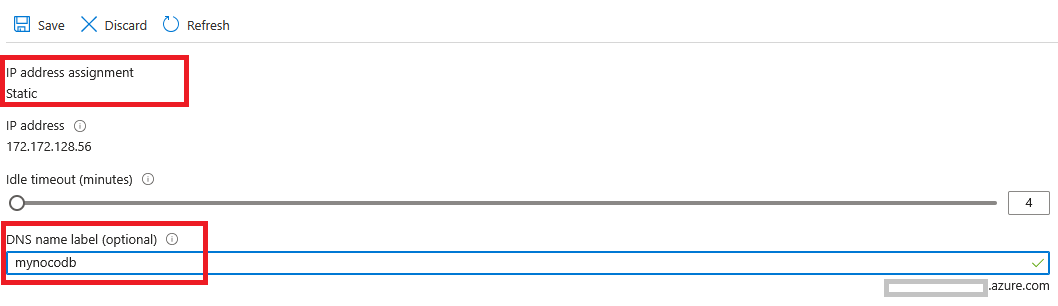
To do so, on Azure, click on “Configure DNS” link on your VM’s details page. It will open a new page. Provide the DNS name and save the changes. We will need this DNS name when editing nocodb-ssl-setup.sh file in the below steps.
The VM comes with the setup files to enable SSL. Connect via Terminal, switch to ubuntu user if not logged in using the ubuntu user already, and navigate to setup directory. Here you can see different nocodb setup files.
cd /home/ubuntu/setup

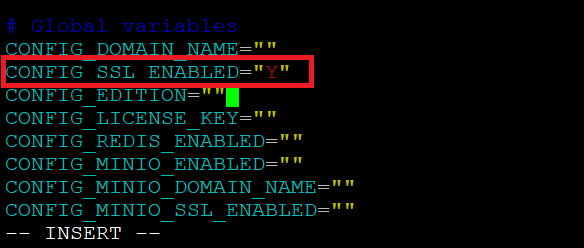
sudo vi /home/ubuntu/setup/nocodb-ssl-setup.sh

Note: If you have a valid domain associated to this VM like we explained above for Azure platform, then you can set the Domain Name to CONFIG_DOMAIN_NAME="" global variable at line No 22. This way you can access the NocoDB UI using Domain Name.
sudo passwd root

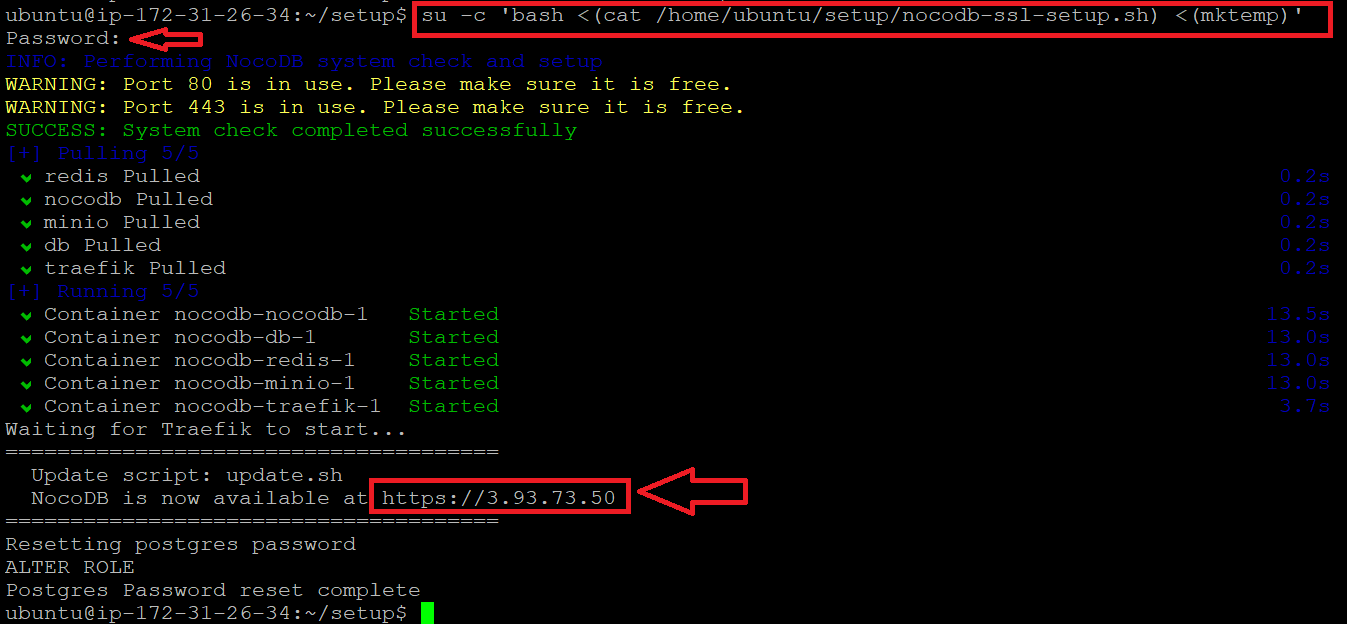
su -c 'bash <(cat /home/ubuntu/setup/nocodb-ssl-setup.sh) <(mktemp)'
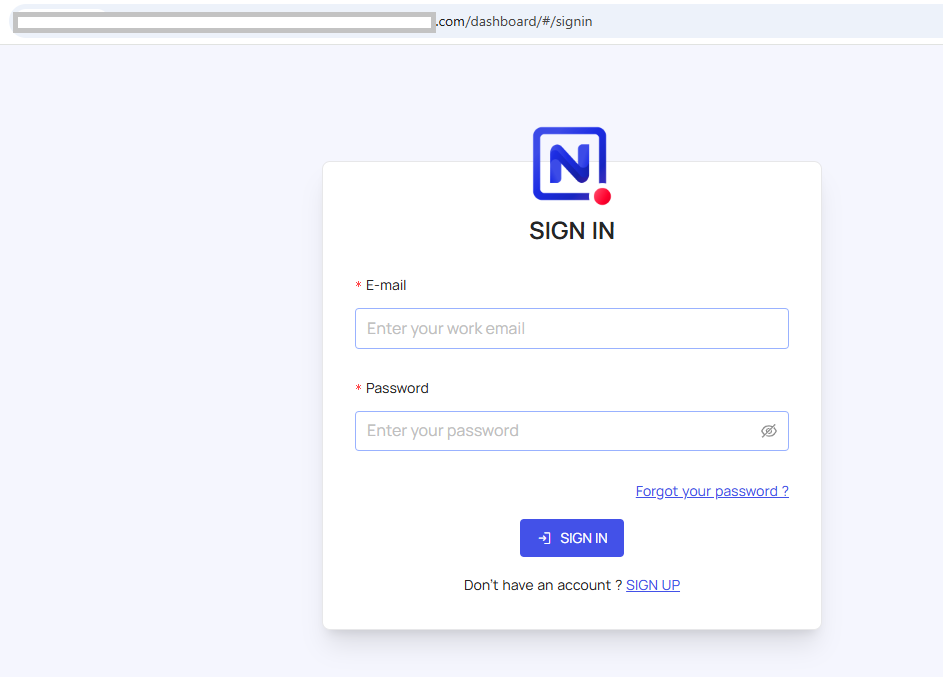
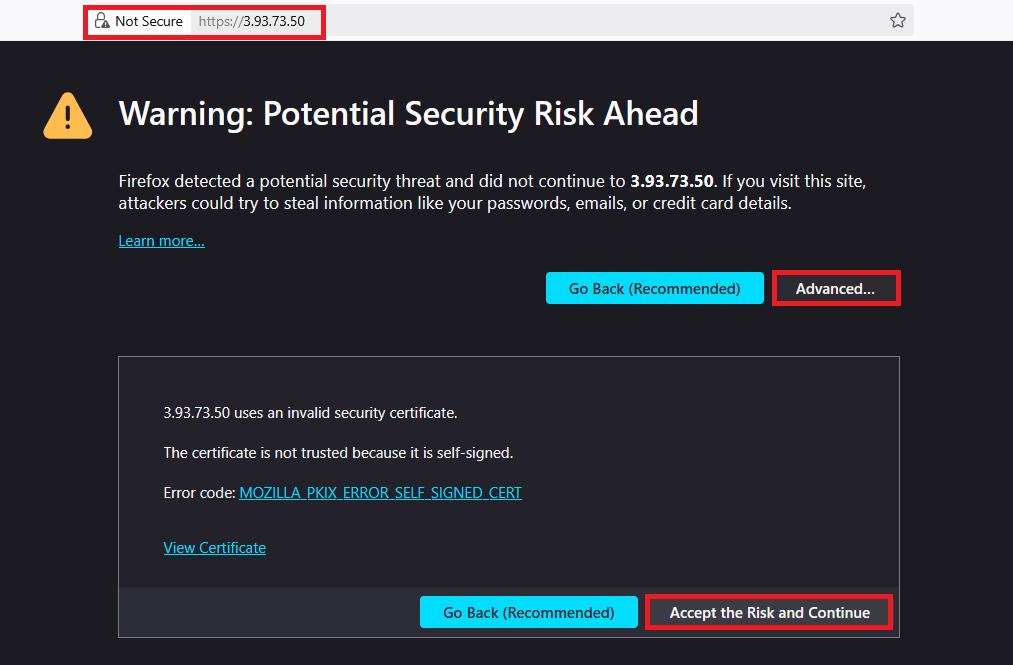
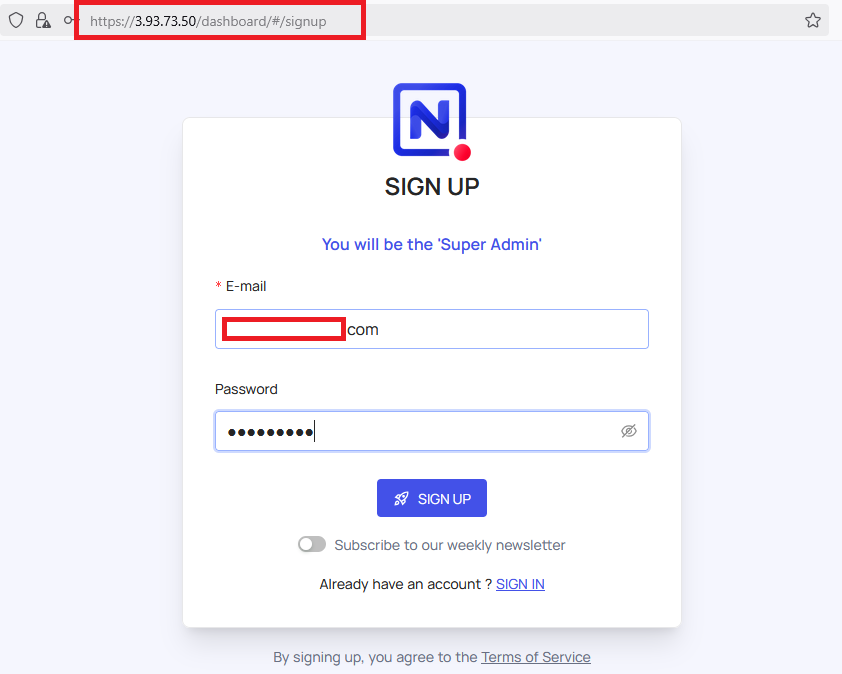
Accept the Browser Warning. It will take you to the SignUp page.
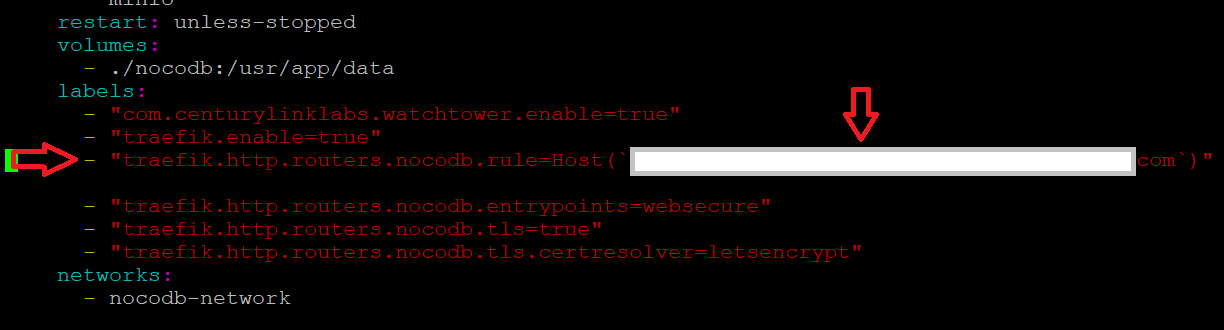
sudo vi /home/ubuntu/nocodb/docker-compose.yml

Replace the IP address with domain name at line no. 18
"traefik.http.routers.nocodb.rule=Host(`mynocodb_instance.com`)"
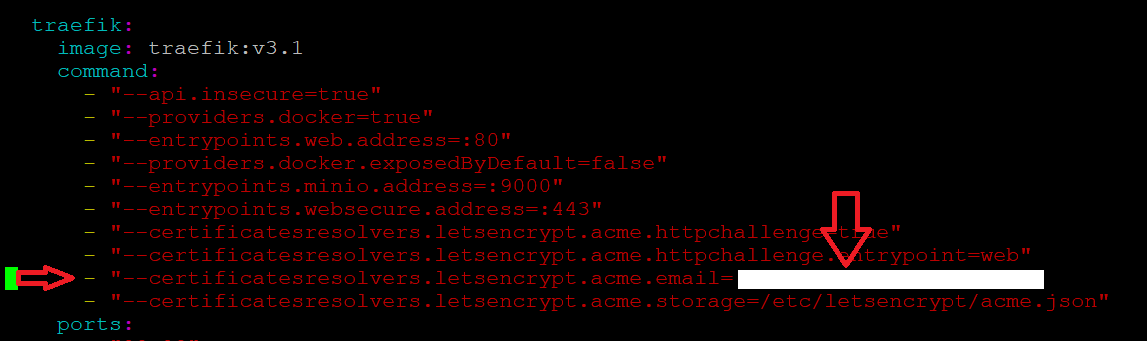
Under minio Section, Similarly replace IP address with domain name at line no. 91
"traefik.http.routers.minio.rule=Host(`mynocodb_instance.com`)"

"--certificatesresolvers.letsencrypt.acme.email=contact@example.com"
Save the changes by pressing ESC key followed by :wq.
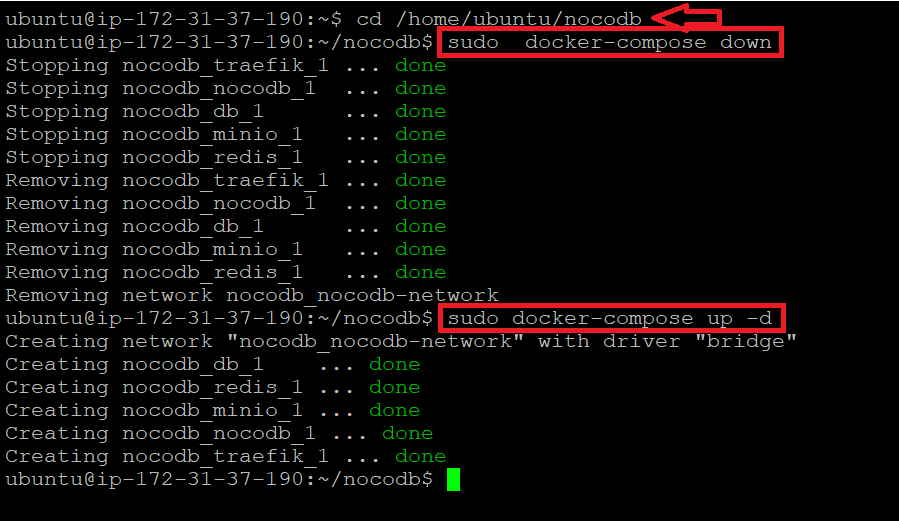
cd /home/ubuntu/nocodb
sudo docker-compose down
sudo docker-compose up -d