Go back

How to enable HTTPS for Metabase

By default Metabase instance is running on Port 80 (HTTP). If you want to access Metabase UI via HTTPS (port 443) then this section describes how to enable HTTPS for Metabase Data Visualization and BI Platform VM solution.

  1. Once your VM is up and running, connect via terminal and install Nginx on metabase vm using
sudo apt update
sudo apt install nginx

/img/common/metabase-https-guide/install-nginx.png

  1. Take the backup of existing default file in /etc/nginx/sites-available/ using
sudo cp /etc/nginx/sites-available/default  /etc/nginx/sites-available/default_bkup

/img/common/metabase-https-guide/default-bkup.png

  1. Edit the default file, delete all the content from it and paste the new content from below.
  • Open the default file using
   sudo vi /etc/nginx/sites-available/default

/img/common/metabase-https-guide/sudo-vi.png

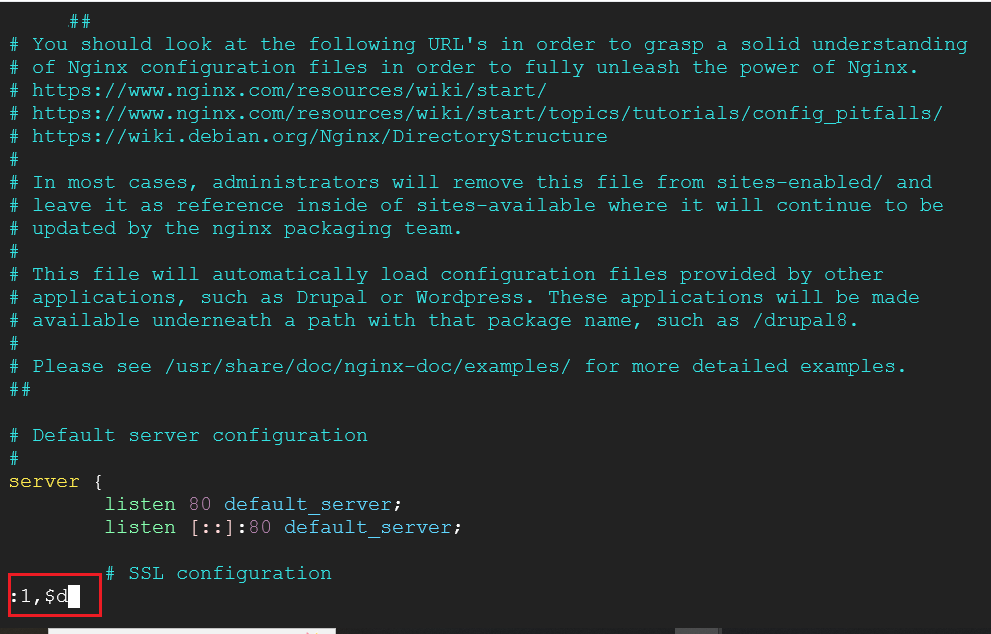
  • Delete all the content by pressing Esc key then :1,$d enter. This will empty the file.

/img/common/metabase-https-guide/delete-content.png

  • Copy the new contents from below, Go back to terminal, use the i command to enter Insert mode, right click in the opened default file and paste it.
server {

       # SSL configuration
       #
       listen 443 ssl  default_server;
       listen [::]:443 ssl default_server;
       include snippets/snakeoil.conf;

       #root /var/www/html;

       # Add index.php to the list if you are using PHP
       index index.html index.htm index.nginx-debian.html;

       server_name _;

       location / {
       proxy_pass http://127.0.0.1:80/;
       proxy_set_header Host $host;
       proxy_http_version 1.1;

       proxy_set_header X-Real-IP $remote_addr;
       proxy_set_header X-Forwarded-For $proxy_add_x_forwarded_for;
       proxy_set_header X-Forwarded-Proto $scheme;
       proxy_buffering off;
       proxy_request_buffering off;
       # In case of websockets
       proxy_set_header Upgrade $http_upgrade;
       #proxy_set_header Connection "upgrade";
   }

}
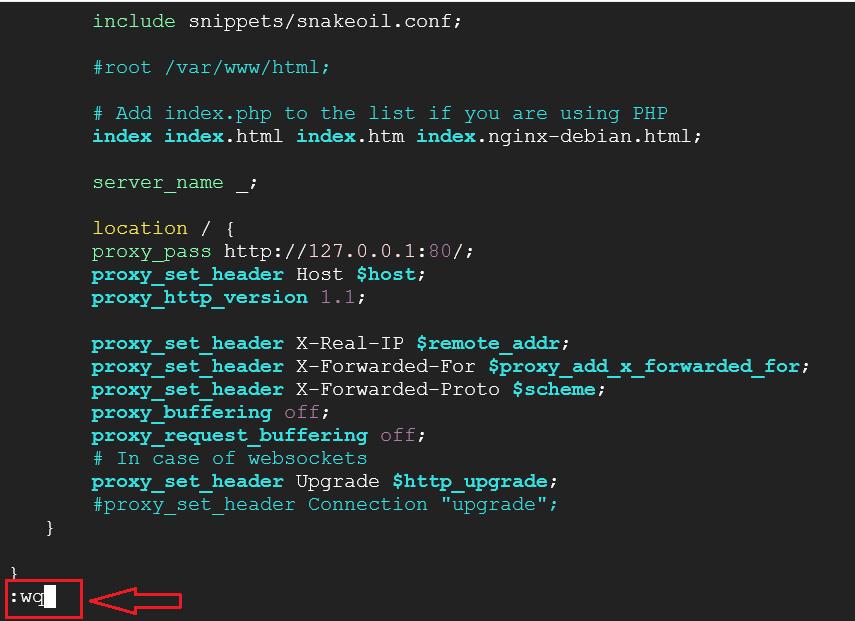
  • Save the file by pressing Esc key then :wq.

/img/common/metabase-https-guide/new-default-file.png

  1. You also need to enable port 443 and disable port 80 on the firewall of this VM in your cloud environment. If you are not aware of how to enable port 443, follow below steps for your respective cloud provide:
  • To add a firewall rule on Azure, from VM’s details page, select Networking -> Network settings from left pane. Under Rules sections, click on Create Port Rule. Select Inbound port rule, on this page keep all the default settings and select HTTPS under Service dropdown. Save the changes.

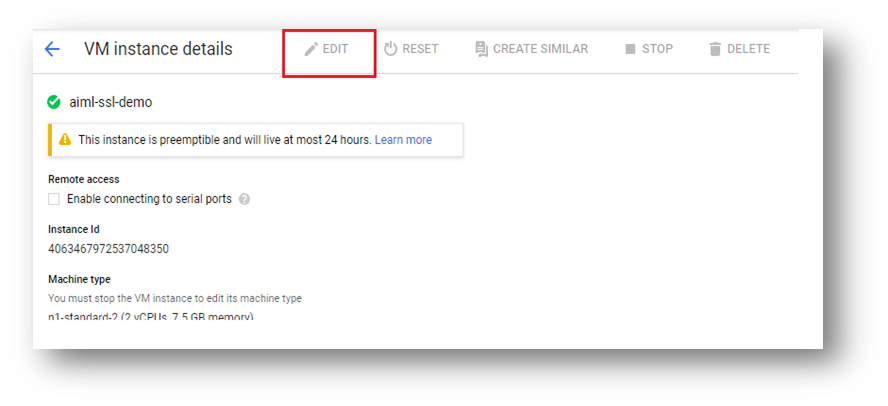
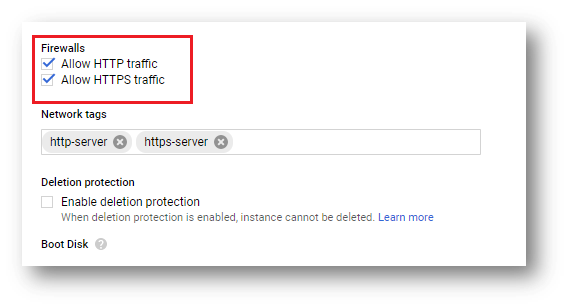
  • For GCP: Open the VM page from GCP console, click on edit and select “https” option and save as shown below:
/img/common/jupyterhub_https_guide_gcp_port_change.png

/img/common/jupyterhub_https_guide_gcp_port_change_02.png

  • For AWS, Go to your EC2 instance, Modify the security group associated with your instance, Open the Inbound tab and Add a rule to allow incoming HTTPS traffic (port 443).
  1. Once you have port 443 opened for your Metabase instance, reboot the VM using below command and access the metabase via HTTPS.
sudo init 6

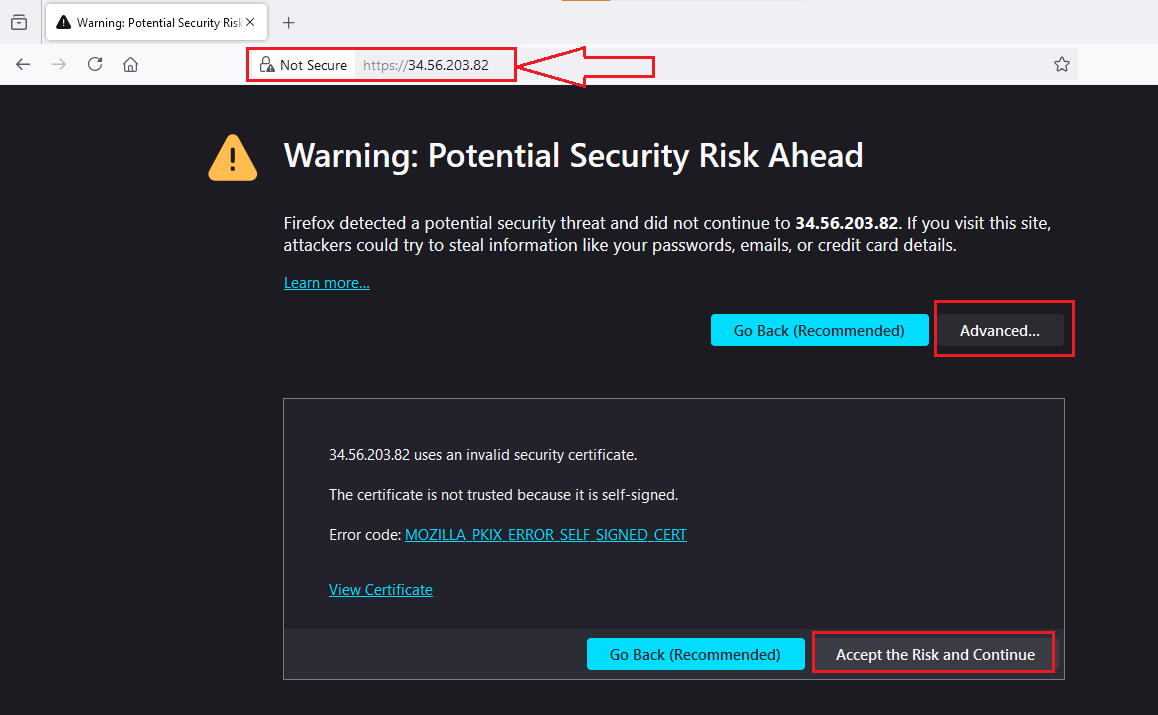
Browser will show you an SSL warning, click on the left bottom advance button and then click on Accept the risk and continue. It will take you to the Metabase Login page.
/img/common/metabase-https-guide/browser-warning.png

Note: The browser warning is due to a self signed SSL certificate. To eliminate the SSL warning associated with self-signed certificates, you need to obtain a certificate from a trusted CA like Let’s Encrypt. After obtaining the certificate and key, you should back up the existing self-signed certificate files and replace them with the new ones. Finally, restart your web server to apply for the new certificate.
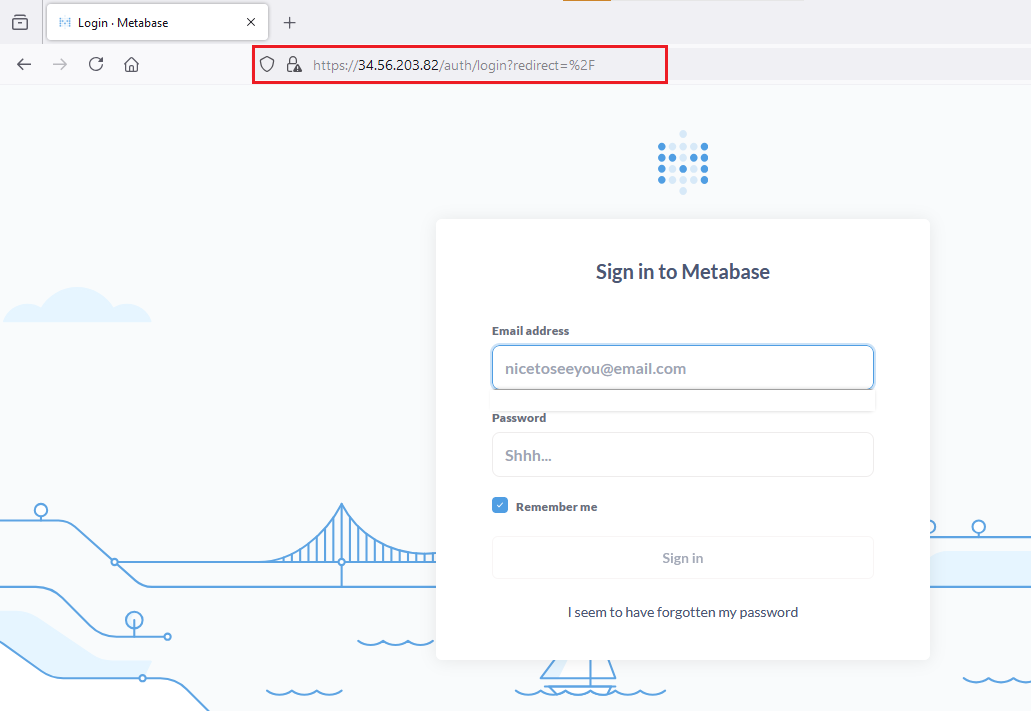
/img/common/metabase-https-guide/metabase-on-https.png

Note: If you encounter 502 Bad Gateway error, then please wait for few seconds and referesh the page.

/img/common/metabase-https-guide/bad-gateway-error.png

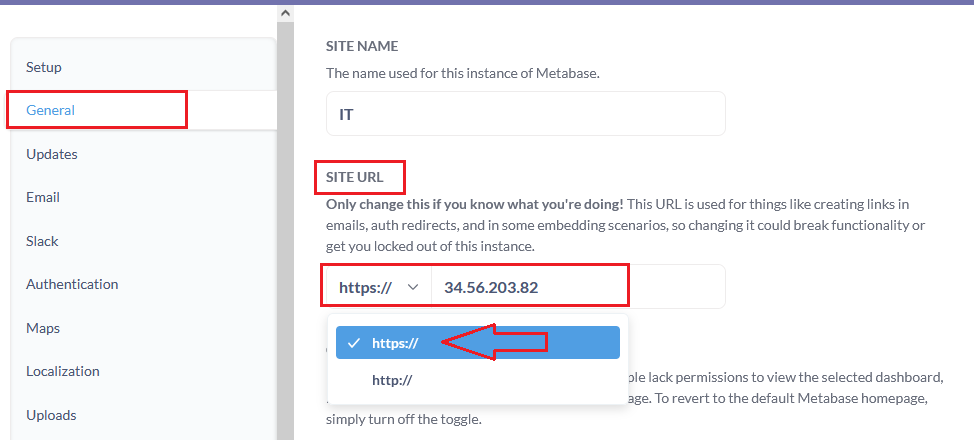
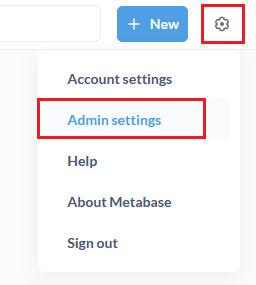
  1. If you want to enable dashboard sharing using HTTPS then login to Metabase UI and Go to Admin settings from the top right corner menu. Select the General tab from the left pane and change the SITE URL to HTTPS.

/img/common/metabase-https-guide/admin-settings.png

/img/common/metabase-https-guide/site-url.png

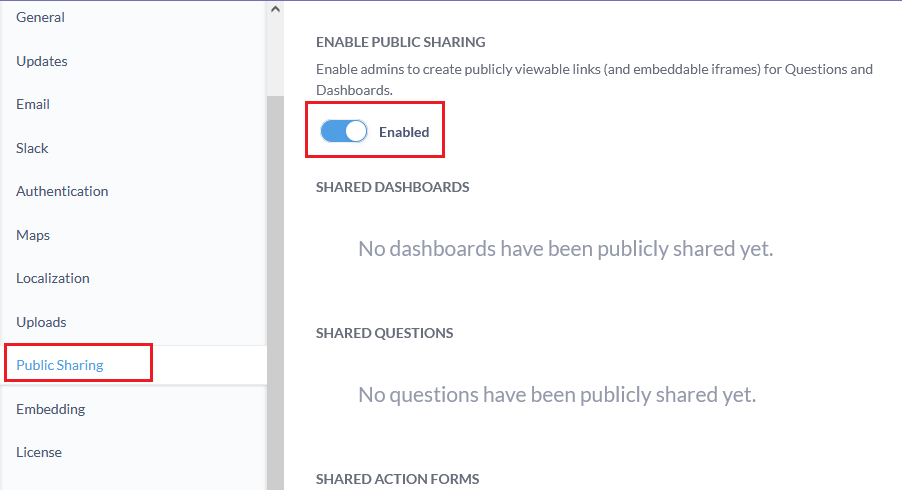
  1. If you want to enable public sharing then on the same Admin Settings page select Public Sharing from the left pane and enable it.

/img/common/metabase-https-guide/public-sharing.png

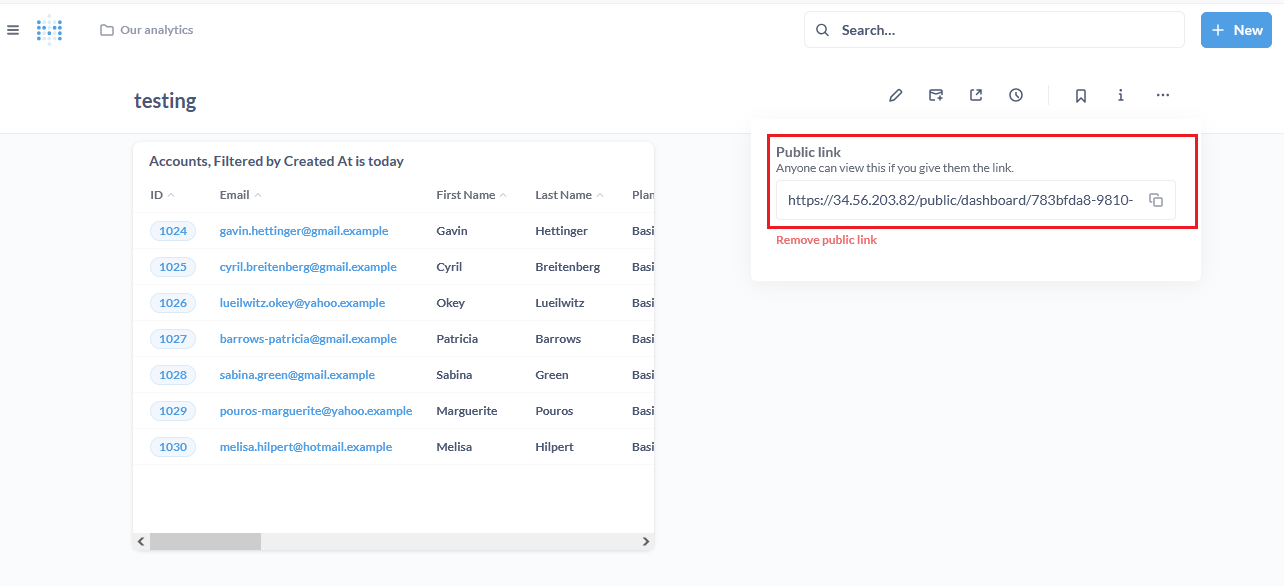
  1. Now you can see public sharing /embedding links on your dashboards. Click on it and it will show you the public sharing link available over HTTPS.

/img/common/metabase-https-guide/public-sharing-2.png

Go back