This VM comes with the JupyterHub running on http. Follow below steps to enable HTTPS for your JupyterHub :
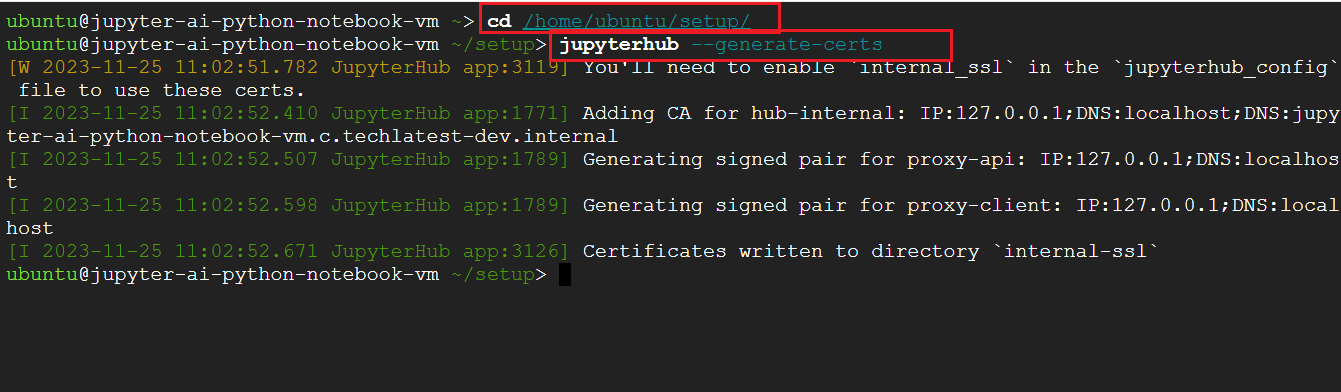
cd /home/ubuntu/setup
Note: Below step is for generating self signed certificate. If you have SSL certificate signed from Certificate Authority, copy the certificate and key in the vm under /home/ubuntu/setup/internal-ssl/hub-ca/ folder with the names hub-ca.crt and hub-ca.key respectively and skip to the per-boot editing step below.
Generate auto sign certificate by running below command. This will generate hub-ca.crt and hub-ca.key files under /home/ubuntu/setup/internal-ssl/hub-ca/ directory.
jupyterhub --generate-certs
sudo sed -i 's|sudo jupyterhub --config /home/ubuntu/setup/jupyterhub_config.py --ip 0.0.0.0 --port 80|#sudo jupyterhub --config /home/ubuntu/setup/jupyterhub_config.py --ip 0.0.0.0 --port 80|g' /var/lib/cloud/scripts/per-boot/jupyter_perboot.sh
sudo sed -i 's|#sudo jupyterhub --config /home/ubuntu/setup/jupyterhub_config.py --port 443|sudo jupyterhub --config /home/ubuntu/setup/jupyterhub_config.py --port 443|g' /var/lib/cloud/scripts/per-boot/jupyter_perboot.sh


For AWS, Go to your EC2 instance, Modify the security group associated with your instance, Open the Inbound tab and Add a rule to allow incoming HTTPS traffic (port 443).
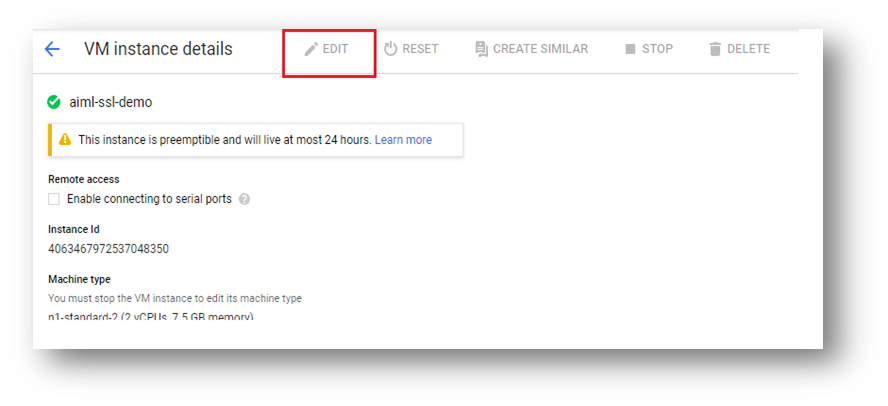
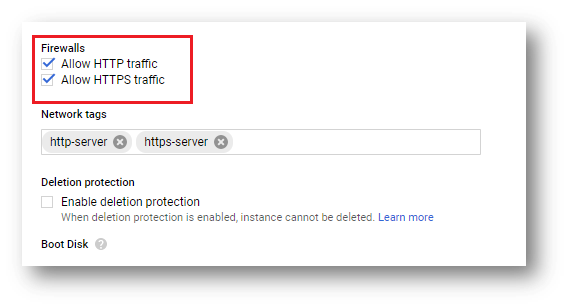
For GCP: Open the VM page from GCP console, click on edit and select “https” option and save as shown below:
sudo init 6
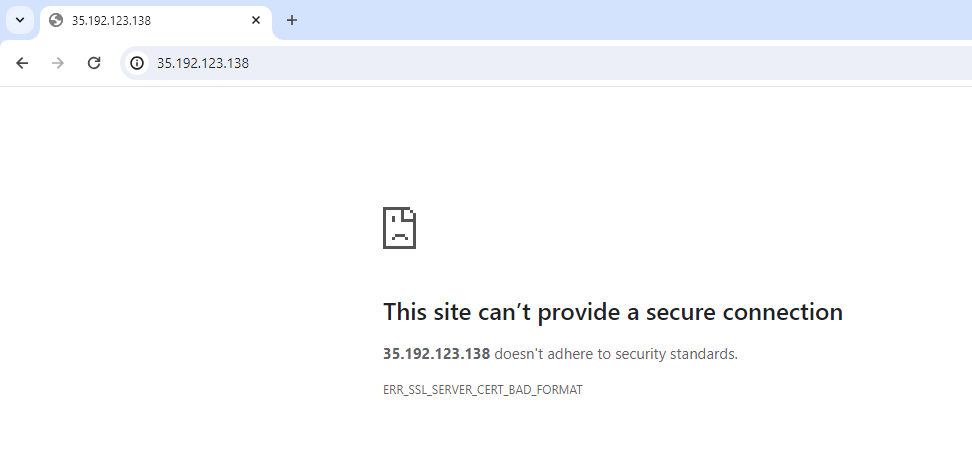
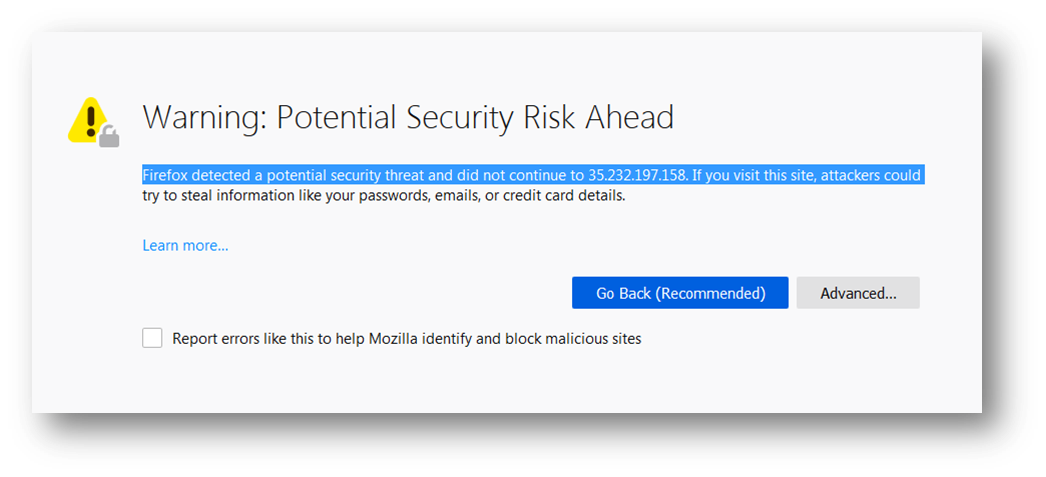
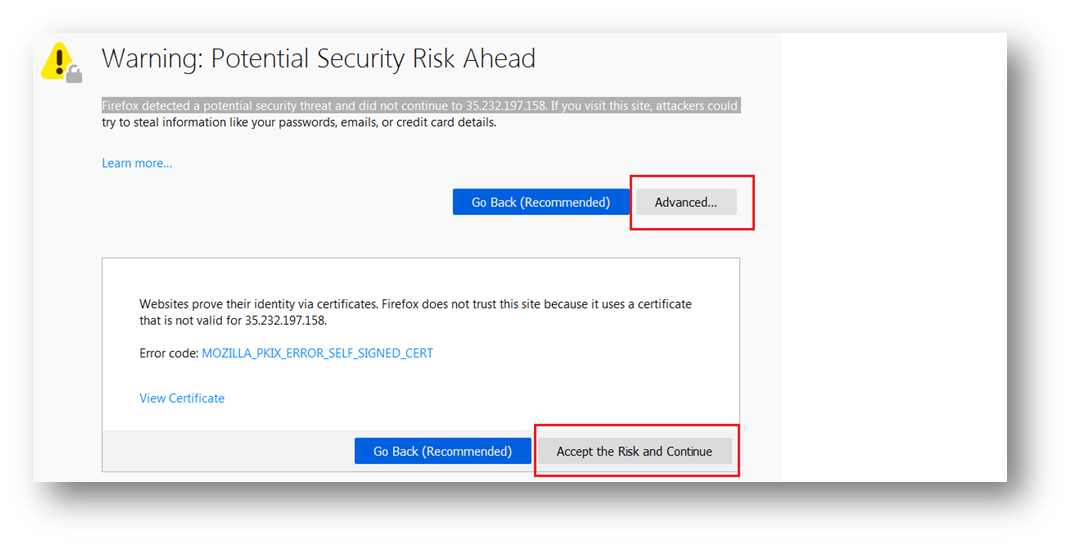
Note: Chrome browser doesn’t add security exception for self signed certificate and will give you error message as shown below. Please use Firefox Browser to access Jupyterhub WebUI.