How to get Techlatest Stable Diffusion with InvokeAI Web Interface on AZURE
This section describes how to launch and connect to Techlatest Stable Diffusion with InvokeAI Web Interface on Azure.
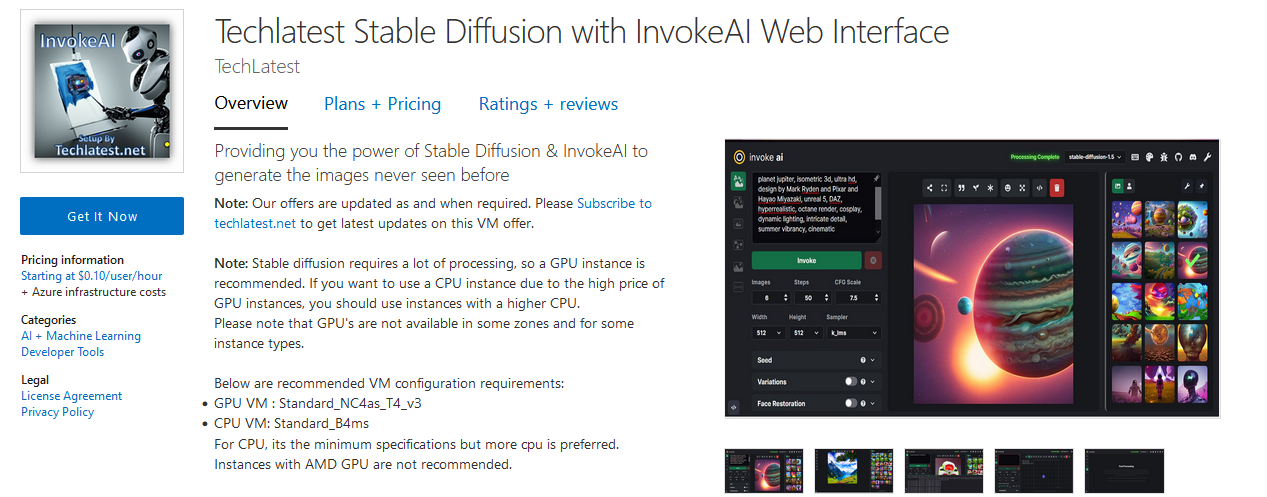
Note: Stable diffusion requires a lot of processing, so a GPU instance is recommended. If you want to use a CPU instance due to the high price of GPU instances, you should use instances with a higher CPU.
Again note that GPU’s are not available in some zones and for some instance types.
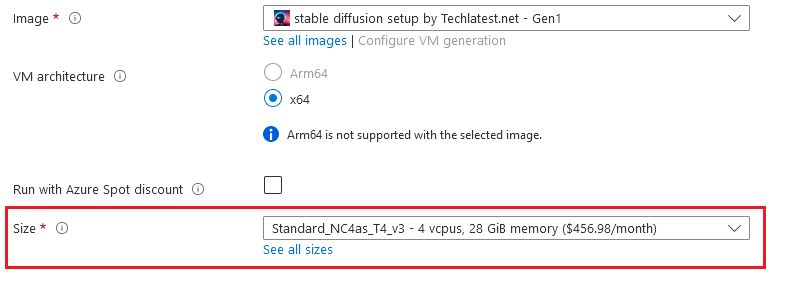
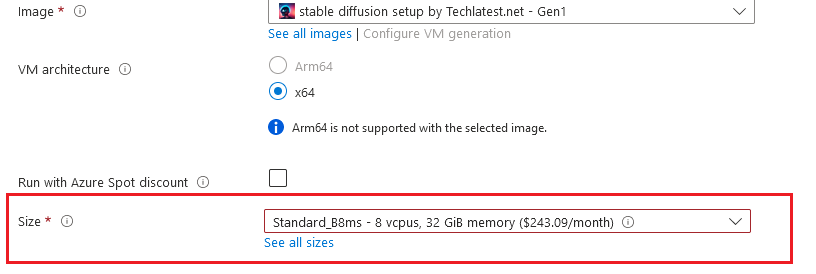
Below are recommended VM configuration requirements:
- GPU VM : Standard_NC4as_T4_v3 (4 vcpu 28GB memory) configuration
- CPU VM : Standard_B4ms (4vcpu, 16gb ram)
For CPU, its the minimum spec but more cpu is preferred. Instances with AMD GPU are not recommended.
Note GPU instance will perform 10x or more faster when processing request compared to CPU instance. Typical GPU instance will take few seconds to render images compared to 10-20 minutes by CPU instance, hence GPU instances are preferred.
NOTE: While deploying the instance on GPU, if you encounter the quota exhaust error or you are unable to deploy the instance on GPU VM then please refer to our Request Quota on Azure Cloud Platform
- Open Techlatest Stable Diffusion with InvokeAI Web Interface VM listing on Azure Marketplace
-
Click on Get It Now
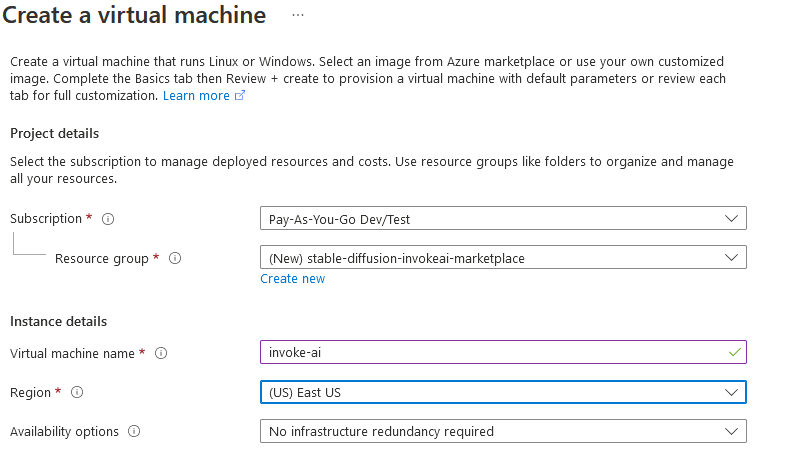
Select a Resource group for your virtual machine
Select a Region where you want to launch the VM(such as East US)
Optionally change the number of cores and amount of memory.
Select the Authentication type as Password and enter Username as ubuntu and Password of your choice.
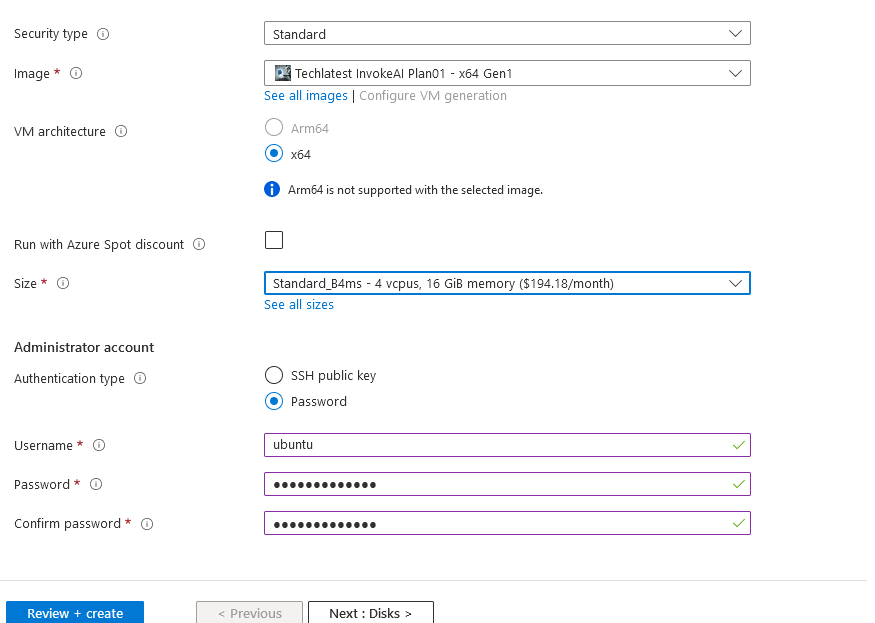
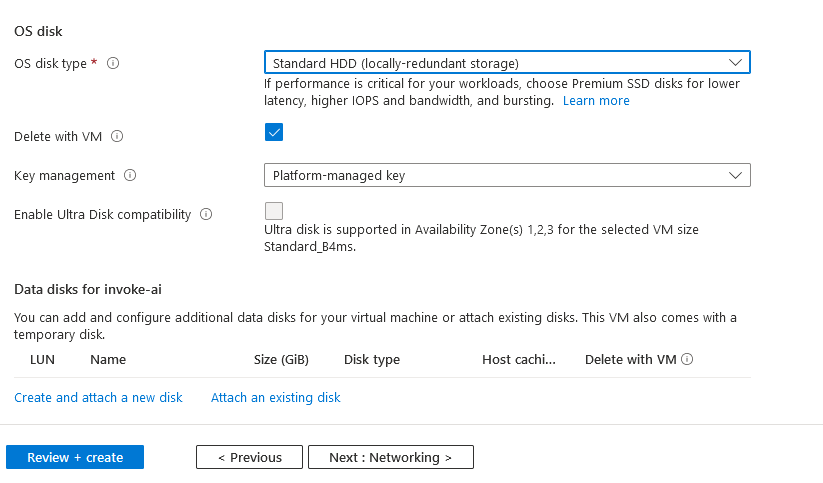
Optionally change the OS disk type.
Optionally change the network and subnetwork names.Be sure that whichever network you specify has ports 22 (for ssh), 3389 (for RDP) and 80 (for HTTP) exposed.
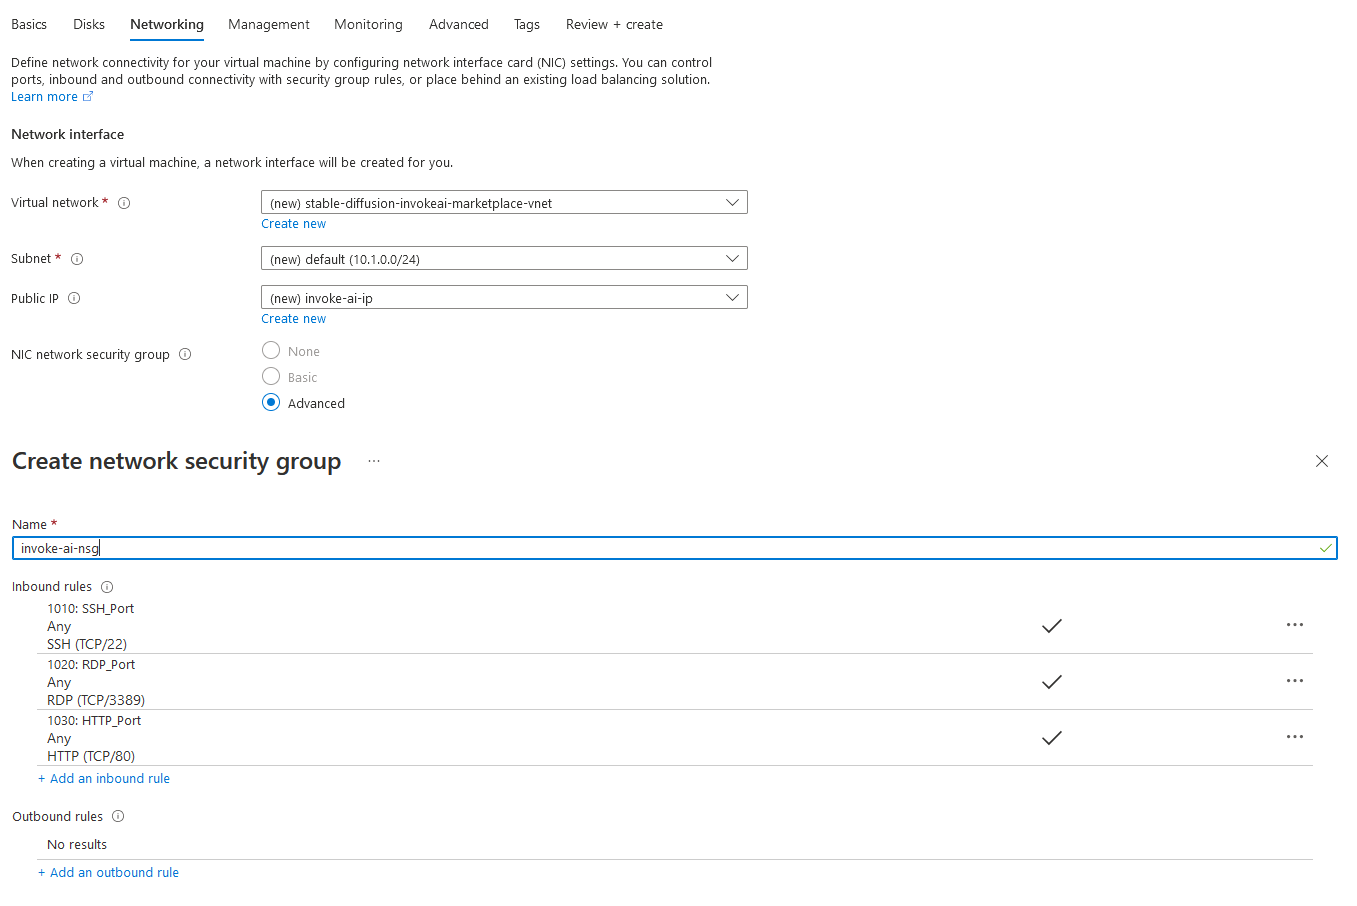
Optionally go to the Management, Advanced and Tags tabs for any advance settings you want for the VM.
Click on Review + create and then click on Create when you are done.
Virtual Machine will begin deploying.
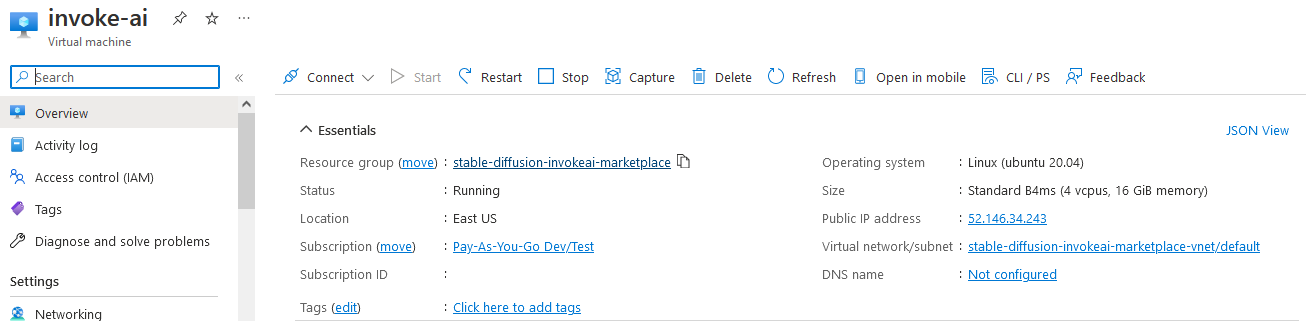
- A summary page displays when the virtual machine is successfully created. Click on Go to resource link to go to the resource page. It will open an overview page of virtual machine.
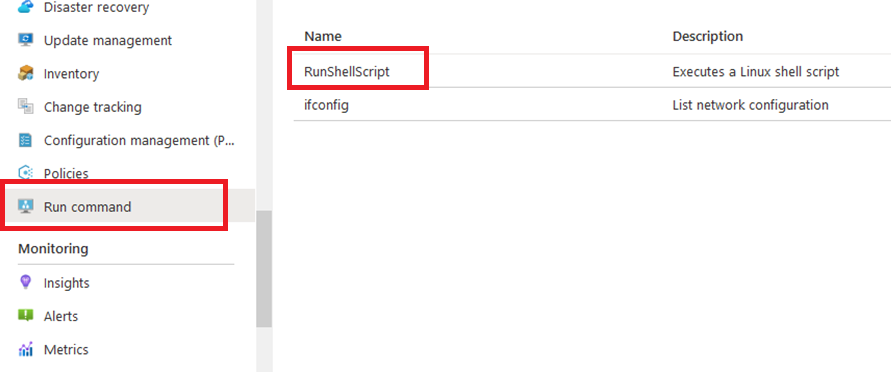
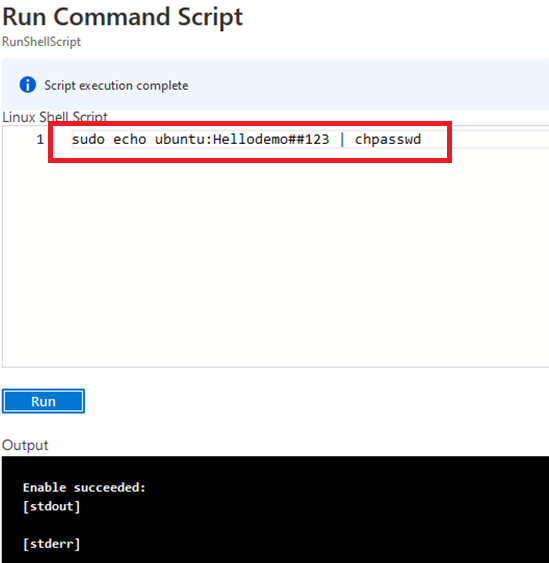
- In the left navigation pane, select Run command, select RunShellScript and enter following command to change the password of the vm .
sudo echo ubuntu:yourpassword | chpasswd
-
Now the password for ubuntu user is set, you can connect to the VM’s desktop environment from any local windows machine using RDP protocol or local linux machine using Remmina.
-
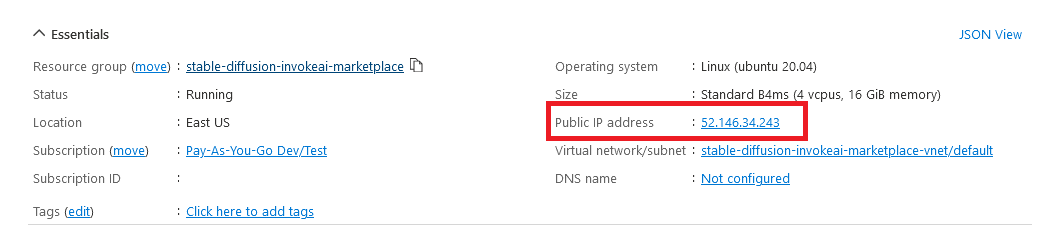
To connect using RDP via Windows Machine, first note the public IP address of the VM from VM details page as highlighted below
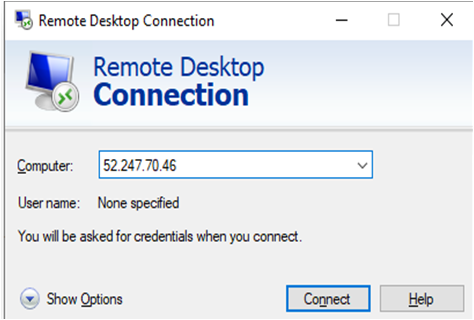
- Then From you local windows machine, goto “start” menu, in the search box type and select “Remote desktop connection”.
In the “Remote Desktop connection” wizard, copy the public IP address and click connect
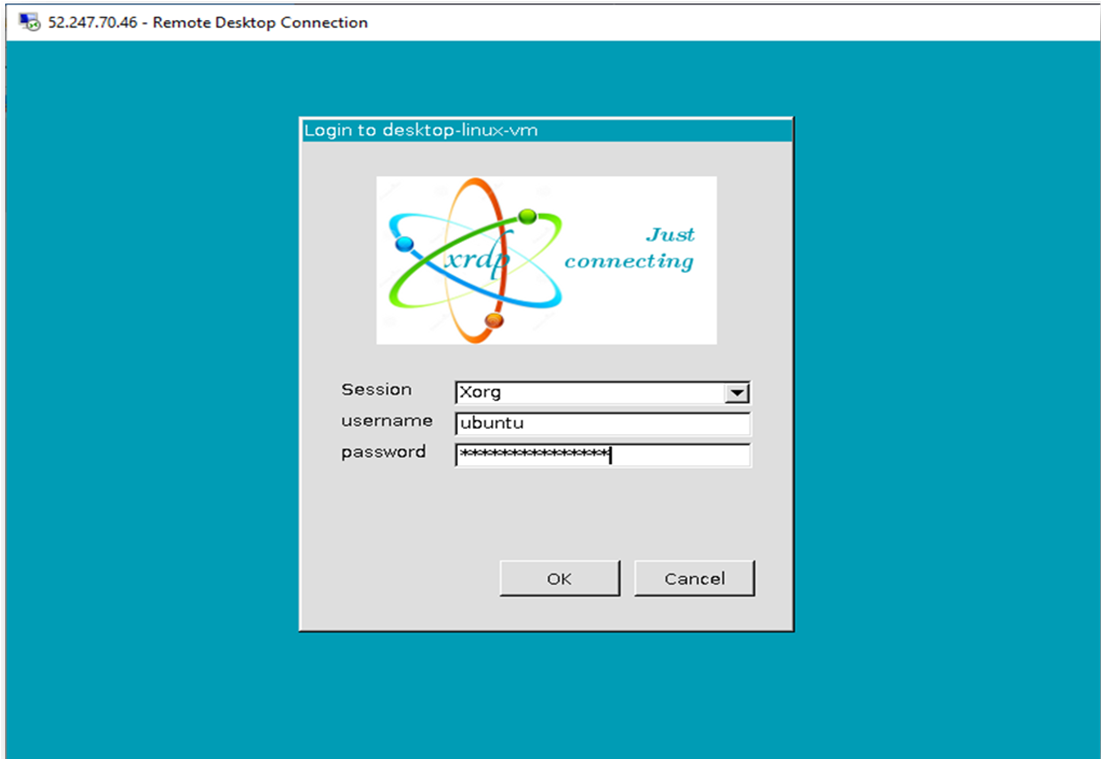
- This will connect you to the VM’s desktop environment. Provide the username (e.g “ubuntu”) and the password set in the step4 to authenticate. Click OK
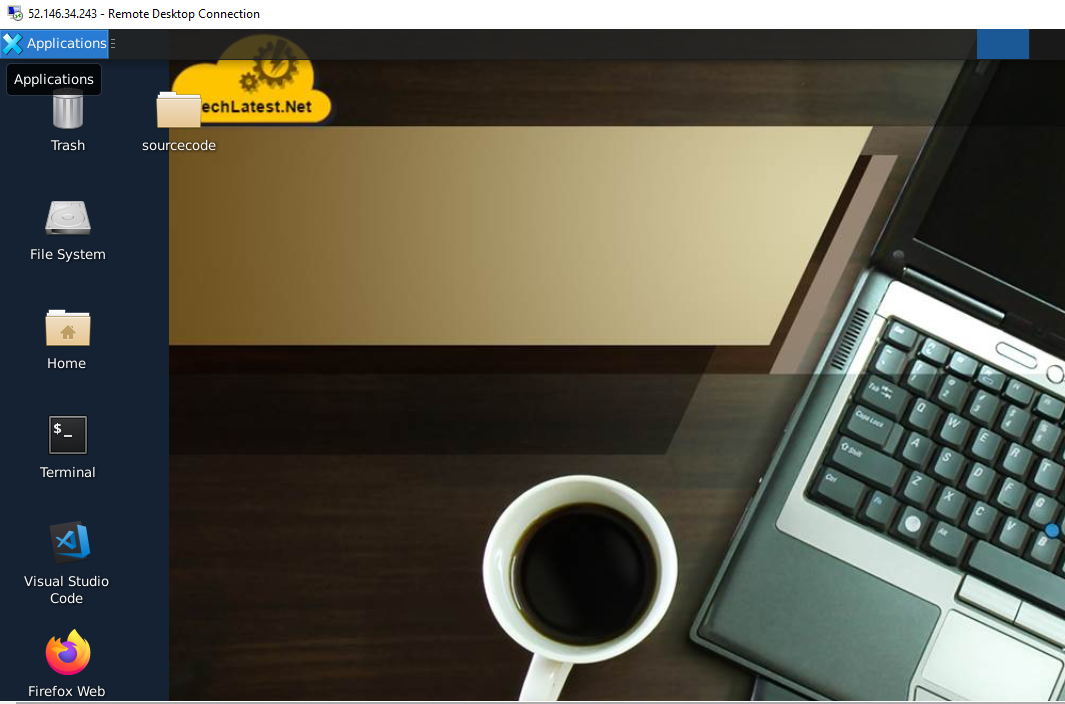
- Now you are connected to the out of box Techlatest Stable Diffusion with InvokeAI Web Interface environment via Windows Machine.
-
To connect using RDP via Linux machine, first note the external IP of the VM from VM details page,then from your local Linux machine, goto menu, in the search box type and select “Remmina”.
Note: If you don’t have Remmina installed on your Linux machine, first Install Remmina as per your linux distribution.

- In the “Remmina Remote Desktop Client” wizard, select the RDP option from dropdown and paste the external ip and click enter.

- This will connect you to the VM’s desktop environment. Provide “ubuntu” as the userid and the password set in above reset password step to authenticate. Click OK

- Now you are connected to out of box Techlatest Stable Diffusion with InvokeAI Web Interface environment via Linux machine.
Once you are connected to GUI environment, follow below steps to launch InvokeAI Web Interface.
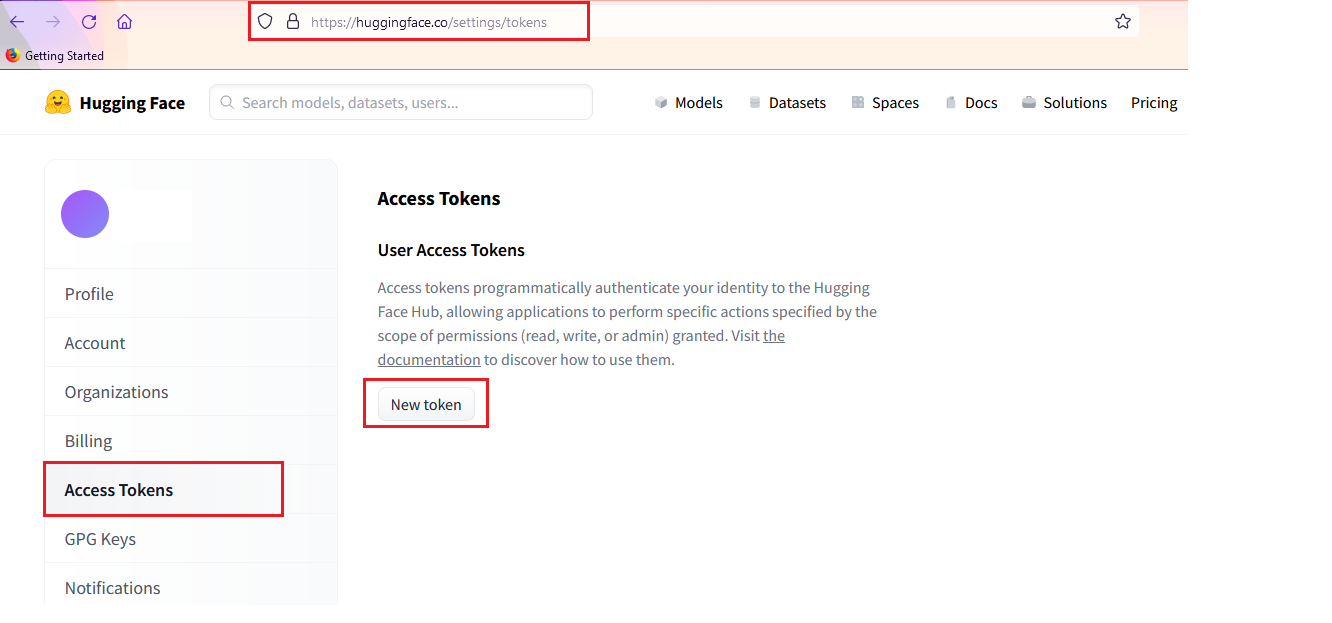
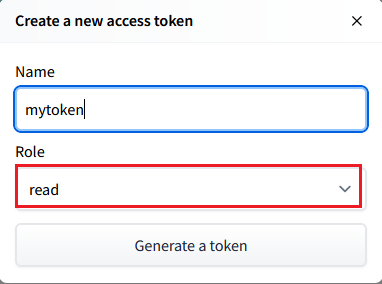
- Setting up a huggingface account.
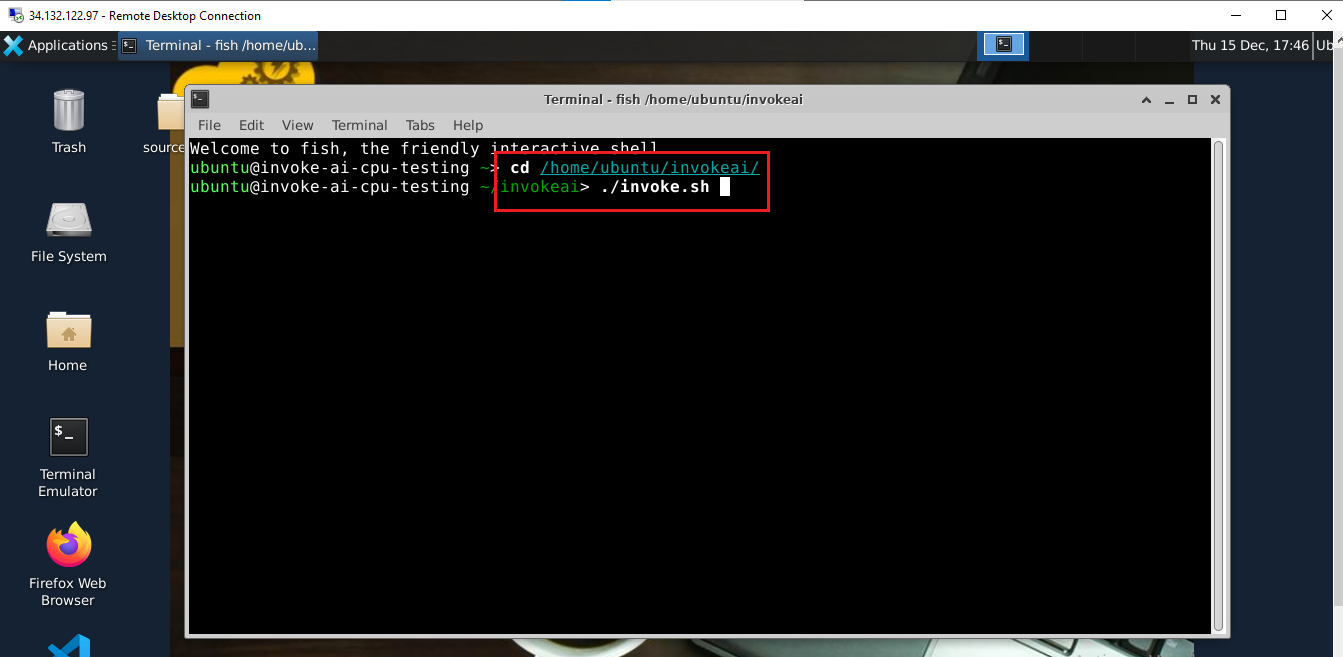
- Now open the terminal inside GUI and run below commands-
   cd /home/ubuntu/invokeai
   ./invoke.sh
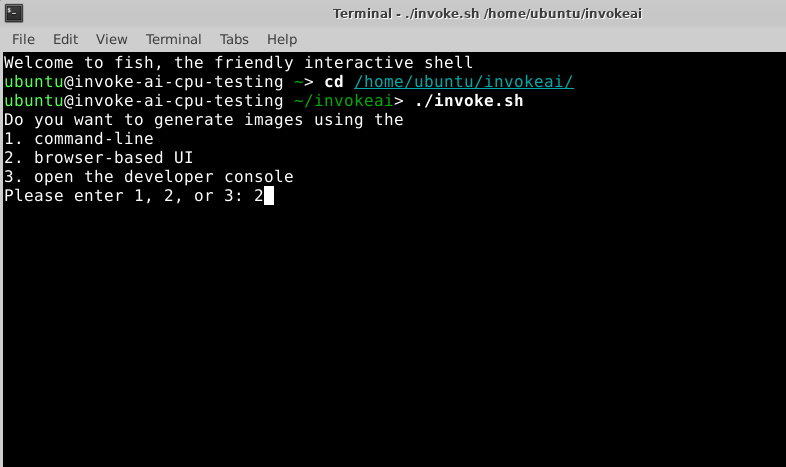
- It will prompt you some questions. For the first prompt, select the option 2 as generate images using browser based UI.
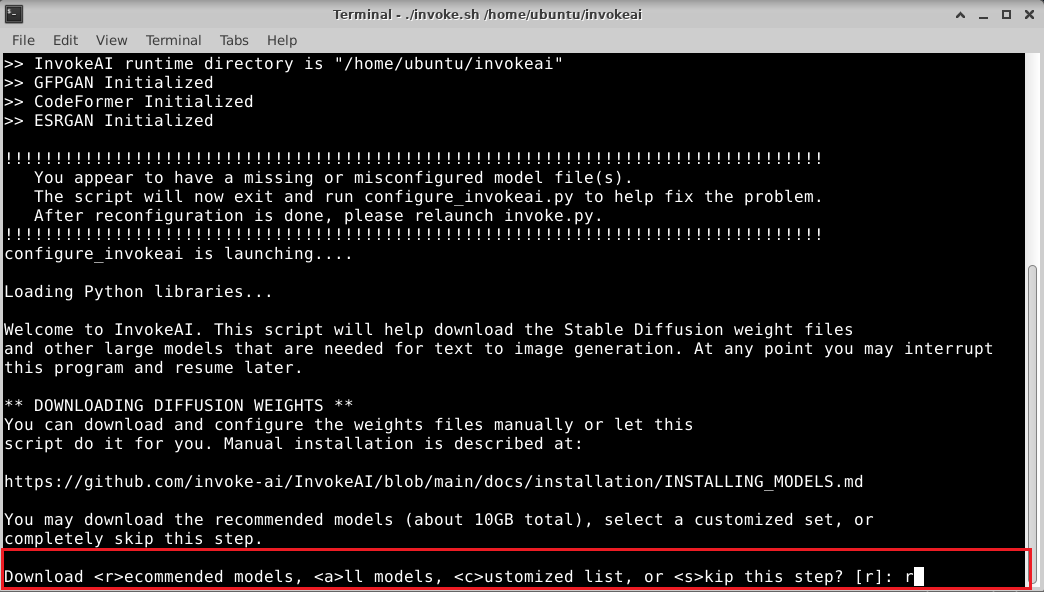
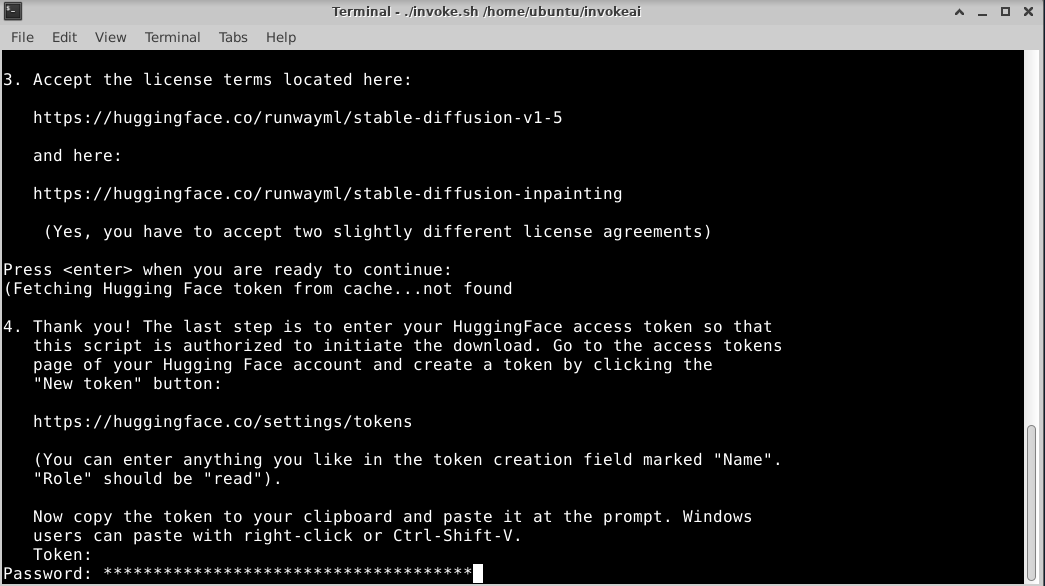
- Next it will ask you to download models, select “r” to download recommended model. You can choose any option other than skip, it is recommended to select “r”. If you select all, make sure you have enough disk space to download all models.
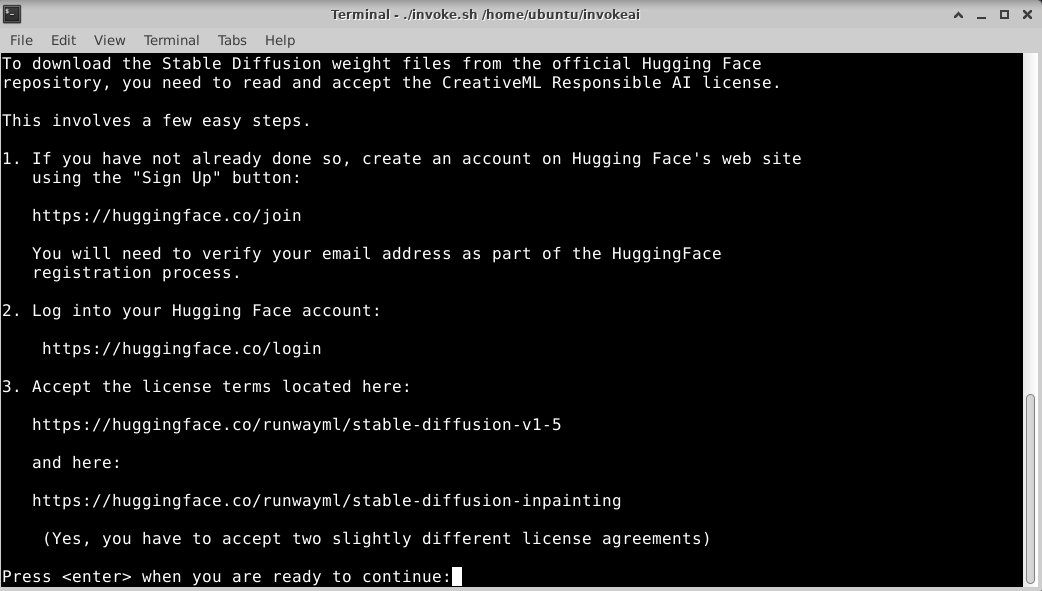
- After providing all the above option, it will ask for inputting the token at the command prompt, paste the token created in hugging face in step 14 above and click enter.
Wait till the setup finishes. Once setup is complete, restart the VM.
- After VM launch for the first time, GPU instances will take 2-5 minutes and CPU instances will take 5-10 minutes to launch the app in the browser.
Wait for 2-5 or 5-10 minutes depending on if your VM is GPU or CPU based and then access the InvokeAI GUI via browser by copying the public IP of the VM from the VM’s overview page and paste it in the browser and then hit enter.
Note Please use http and not https in the URL when accessing InvokeAI interface in GUI, for eg. http://vm_public_ip.
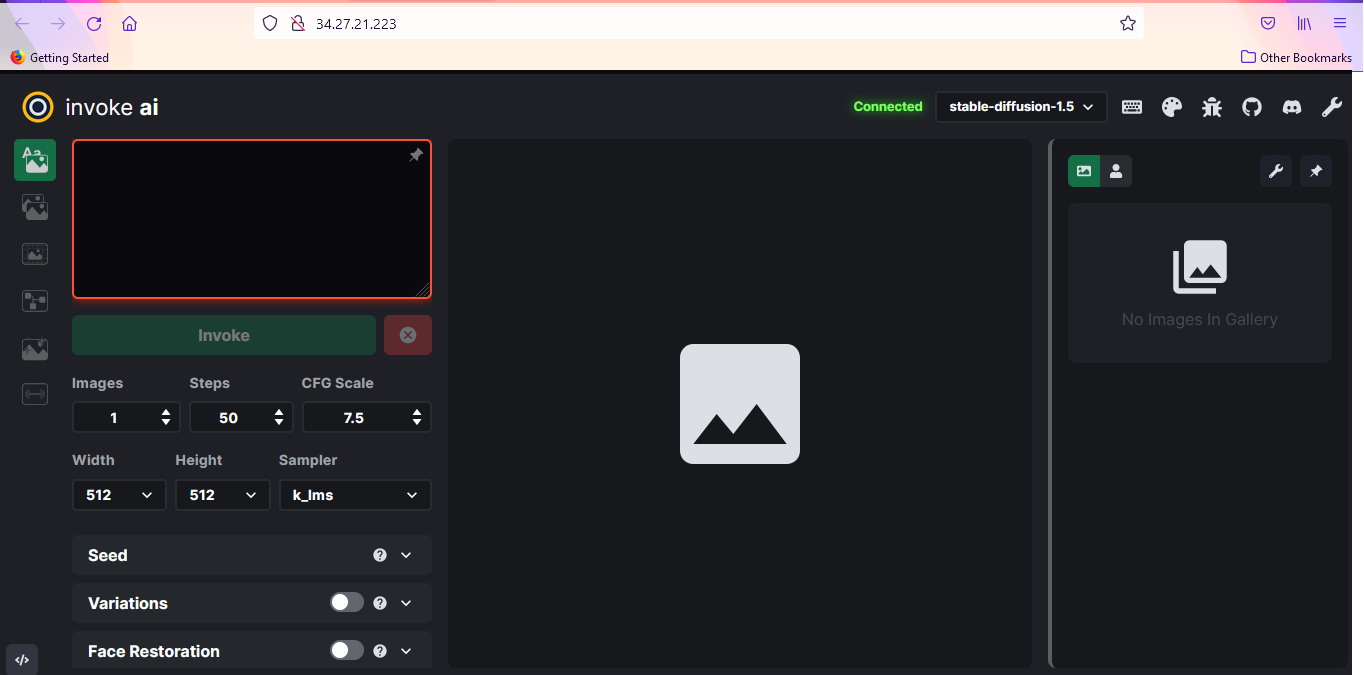
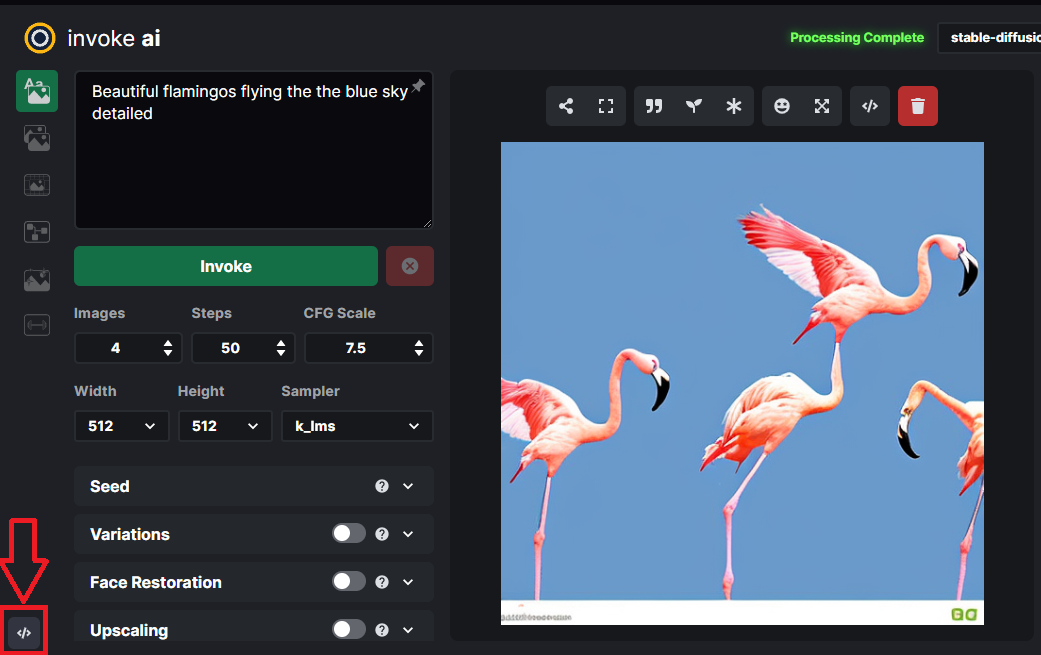
- The Stable Diffusion InvokeAI GUI comes with lots of options and settings. The first window shows text to image page.There are three main sections.
1. A control panel on the left, which contains various settings for text to image generation.
2. The current image section in the middle, which shows a large format version of the image you are currently working on.
3. A gallery section on the right that contains a history of the images you have generated.
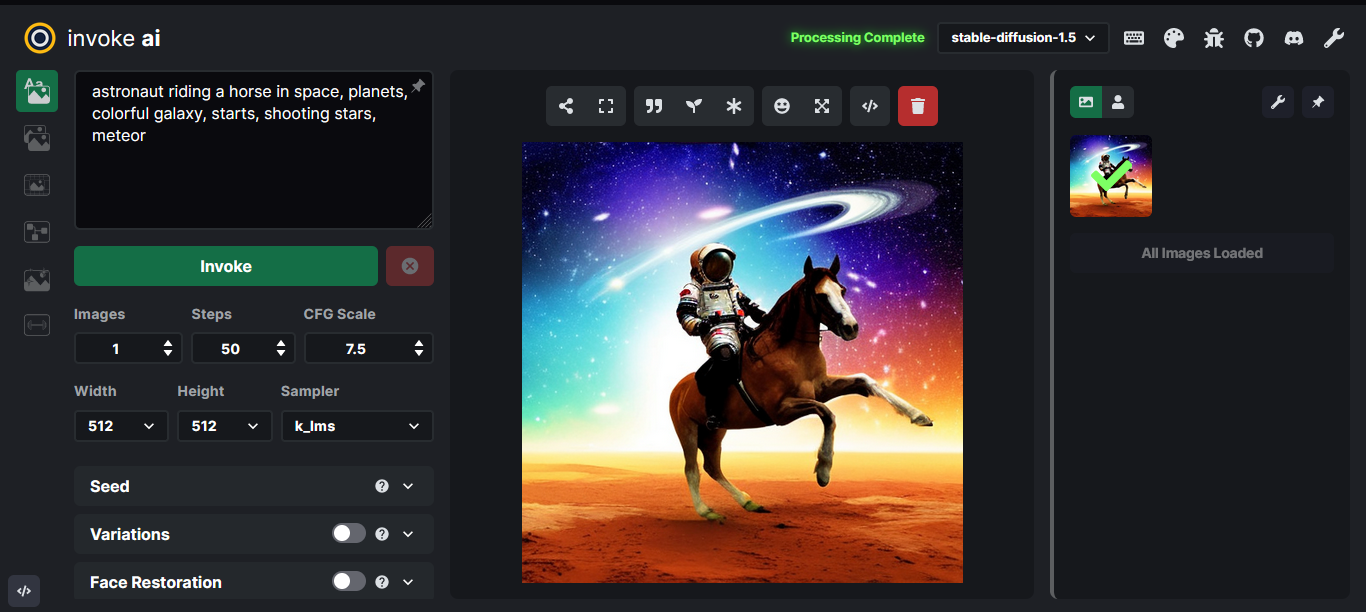
- Provide the Prompt and click on Invoke button and wait till it finishes.
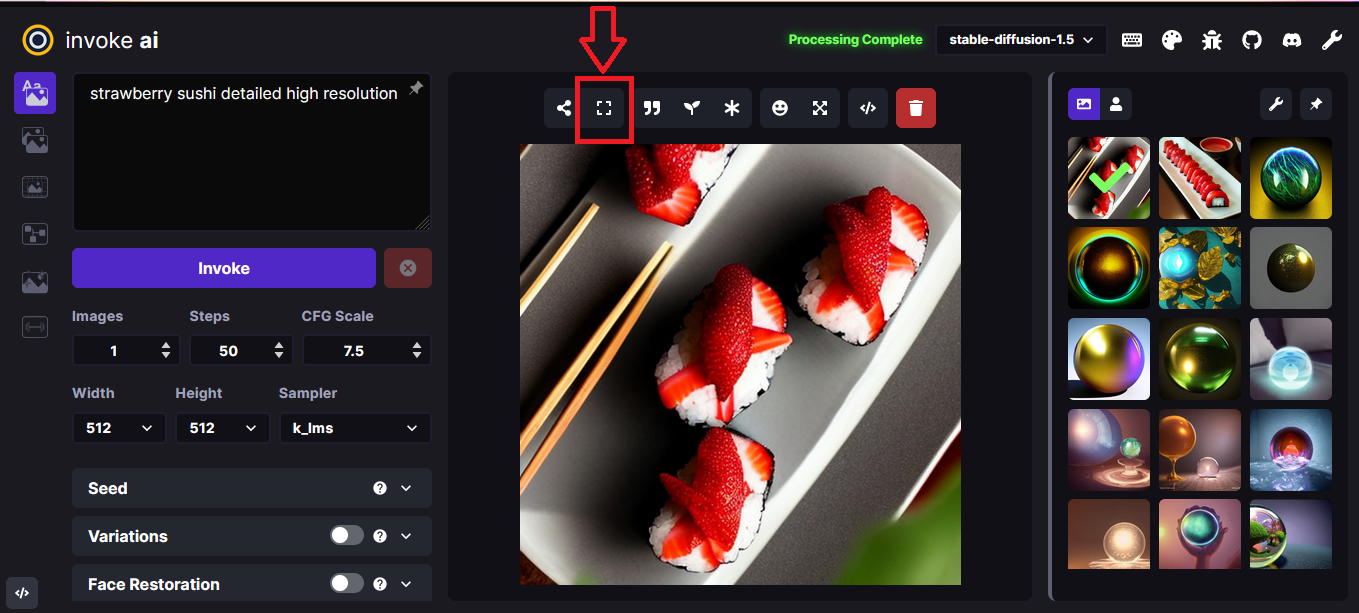
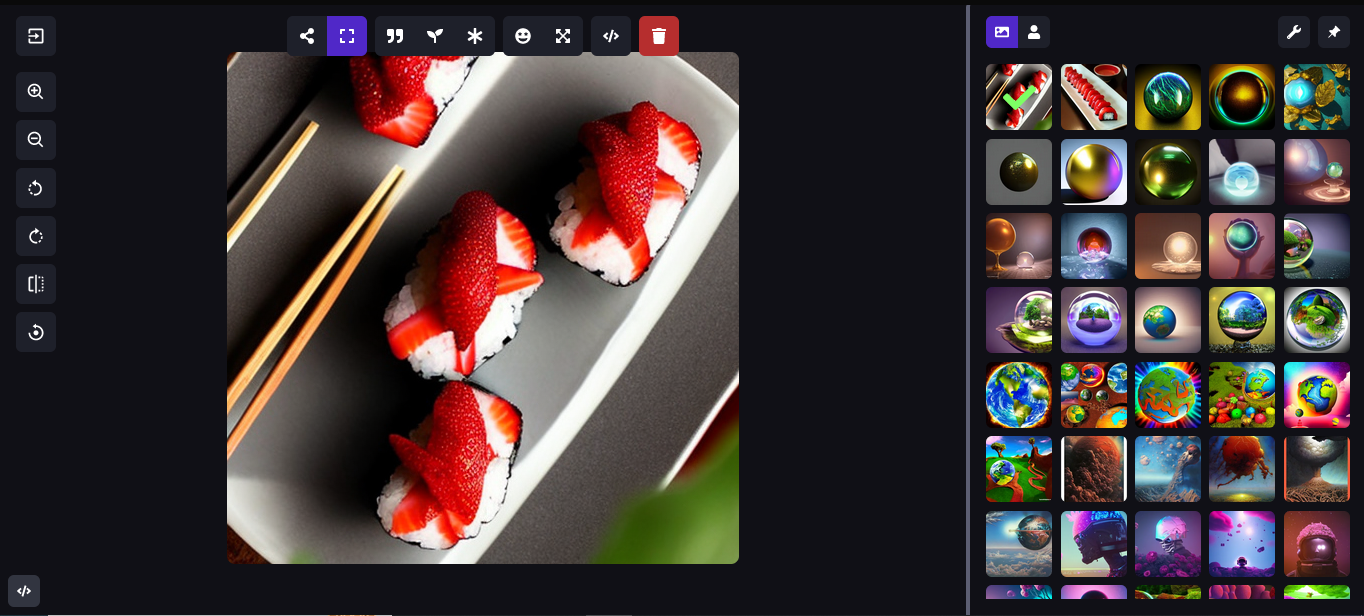
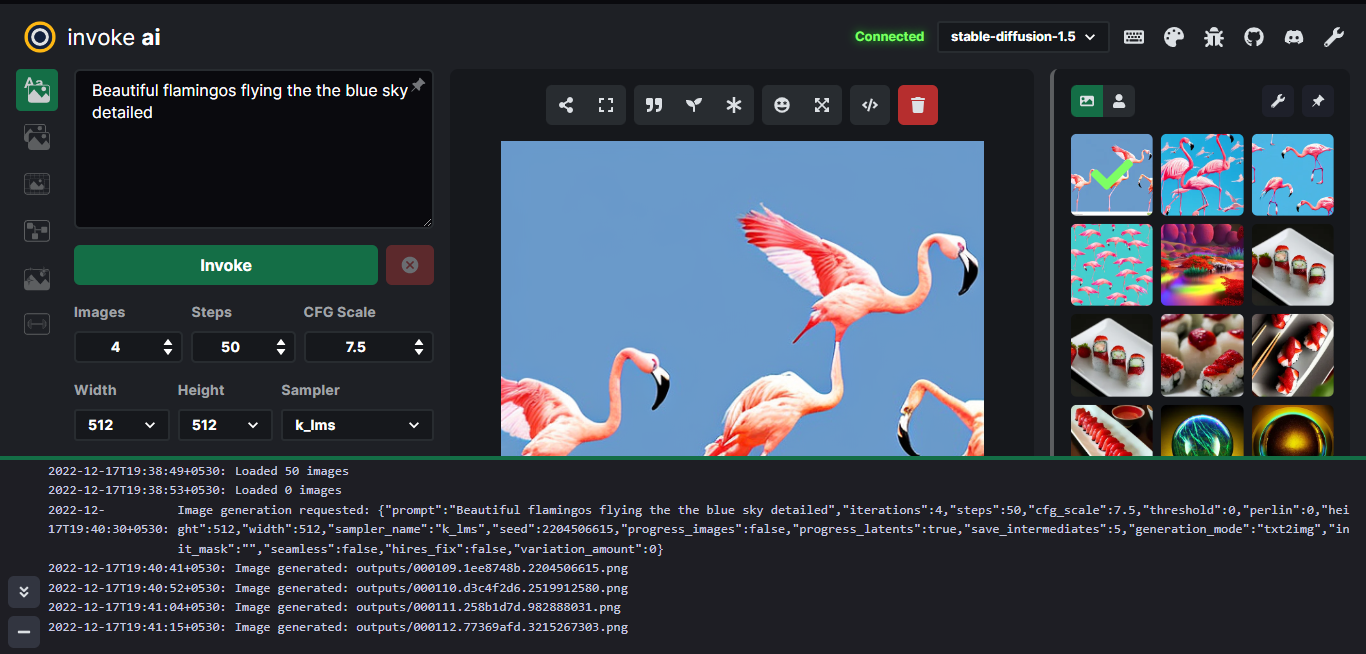
- You can see and edit all the images in viewer window. Click on viewer icon as shown below to load the images.
- You can also access the web console by clicking web console arrow in the left-bottom
- For more information on how to use the GUI, Go to InvokeAI Web UI
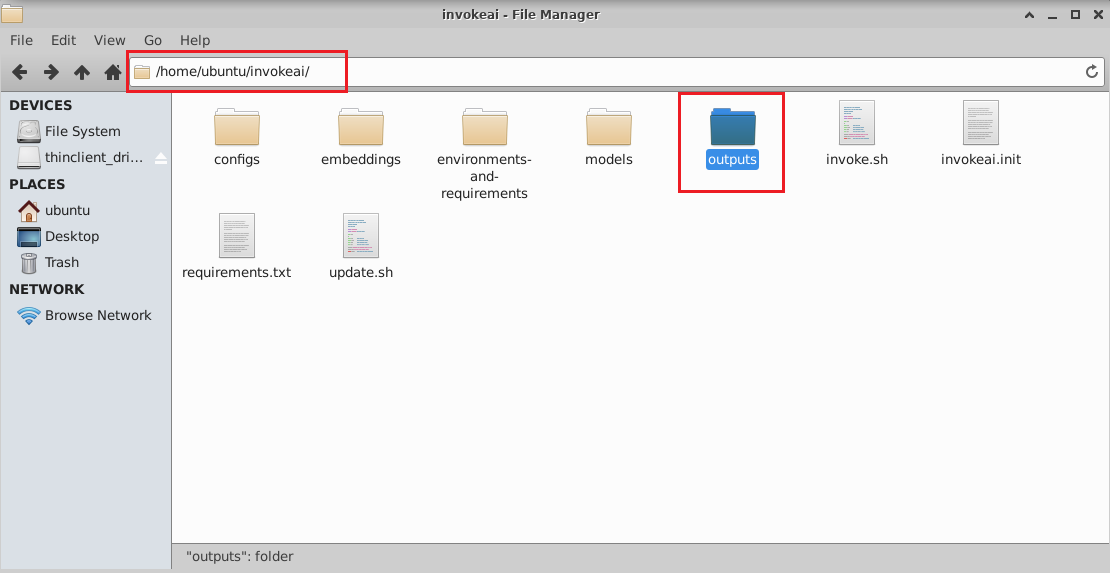
- You can access InvokeAI directory at /home/ubuntu/invokeai.
The images created from GUI are stored under /home/ubuntu/invokeai/output directory.
To access this directory, connect to VM’s Desktop environment as explained above, and navigate to home - > ubuntu -> invokeai-> output directory.
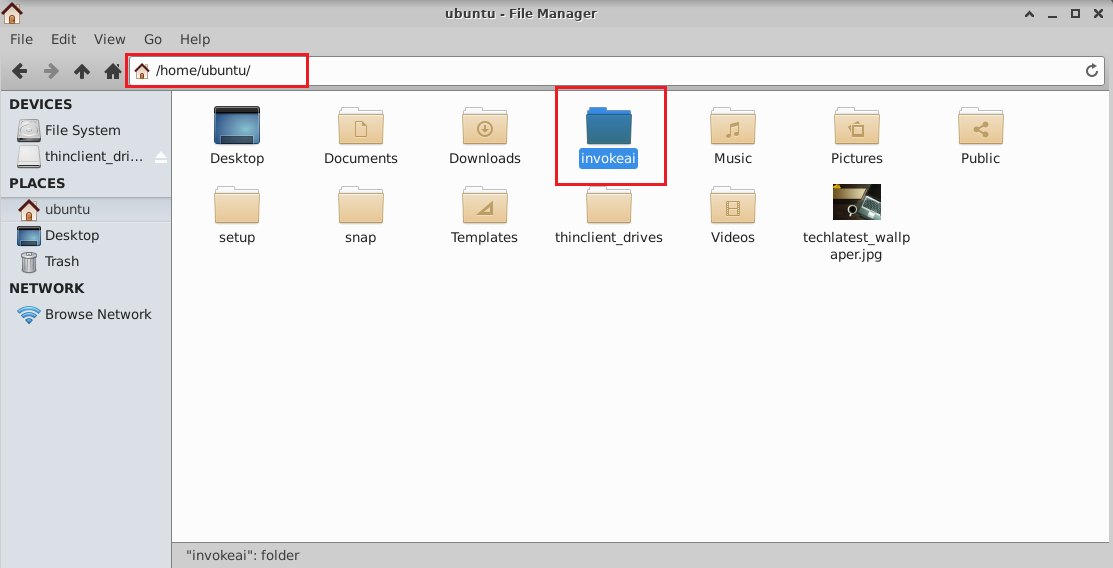
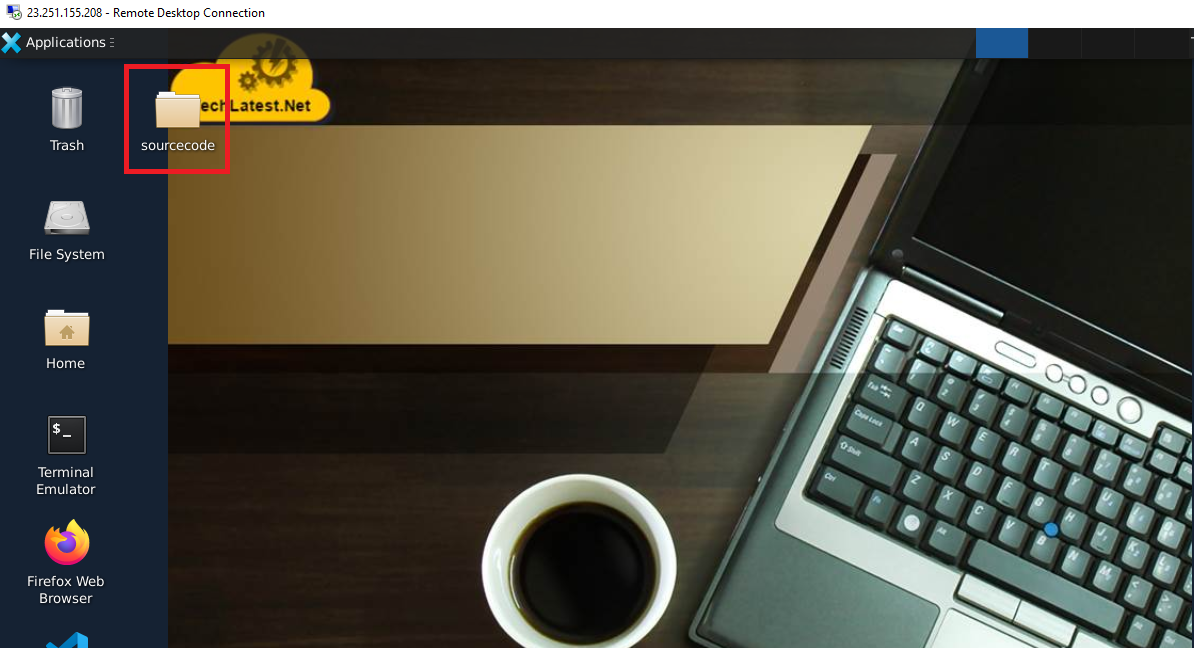
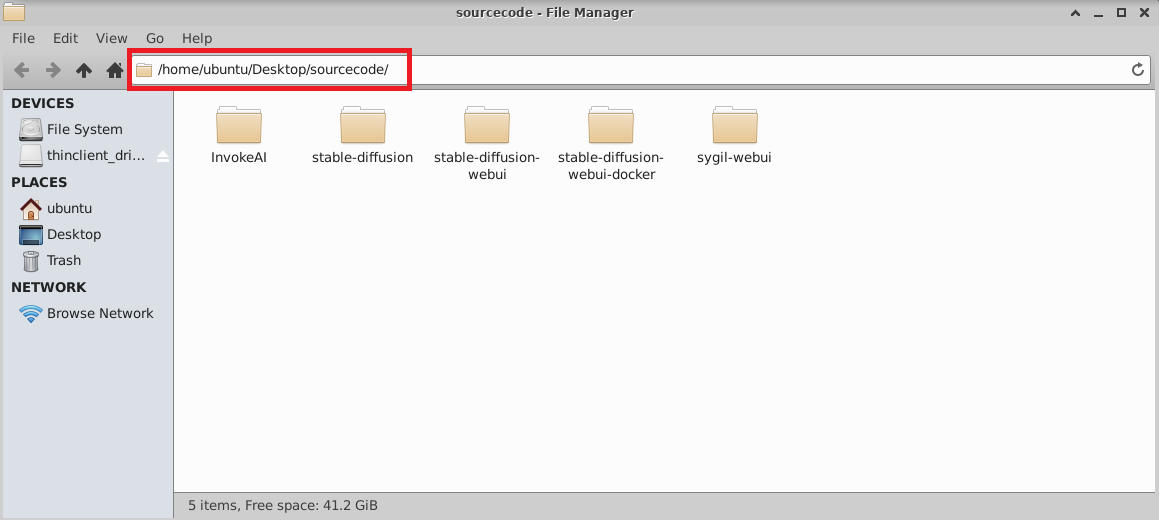
- You can also access the sourcecode of the InvokeAI. It is available under sourcecode folder on Desktop.
Credits:
https://github.com/CompVis/stable-diffusion.git
https://github.com/AbdBarho/stable-diffusion-webui-docker
https://github.com/AUTOMATIC1111/stable-diffusion-webui
https://github.com/Sygil-Dev/sygil-webui
https://github.com/invoke-ai/InvokeAI
https://invoke-ai.github.io/InvokeAI/other/CONTRIBUTORS/