Setup and installation of 'Chroma: Vector DB for AI Development' on AWS
This section describes how to launch and connect to ‘Chroma: Vector DB for AI Development’ VM solution on AWS.
- Open Chroma: Vector DB for AI Development VM listing on AWS marketplace.
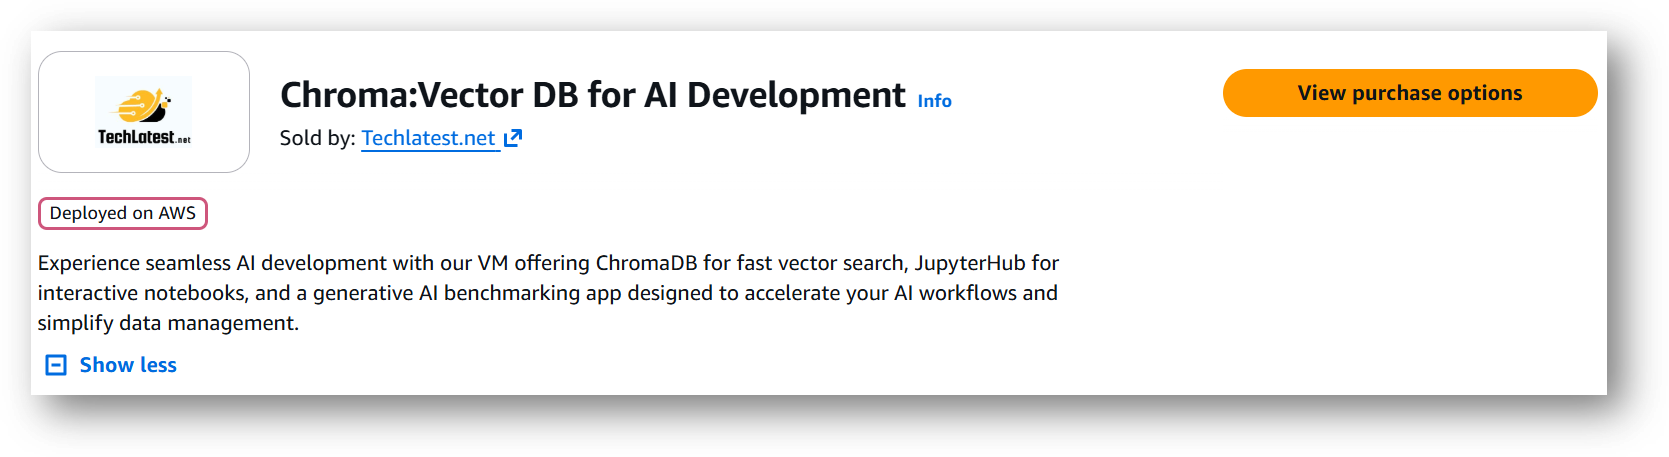
- Click on View purchase options.
- Login with your credentials and follow the instruction.
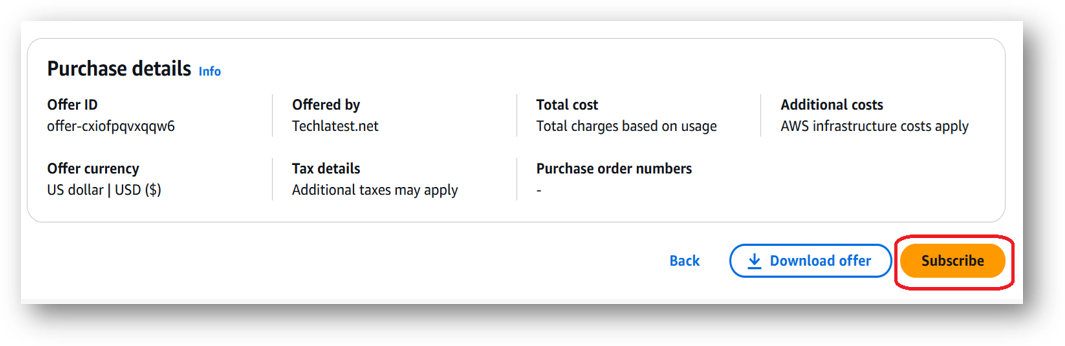
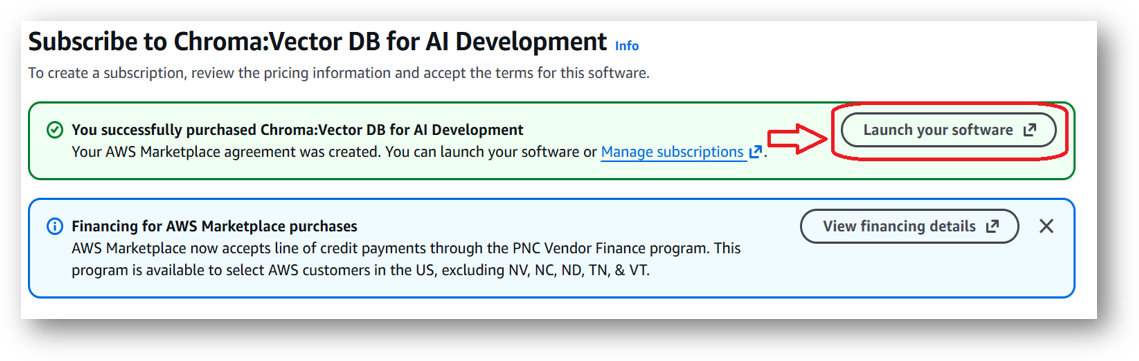
- Review the prices and subscribe to the product by clicking on subscribe button located at the bottom of this page. Once you are subscribed to the offer, click on Launch your software button.
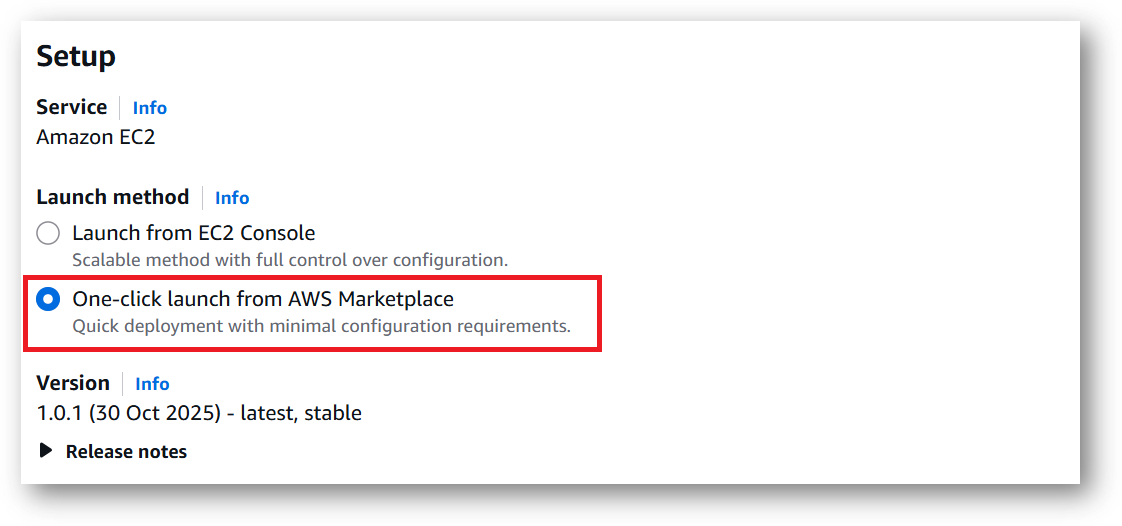
- Next page will show you the options to launch the instance, Launch through EC2 and One-click launch from AWS Marketplace. Tick the 2nd option One-click launch from AWS Marketplace.
-
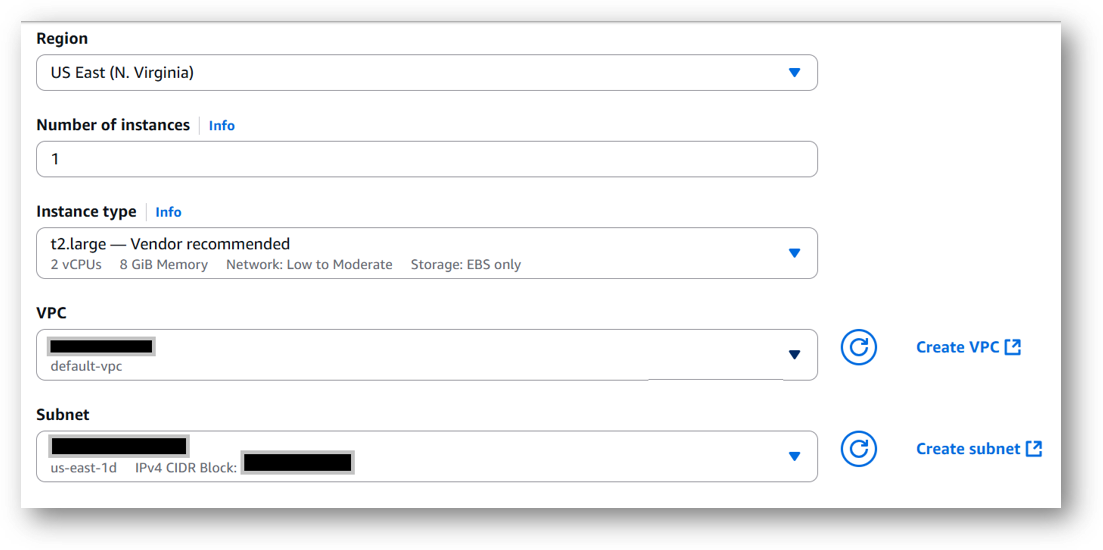
Select a Region where you want to launch the VM(such as US East (N.Virginia))
-
Optionally change the EC2 instance type. (This defaults to t2.large instance type, 2 vCPUs and 8 GB RAM.)
Minimum VM Specs : 8GB vRAM / 2vCPU, but for swift performace please choose 16GB vRAM/4vCPU configuration.
- Optionally change the network name and subnetwork names.
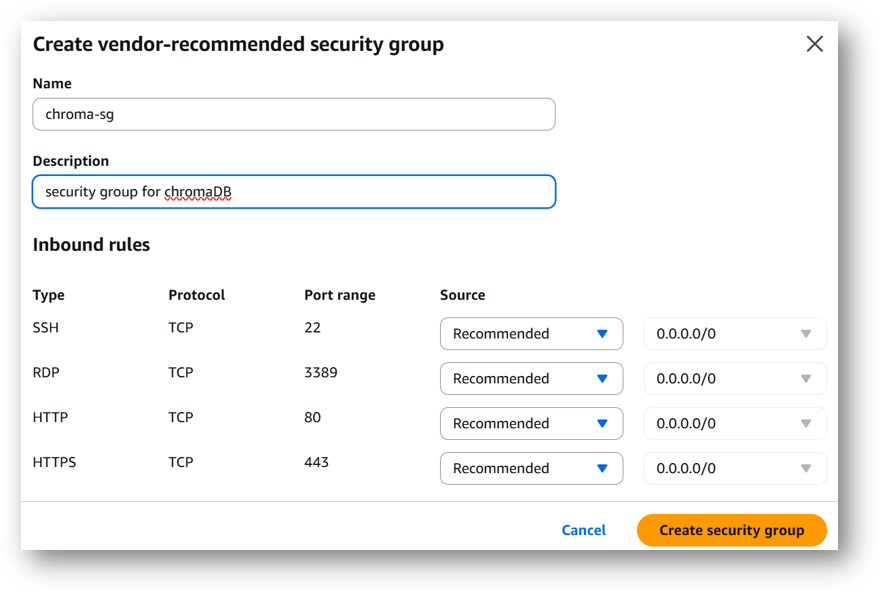
- Select the Security Group. Be sure that whichever Security Group you specify have ports 22 (for SSH), 3389 (for RDP), 80 (for HTTP) and 443 (for HTTPS) exposed. Or you can create the new SG by clicking on “Create Security Group” button. Provide the name and description and save the SG for this instance.

-
Be sure to download the key-pair which is available by default, or you can create the new key-pair and download it.
-
Click on Launch..
-
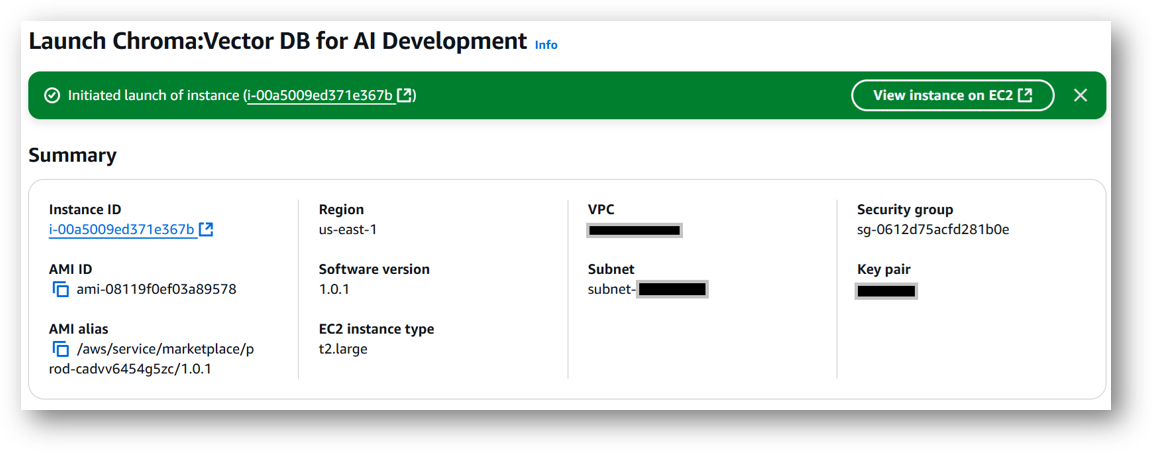
Chroma: Vector DB for AI Development will begin deploying.
- A summary page displays. To see this instance on EC2 Console click on View instance on EC2 link.
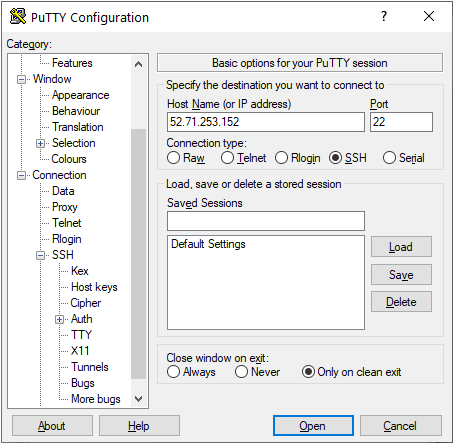
- To connect to this instance through putty, copy the IPv4 Public IP Address from the VM’s details page.

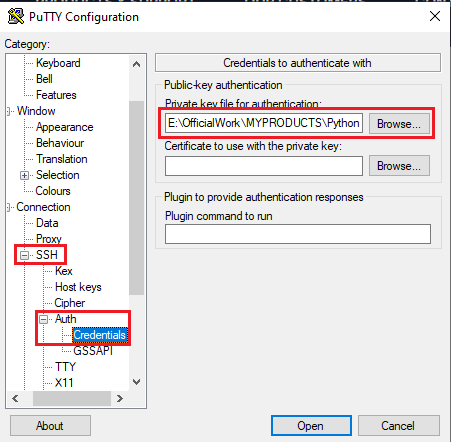
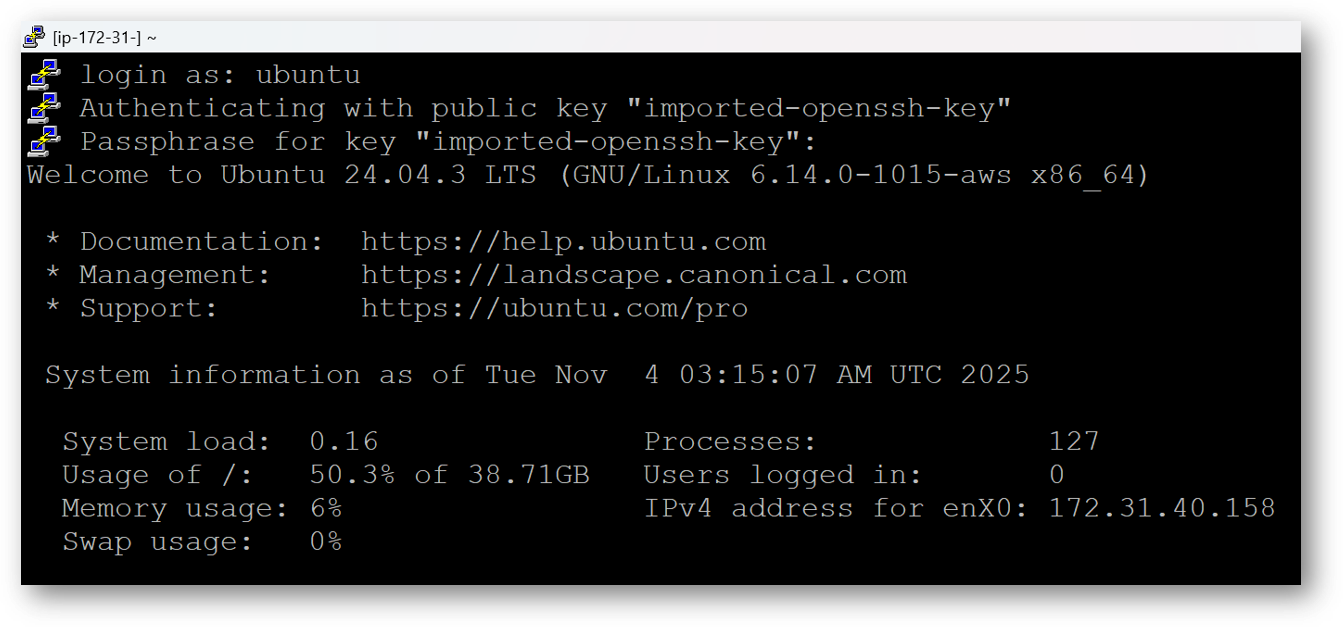
- Open putty, paste the IP address and browse your private key you downloaded while deploying the VM, by going to SSH->Auth->Credentials, click on Open. Enter ubuntu as userid
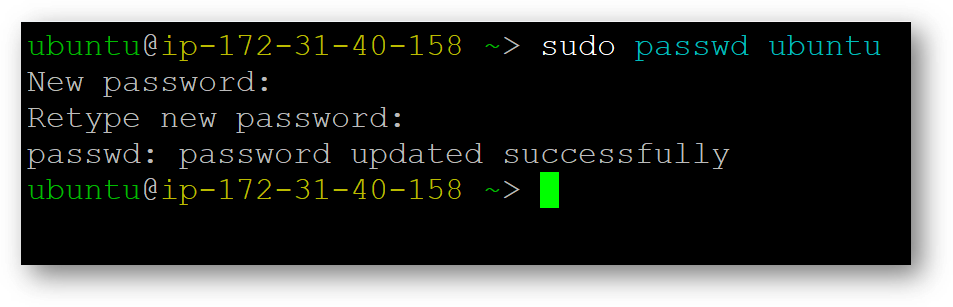
- Once connected, change the password for ubuntu user using below command
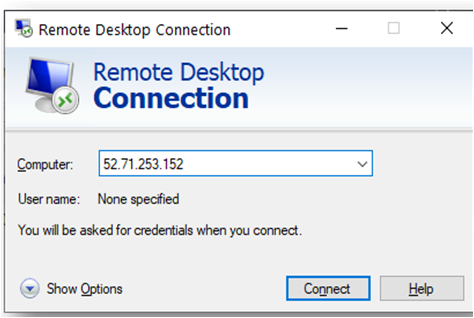
- Now the password for ubuntu user is set, you can connect to the VM’s desktop environment from any local Windows Machine using RDP protocol or Linux Machine using Remmina.
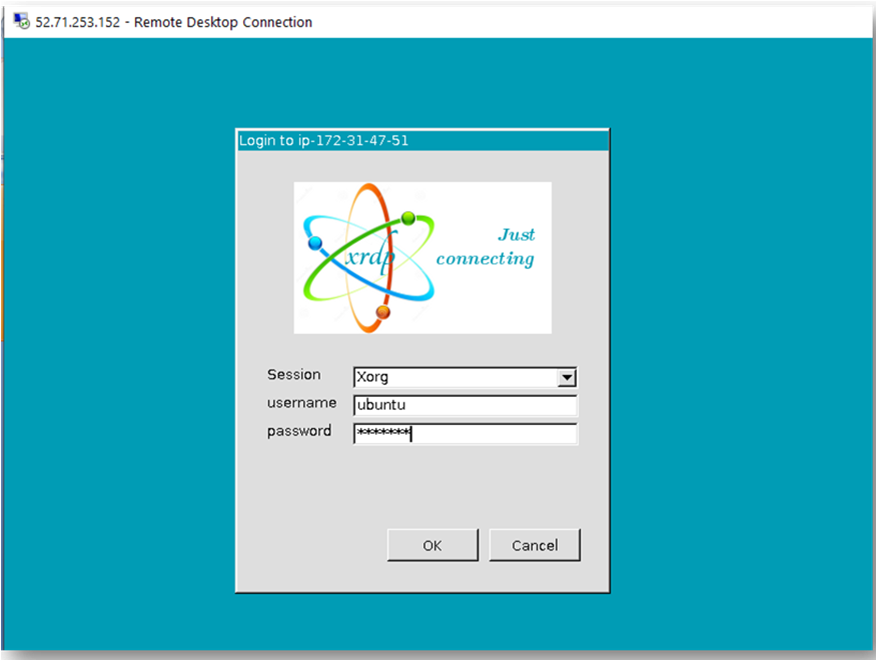
From your local windows machine, goto “start” menu, in the search box type and select “Remote desktop connection”. In the “Remote Desktop connection” wizard, copy the public IP address and click connect
- This will connect you to the VM’s desktop environment. Provide the username “ubuntu” and the password set in the above “Reset password” step to authenticate. Click OK
- Now you are connected to the out of box Milvus DB: AI-Ready Vector Database Environment VM’s desktop environment via Windows Machine.

- To connect using RDP via Linux machine, first note the external IP of the VM from VM details page, then from your local Linux machine, goto menu, in the search box type and select “Remmina”.
Note: If you don’t have Remmina installed on your Linux machine, first Install Remmina as per your linux distribution.

- In the “Remmina Remote Desktop Client” wizard, select the RDP option from dropdown and paste the external ip and click enter.

- This will connect you to the VM’s desktop environment. Provide “ubuntu” as the userid and the password set in above reset password step to authenticate. Click OK

- Now you are connected to out of box Milvus DB: AI-Ready Vector Database Environment VM’s desktop environment via Linux machine.
- When the VM is deployed, Chromadb will start in the background. Connect to Chroma at: http://localhost:8000 .
Example code to connect to Running ChromaDB server is
import chromadb
from chromadb.config import Settings

client = chromadb.HttpClient(host="localhost", port=8000)
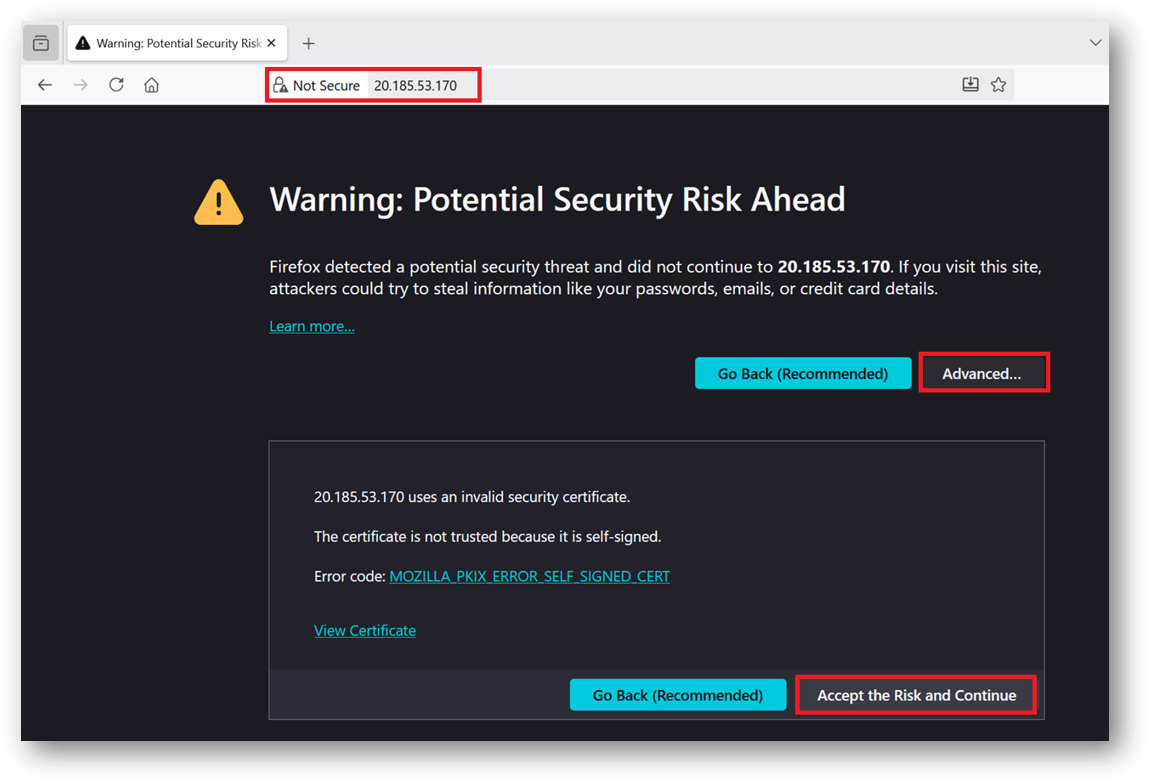
- To access the JupyterHub Web Interface, copy the public IP address of the VM and paste it in your local browser as https://public_ip_of_vm.
Browser will display a SSL certificate warning message. Accept the certificate warning and Continue.
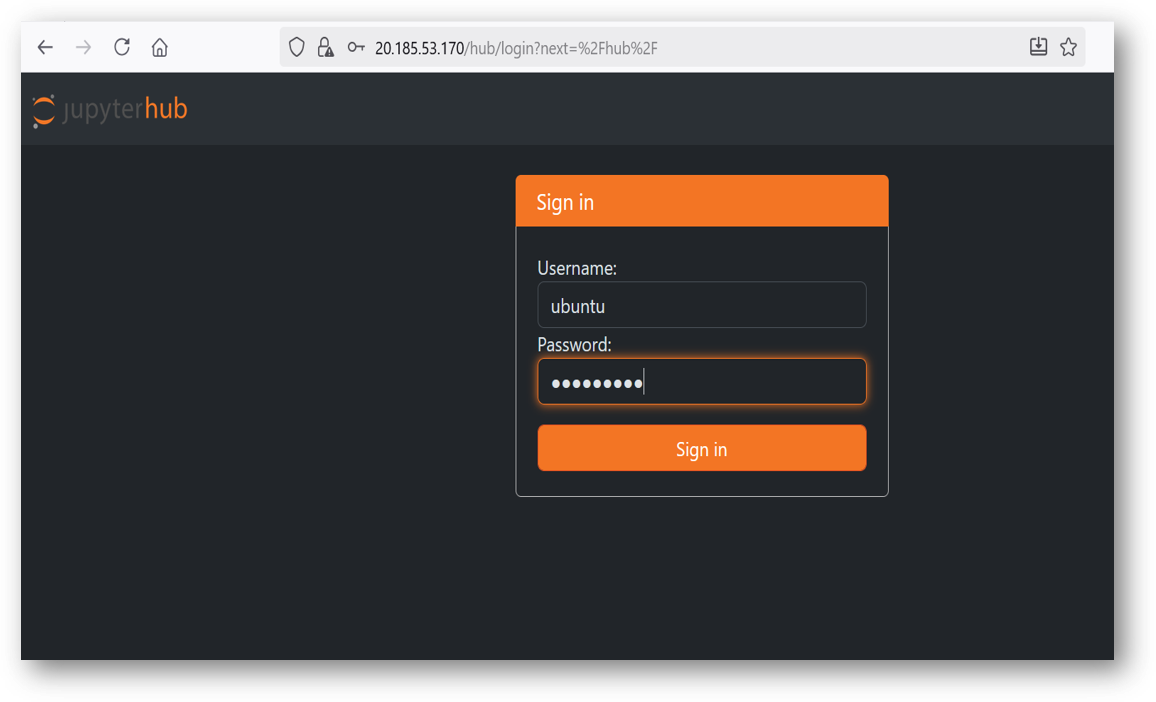
- Provide the ‘ubuntu’ user and its password set during VM creation. ubuntu is configured as an admin user here.
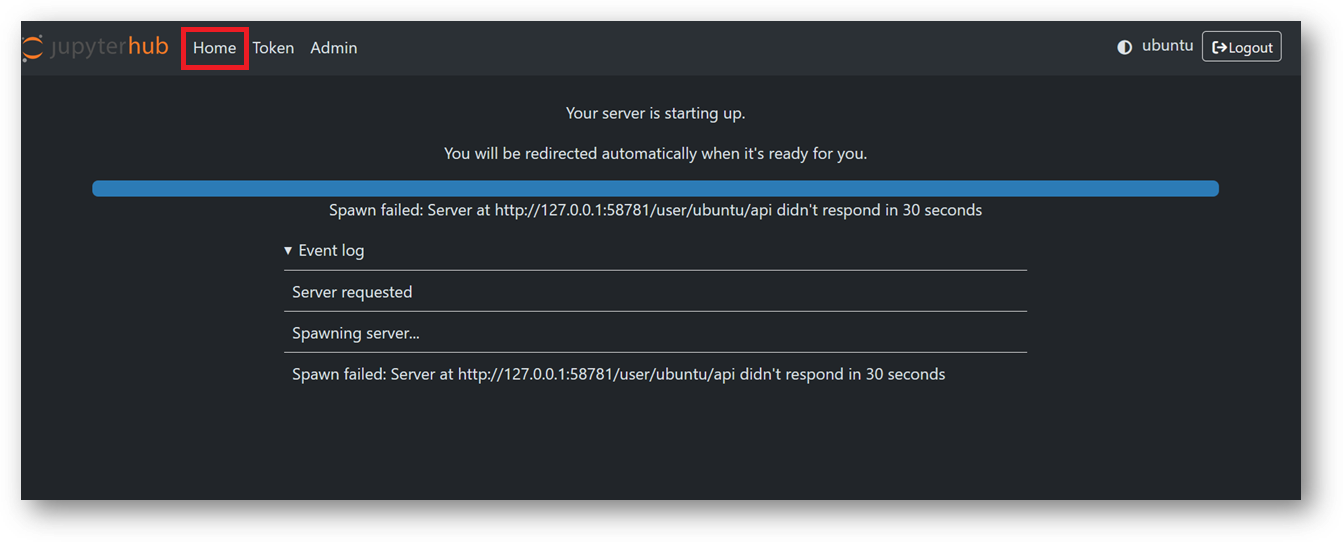
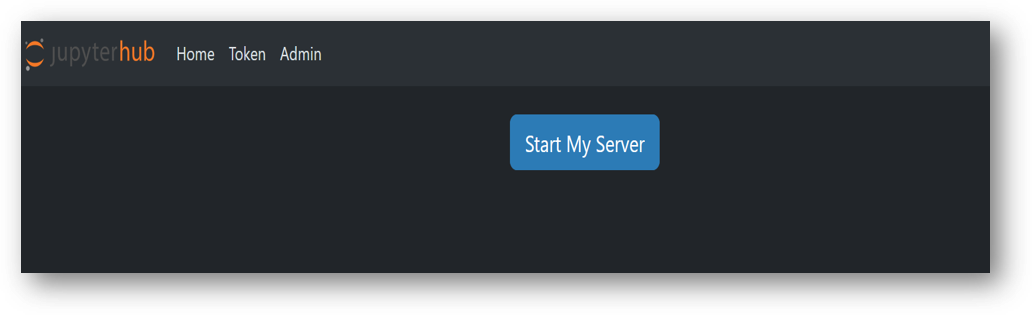
- If your jupyter server did not spawn in 30 sec you will see error message as shown in below screenshot. In this case simply click on Home tab and click Start My Server button. It will spawn the server again.
- Now you are logged in to jupyterhub. Here you can see we have setup folder configured with venv, jupyterhub_config.py files along with other jupyterhub configuration files. You can use jupyter notebook to run and test your AI projects.
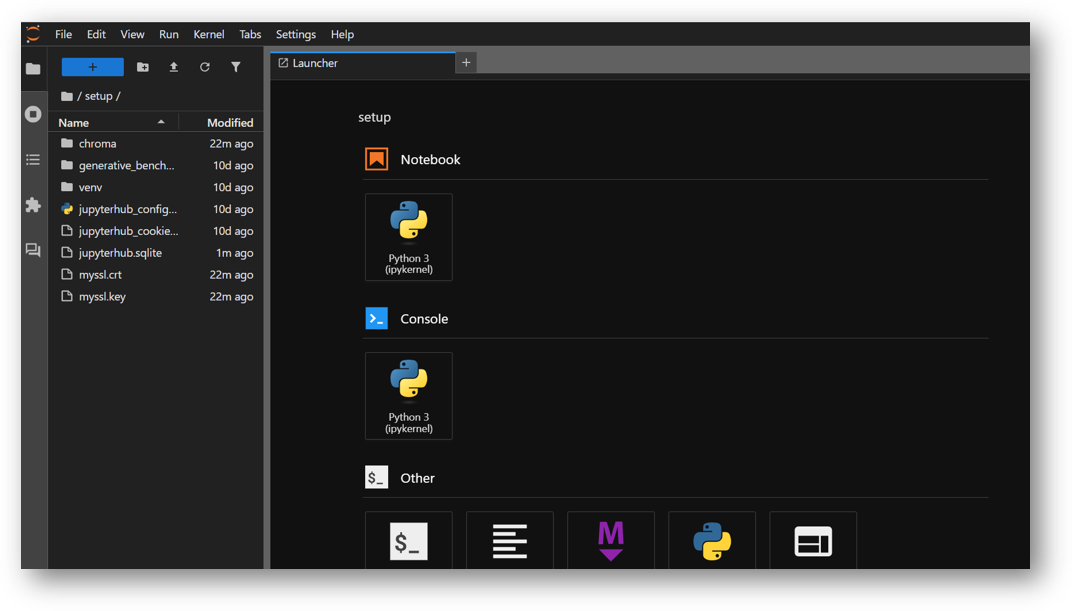
- The VM comes preloaded with “Generative Benchmarking” App. The App project “Generative Benchmarking” is available in /home/ubuntu/setup/ directory. Once you logged in the jupyterhub, navigate to setup directory and click on “Generative Benchmarking” directory.

Benchmarking is used to evaluate how well a model is performing. You can update the models and provide your data here and perform the benchmarking. Instruction to modify the code are given before the cells where modification is required for your custom data.
The App directory comes with:
-
generate_benchmark.ipynb
A comprehensive guide to generating a custom benchmark based on provided data
-
compare.ipynb
A framework for comparing results, which is useful when evaluating different embedding models or configurations
-
data/
Example data to immediately test out the notebooks with
-
functions/
Functions used to run notebooks, includes various embedding functions and llm prompts
-
results/
Folder for saving benchmark results, includes results produced from example data
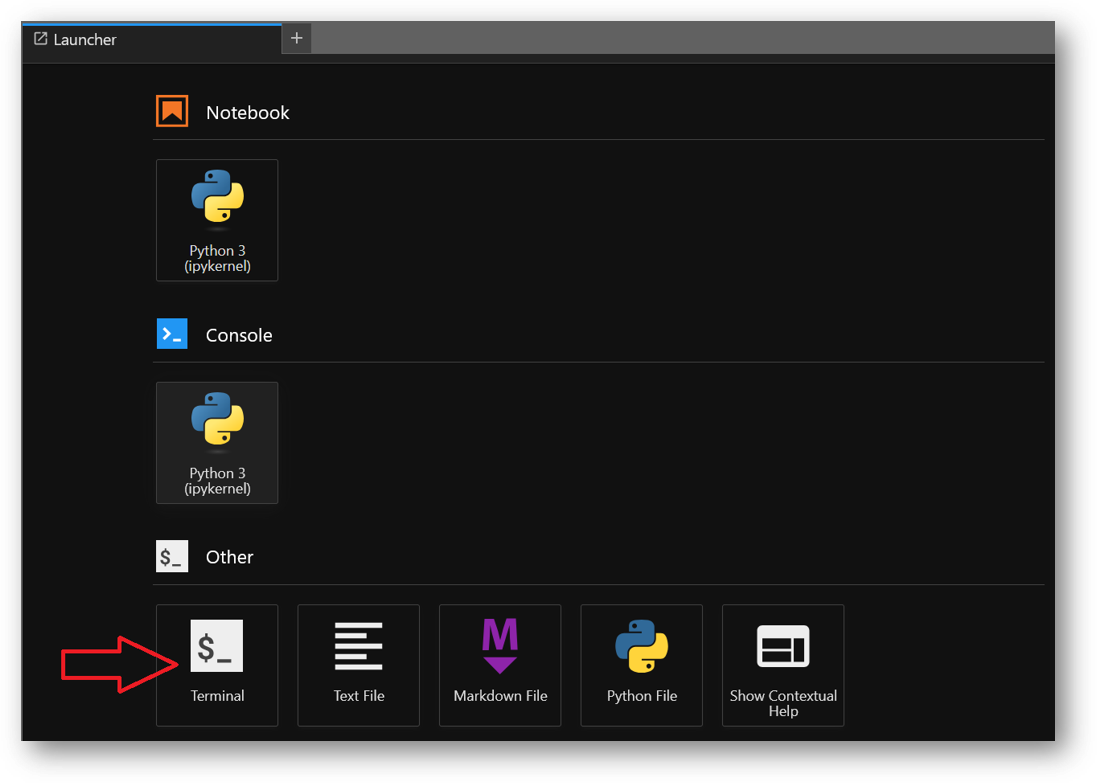
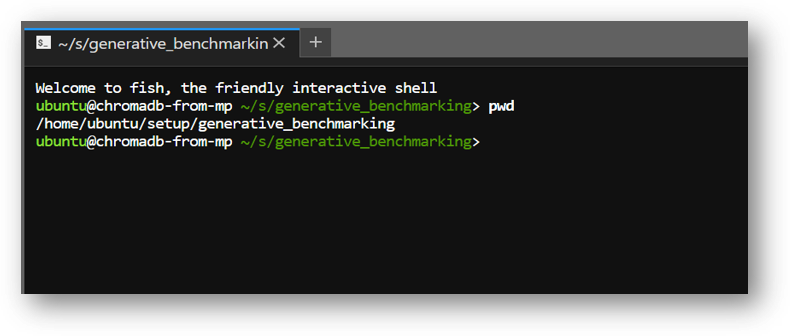
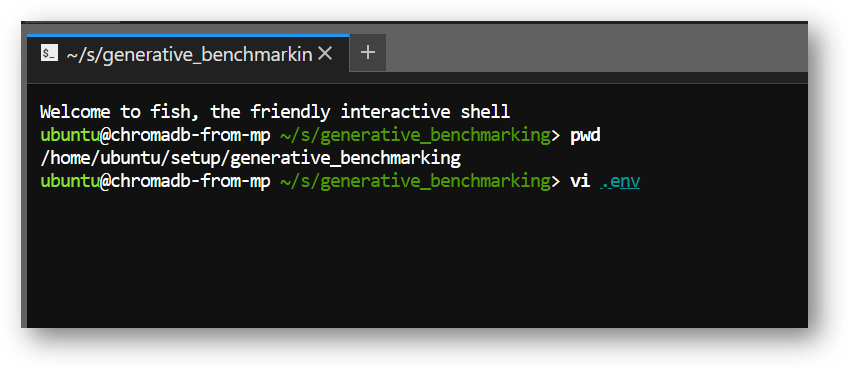
- Before running this Sample App, you will need to set the OPENAI API Key in environment file. To do so, from this jupyterlab window, open the terminal and make sure you in /home/ubuntu/setup/generative_benchmarking directory.
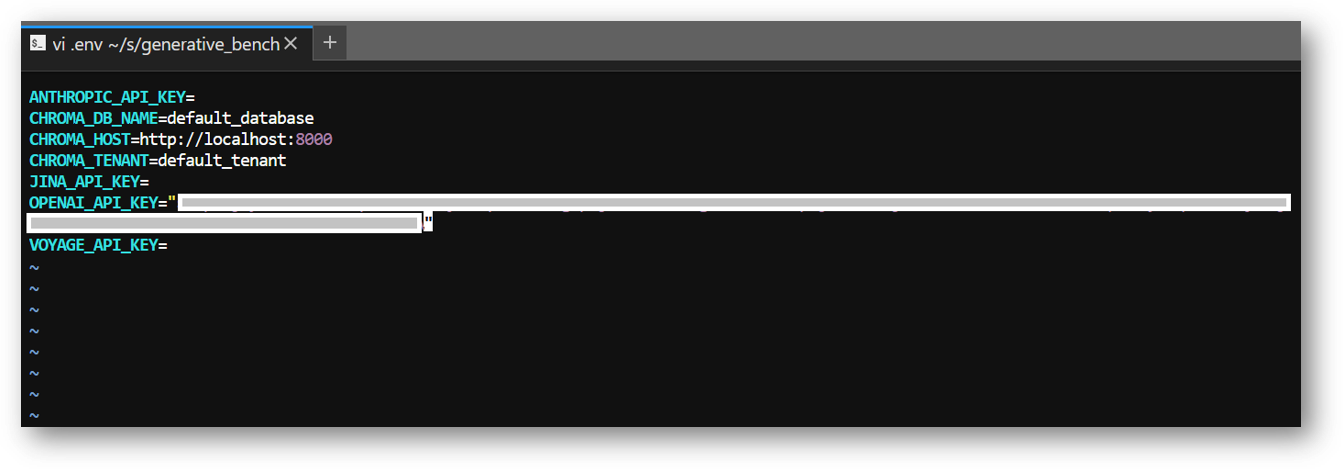
- In this directory we have .env file. Open this file using -
Press “i” to enable insert mode, copy paste your OPENAI API Key and other API Keys here. Save the changes by pressing ESC key followed by :wq
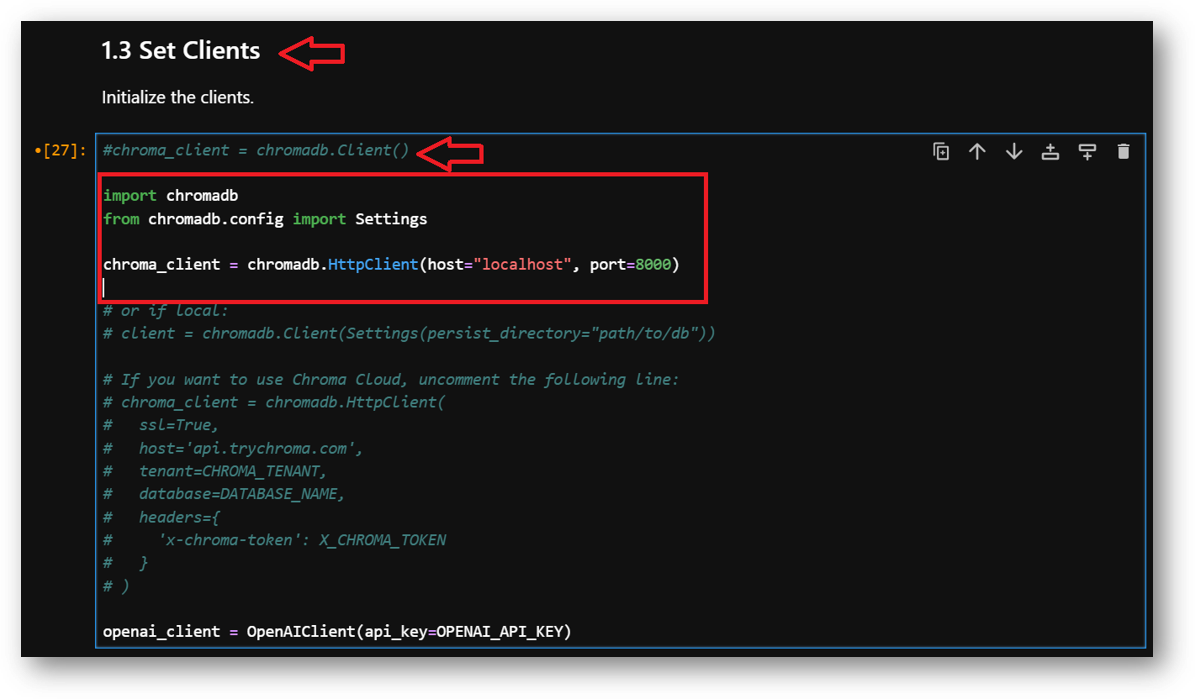
- By default, the collection created after running this sample code is stored on a temporary volume and will not persist. To store it on a persistent volume, open generate_benchmark.ipynb, locate the “Set Clients” cell, and comment out the line:
chroma_client = chromadb.Client()
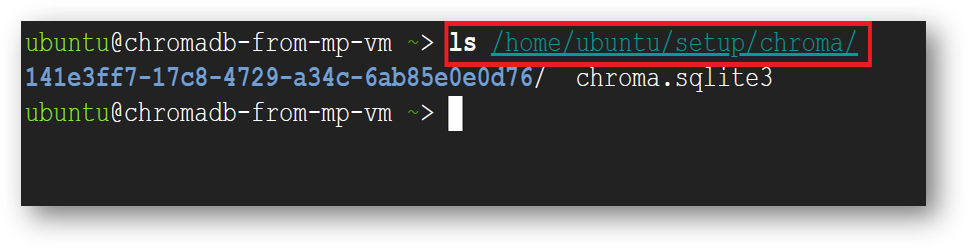
Then, replace it with code that initializes chroma_client using PersistentClient, with below code snippet. The ChromaDB server will then use your local storage at /home/ubuntu/setup/chroma. ChromaDB is running on localhost on port 8000.
import chromadb
from chromadb.config import Settings

chroma_client = chromadb.HttpClient(host="localhost", port=8000)
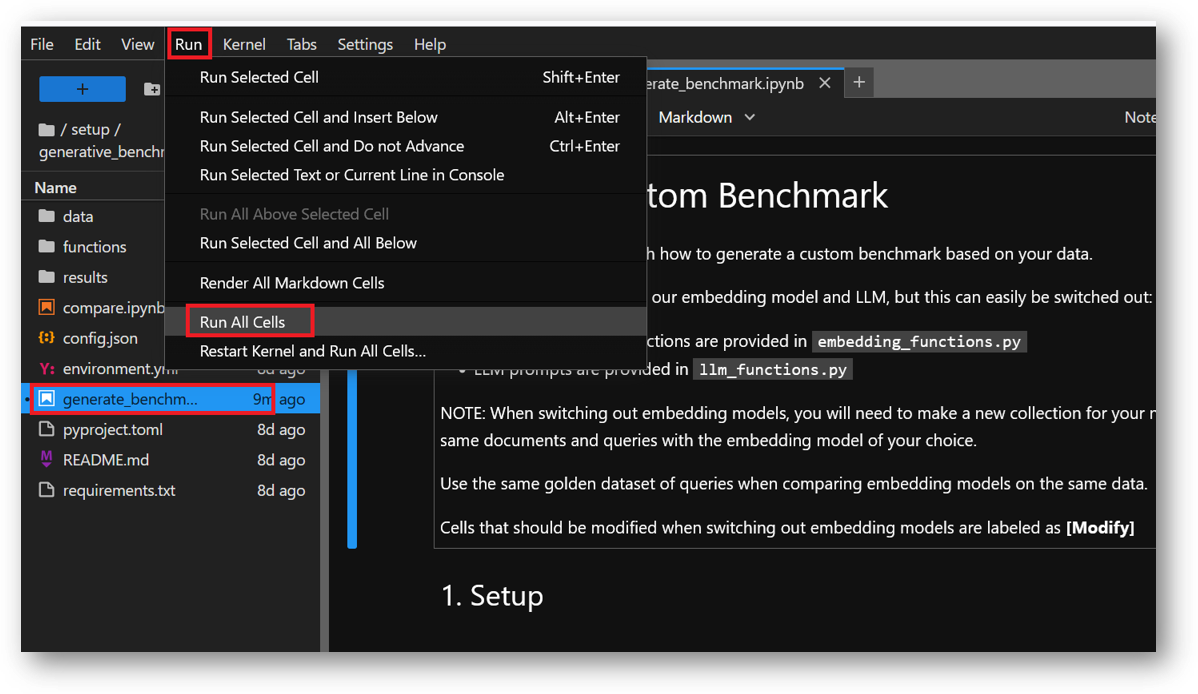
- There are 2 notebook files available in this directory. They are generate_benchmark.ipynb and compare.ipynb. You can simply run each cell one by one in same sequence or you can select the Run All Cells option from Run Menu at the top. Wait for it to finish.
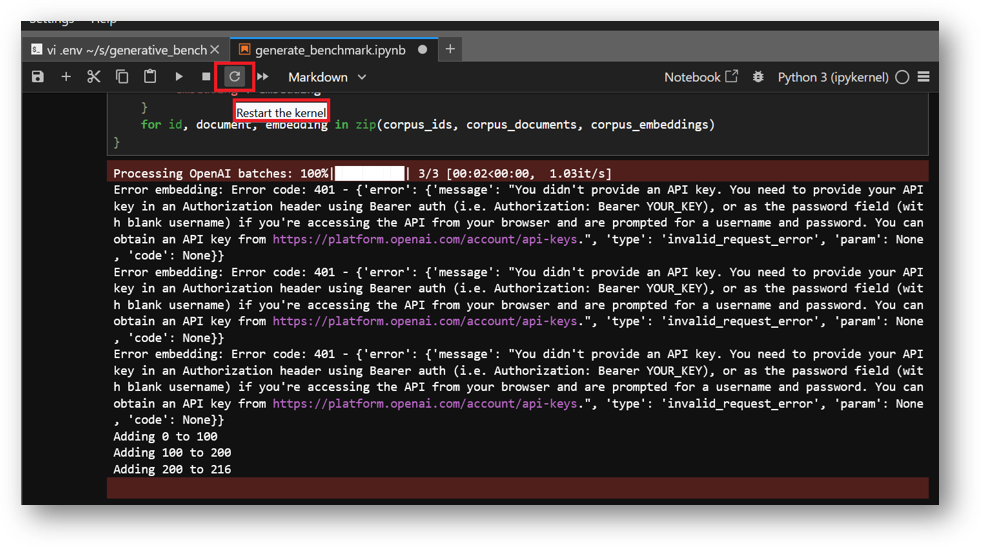
Note: After setting the API keys in .env file and running the notebooks, if you get API Key not found error at any step then restart the kernel as shown below and rerun all the cells from beginning.
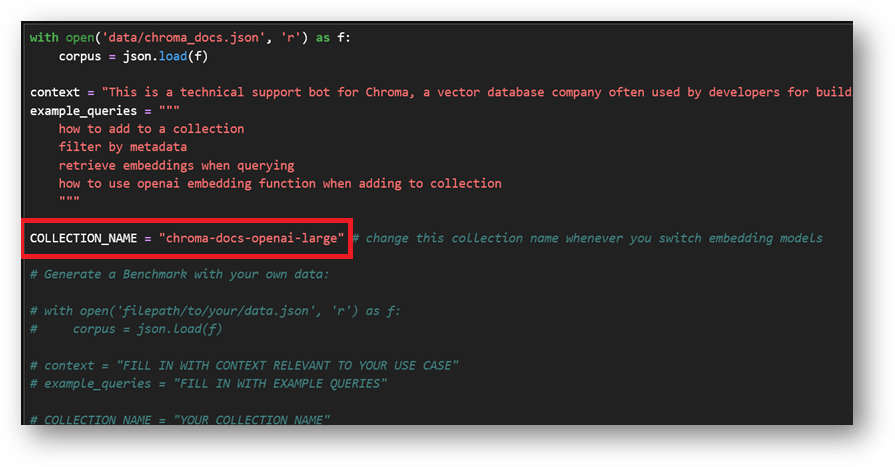
- This example will insert data in ChromaDB with collection name “chroma-docs-openai-large”.
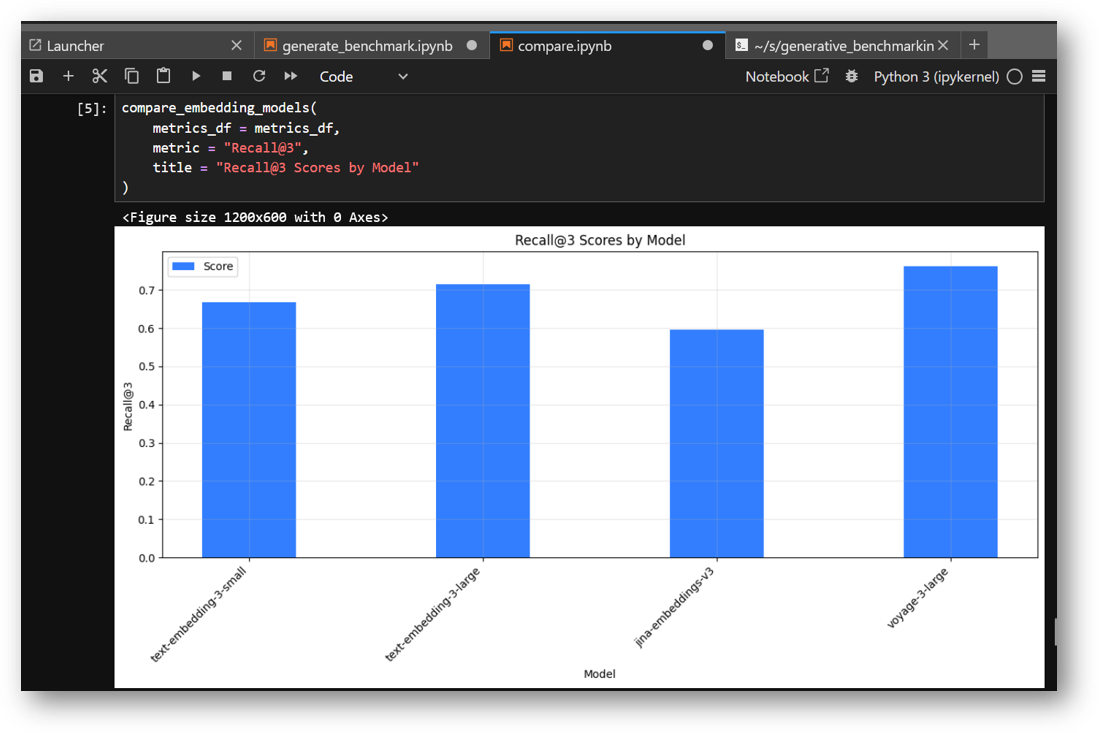
Output of compare.ipynb notebook
- ChromaDB provides an in-Terminal User Interface (iTUI) feature to browse your data. If you have updated chromadb client to use persistent volume as explained at step.22 above then you can browse chroma-docs-openai-large collection using the ChromaDB in Terminal User Interface. For that connect to SSH terminal of this vm as explained above in this guide. Then run below command-
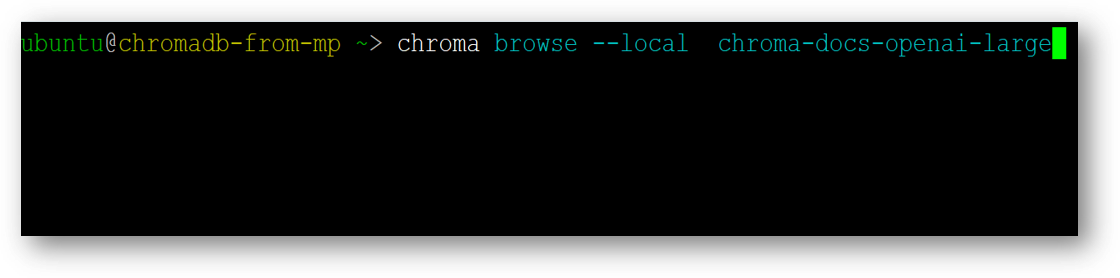
chroma browse --local chroma-docs-openai-large
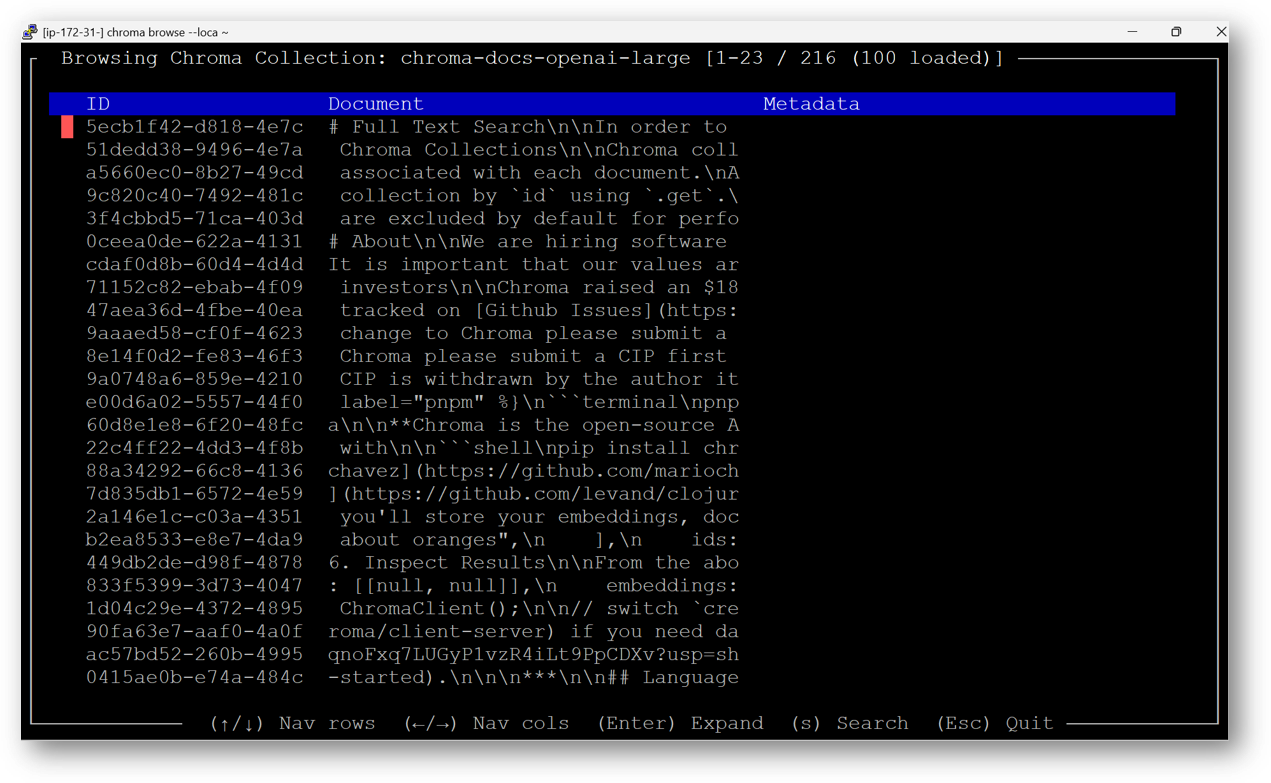
Use left, right , up and down arrow keys to navigate. Press Enter to see the full record. Press ESC key to exit the current window.
For more details, please visit Official Documentation page